Are you ready to take your adventures to the next level? Imagine cruising down the open road with the perfect soundtrack accompanying your journey, or relaxing at your campsite with crystal-clear audio filling the air. With a range of audio options, you can transform your Vandoit into the ultimate entertainment hub. Let’s dive into the different stages of audio upgrades we offer and discover how each one can enhance your van life experience!
Stage 1 Audio: The Foundation of Quality Sound
The Stage 1 Audio package sets the stage for exceptional audio quality in your van. We upgrade the front door speakers with JL Audio C3 Component Speakers, ensuring high-definition audio for your favorite music and podcasts. Additionally, we add sound-deadening materials to the front door panels, minimizing outside noise for a more immersive listening experience.
But it doesn’t stop there. We take it a step further by upgrading the rear door speakers with marine loudspeakers, providing excellent sound quality even with the doors open. The entire sound system is controlled and amplified through fully digital amplifiers and processing, seamlessly integrating with the Ford factory sound system. Plus, with the added Bluetooth capability, you can enjoy great sound even when the vehicle is off. Perfect for the neighborhood barbecue!
Stage 2 Audio: Adding Depth and Power
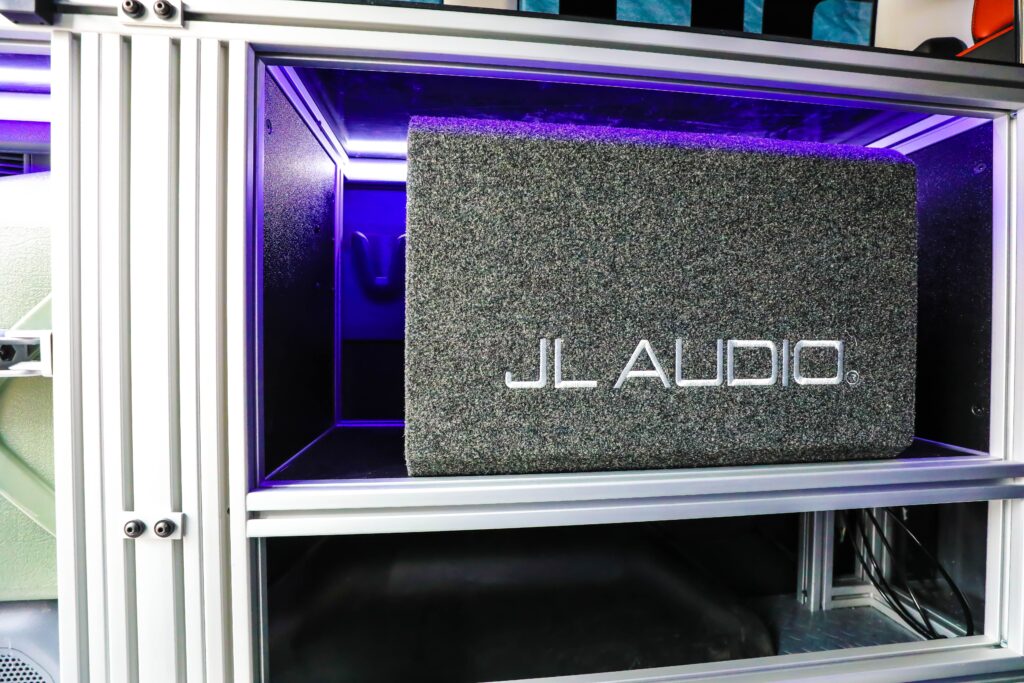
Building upon the Stage 1 package, Stage 2 Audio brings your music to life with added depth and power. In addition to the front and rear door upgrades, this package introduces a 10″ 400-watt ported subwoofer, delivering deeper bass and enhancing the overall soundstage of your van. With this addition, every beat transforms your van into a mobile concert.
Stage 3 Audio: Immersive Sound Experience
For those who crave the ultimate audio experience, Stage 3 Audio is the pinnacle of van sound systems. This complete sound system is designed to bring visual sound to life, making you feel like you’re sitting inside the music. Rear door speakers are upgraded to a larger component setup for deep, crisp mids, while the subwoofer is boosted to a high output of 10 inches for rich, immersive sound. For reference; imagine the sound in the movie theater!
But the real magic lies in the center channel pod speakers installed in the ceiling of the van, quite literally surrounding you with sound. With Stage 3 Audio, every note, every chord envelops your van. This is great for tailgating!
Portable JBL Charge 4 Speaker: Take the Party Anywhere
And let’s not forget about versatility. With the portable JBL Charge 4 Speaker included in all packages, you can take the party outside the van whenever you want. Whether you’re gathered around the campfire or lounging at the beach, this portable speaker ensures the music never stops.
Whether you’re a music enthusiast, podcast lover, or simply enjoy the ambiance of background music on your adventures, Vandoit has the perfect audio solution for you. Elevate your van life experience with Vandoit’s audio upgrades and let the road trip rhythms begin!
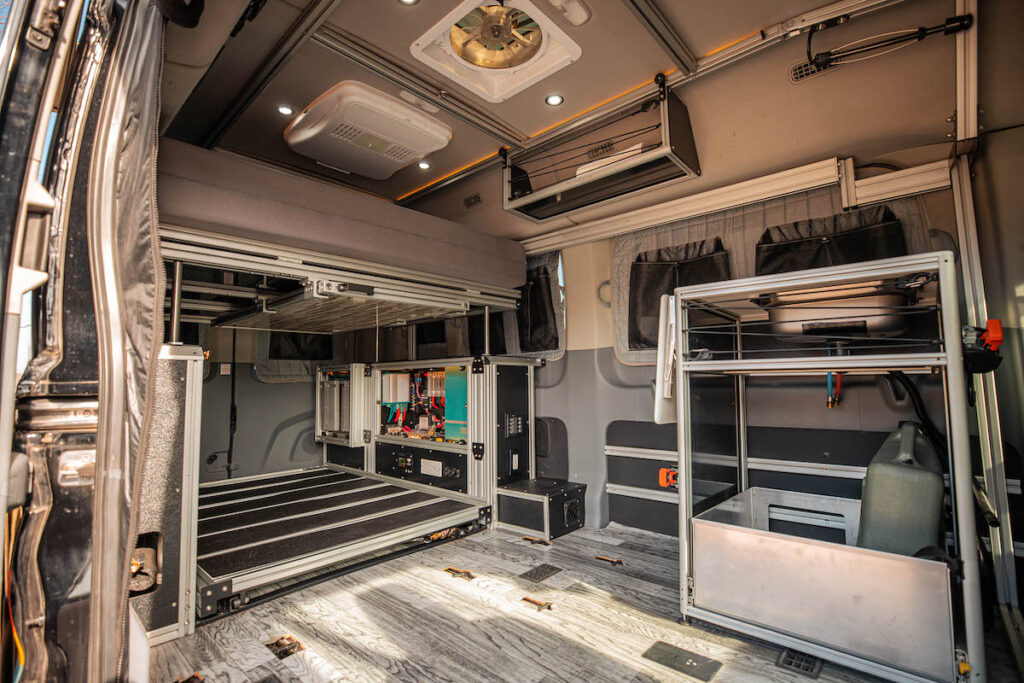
In the world of van life, innovation never ceases to amaze us. Vandoit has once again pushed the boundaries of comfort and versatility with their all-new MOOV model, featuring the ingenious drawbridge bed. For those who dream of embarking on unforgettable road trips while experiencing the comforts of home, the MOOV’s drawbridge bed is a game-changer that makes your van life experience even more extraordinary.
A Bed Like No Other
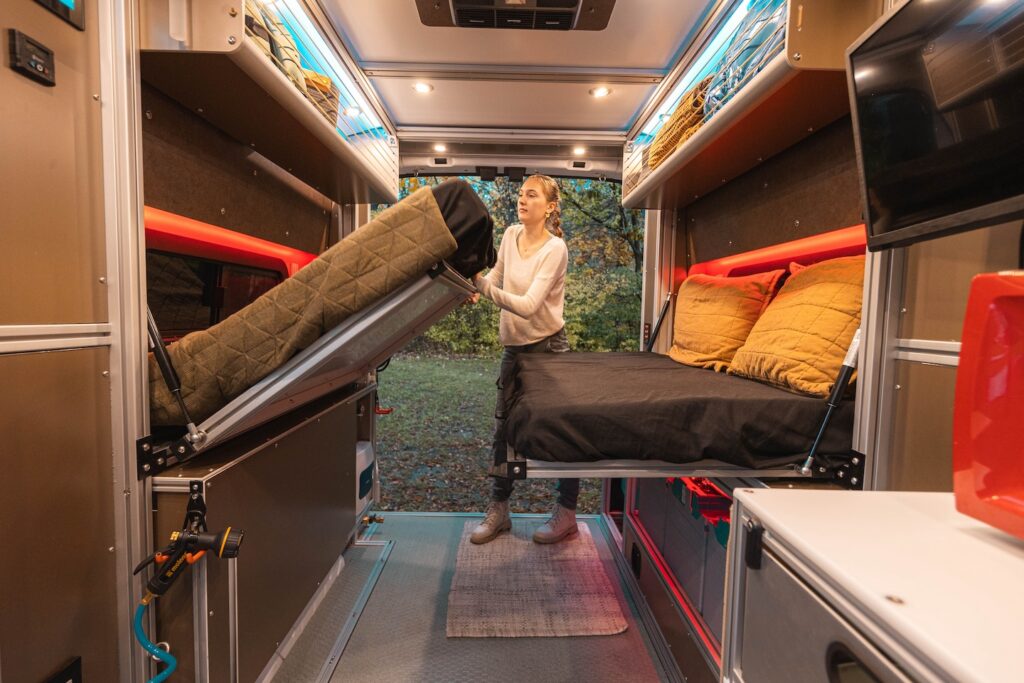
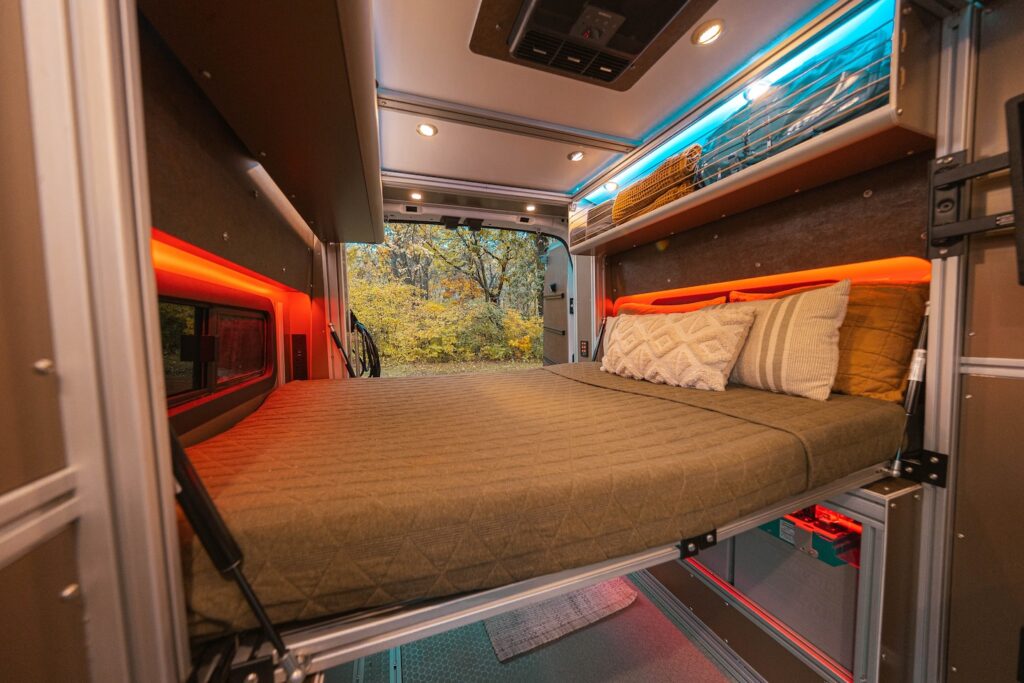
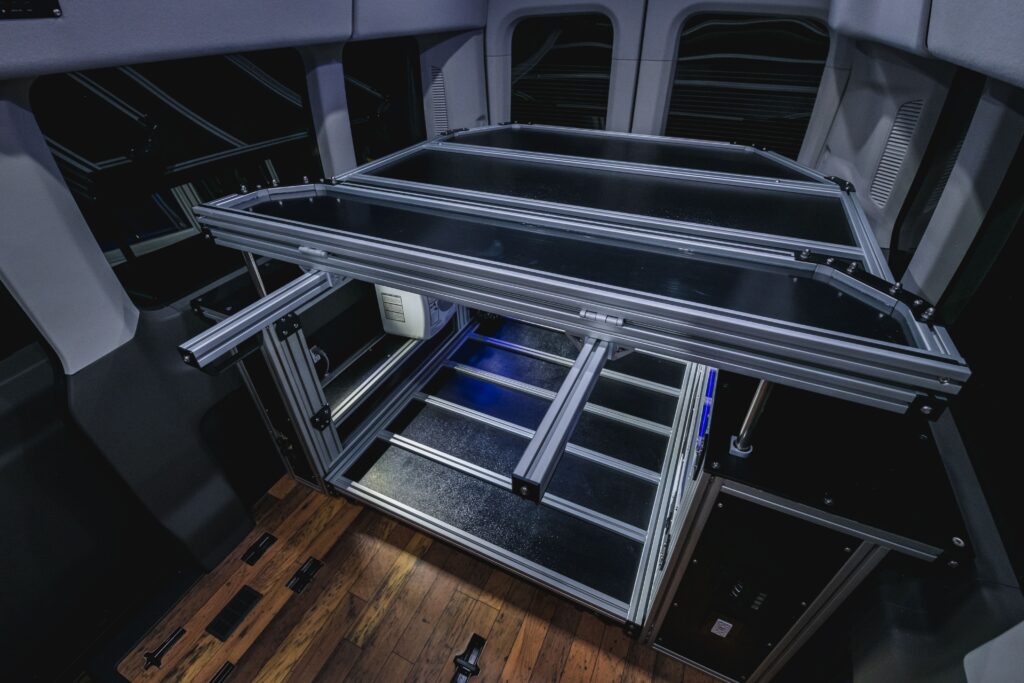
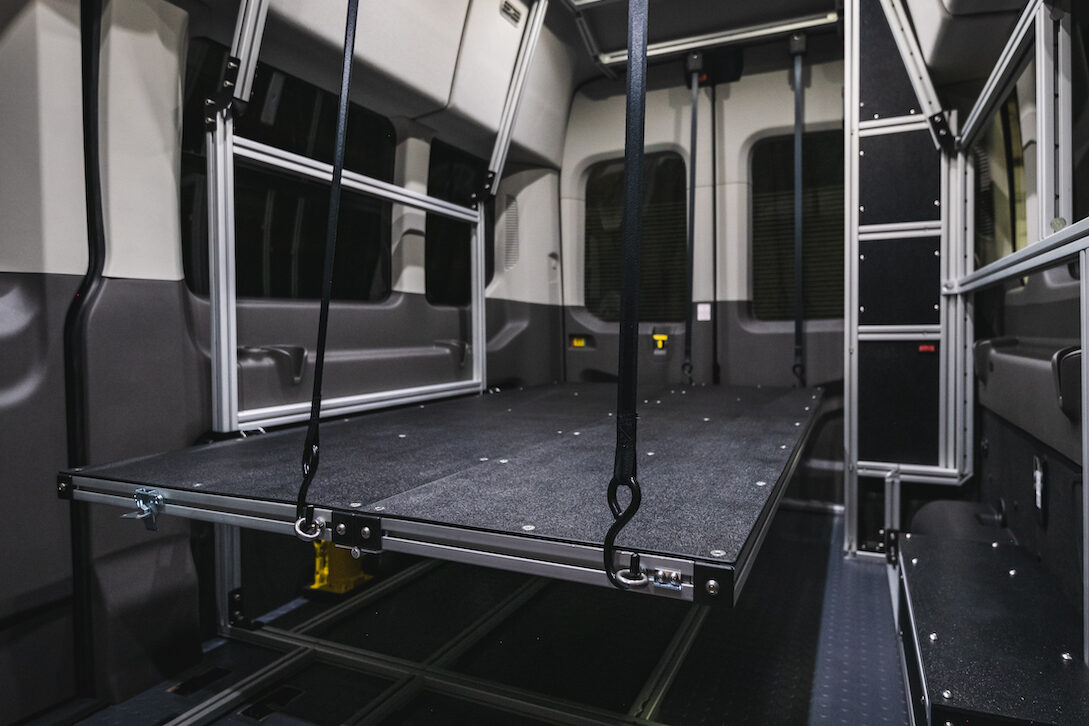
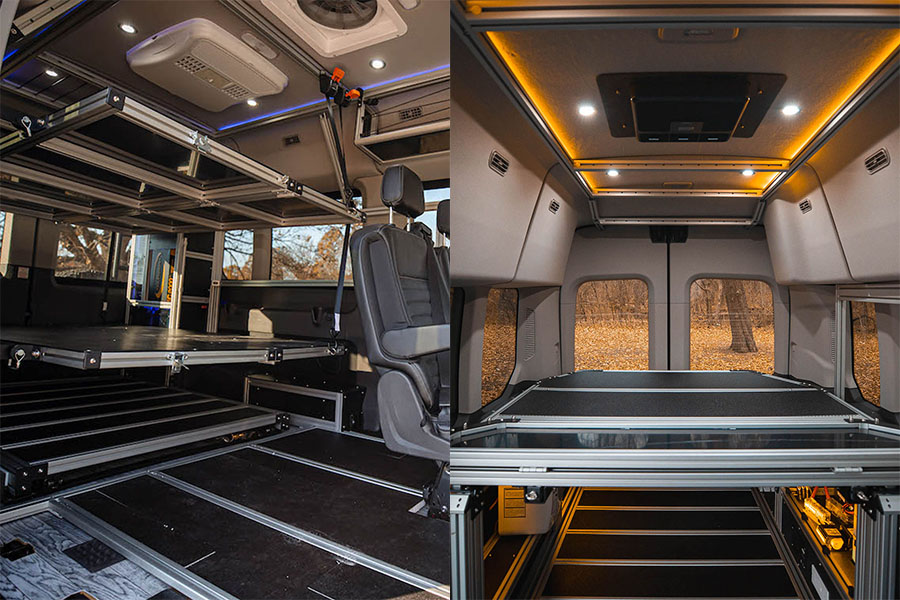
The drawbridge bed is unlike any other sleeping arrangement you’ve encountered in the world of camper vans. Consisting of two platforms affixed to either side of the van’s interior, this innovative design utilizes gas struts for a controlled descent. When it’s time to catch some Z’s, these platforms fold down seamlessly to create a full-size bed platform. The result is a spacious and comfortable sleeping space that allows you to sleep side by side, all while saving precious space within the main living area of your van.
A Space-Saving Marvel
The drawbridge bed’s genius lies in its ability to maximize the functionality of your van’s interior. When the bed is folded up, it opens up front-to-back walking and storage space within the van. This means no more awkwardly navigating around a fixed bed or feeling cramped in a confined living area. You get the freedom to move about comfortably, making your van life experience even more enjoyable.
One of the notable advantages of the drawbridge bed is its seamless integration with the all-new indoor shower, which is an exciting addition to the MOOV model. With the bed folded up, you can access the shower easily and conveniently. This is a game-changer for those who appreciate the luxury of a warm shower in the great outdoors.
Versatility at Its Best
Vandoit knows that every adventurer has unique preferences and requirements. That’s why the MOOV model doesn’t just stop at the drawbridge bed. The vehicle also offers classic choices such as the queen-size hydraulic lift bed and Murphy-style beds, as seen in the LIV and DO models. This level of customization allows you to tailor your van’s interior to your specific lifestyle and needs. Whether you prefer the spaciousness of the drawbridge bed or the convenience of a hydraulic lift bed, the MOOV model has got you covered. It’s all about ensuring that your van life adventure is as comfortable and versatile as possible.
Vandoit’s MOOV model and its drawbridge bed represent a new era in van life innovation. By maximizing interior space and offering various bed options, Vandoit caters to the needs and desires of every adventurer. The drawbridge bed, with its controlled descent and space-saving design, not only offers a comfortable place to rest your head but also opens up new possibilities for convenient living on the road.
If you’re considering a van life adventure, the MOOV model and its drawbridge bed are certainly worth a tour to see one in person! With Vandoit’s commitment to innovation, your journey is bound to be filled with comfort and convenience, making every moment on the road easier than ever before.
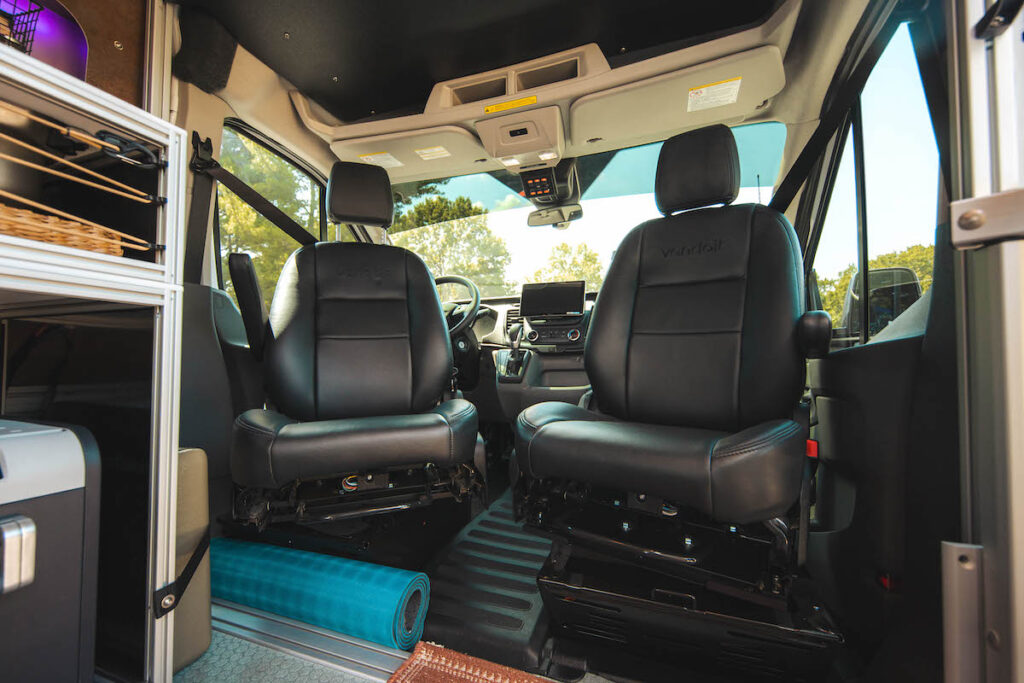
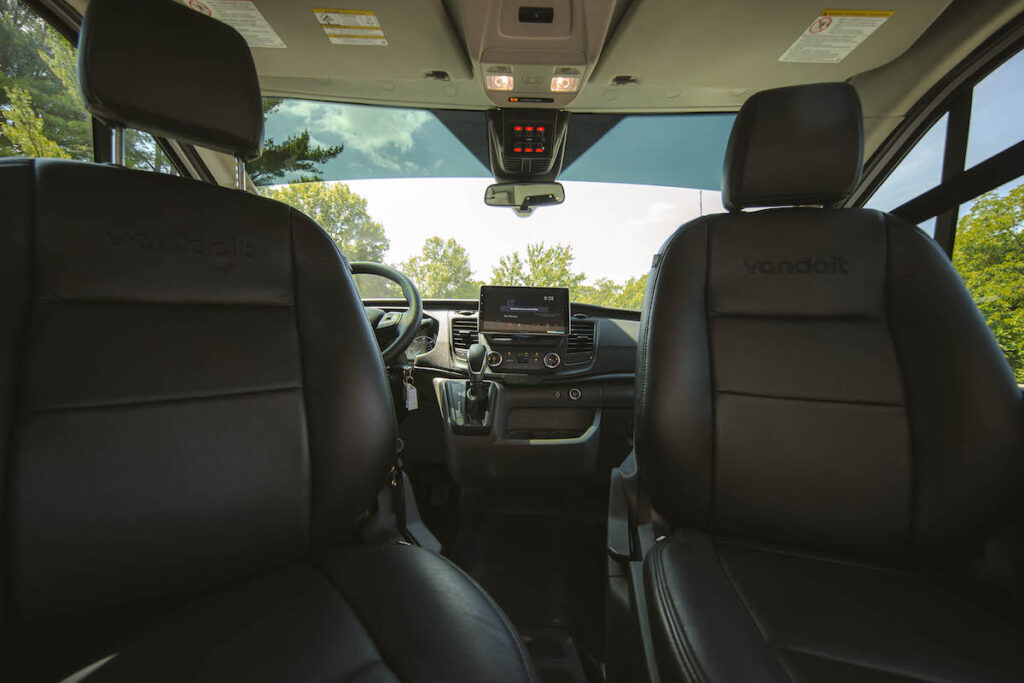
When it comes to hitting the open road in style and comfort, campervan enthusiasts are always on the lookout for innovative features that can transform their travel experience. One such game-changer is the passenger and driver swivel seat option available in the Vandoit campervan upfit on Ford Transit vans. This feature not only adds versatility and functionality to your campervan but also opens up a world of possibilities for customization and convenience. In this blog, we’ll dive into the reasons why you’ll want swivel seats in your campervan and how this feature can elevate the overall van ownership experience.
Versatility and Freedom of Movement
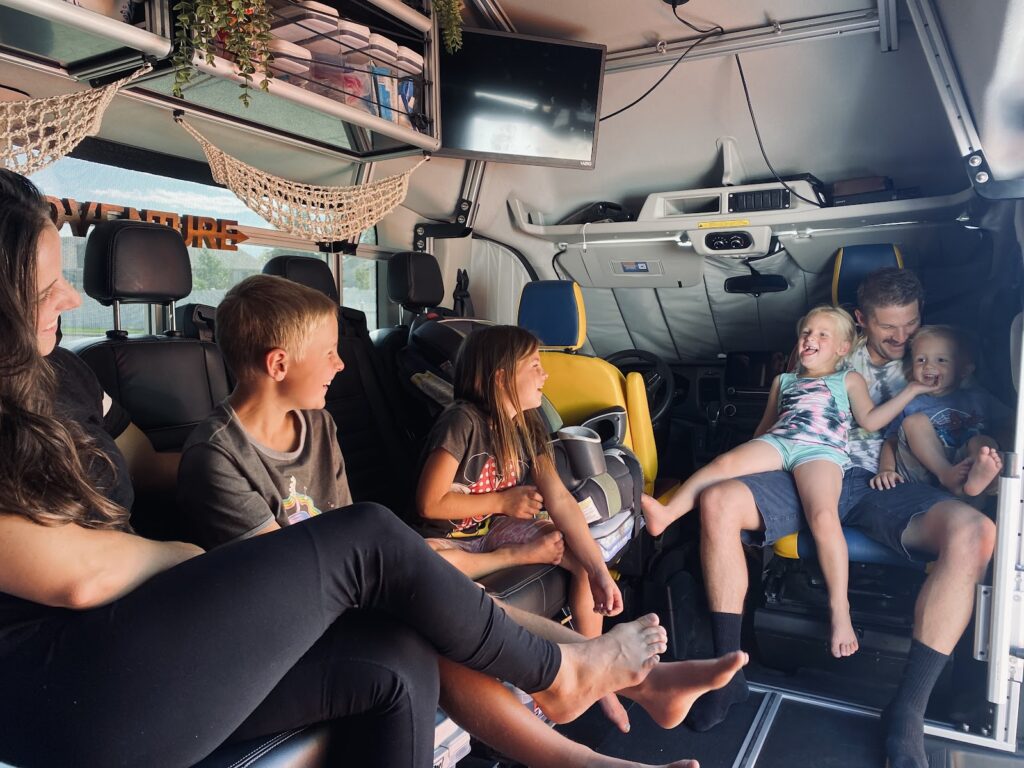
The swivel seat option in a Vandoit upfit offers a level of versatility that can’t be understated. Whether you’re parked at a picturesque campsite, enjoying a meal, or simply taking in the scenery, being able to rotate your passenger and driver seats can completely transform the interior space of your campervan. Swivel seats allow you to turn your cabin seating into a cozy lounge space, fostering a more communal and interactive atmosphere within the van. This flexibility is especially valuable during downtime or when you’re spending extended periods inside the campervan–working, playing cards, or escaping a rain storm.
Use of Space
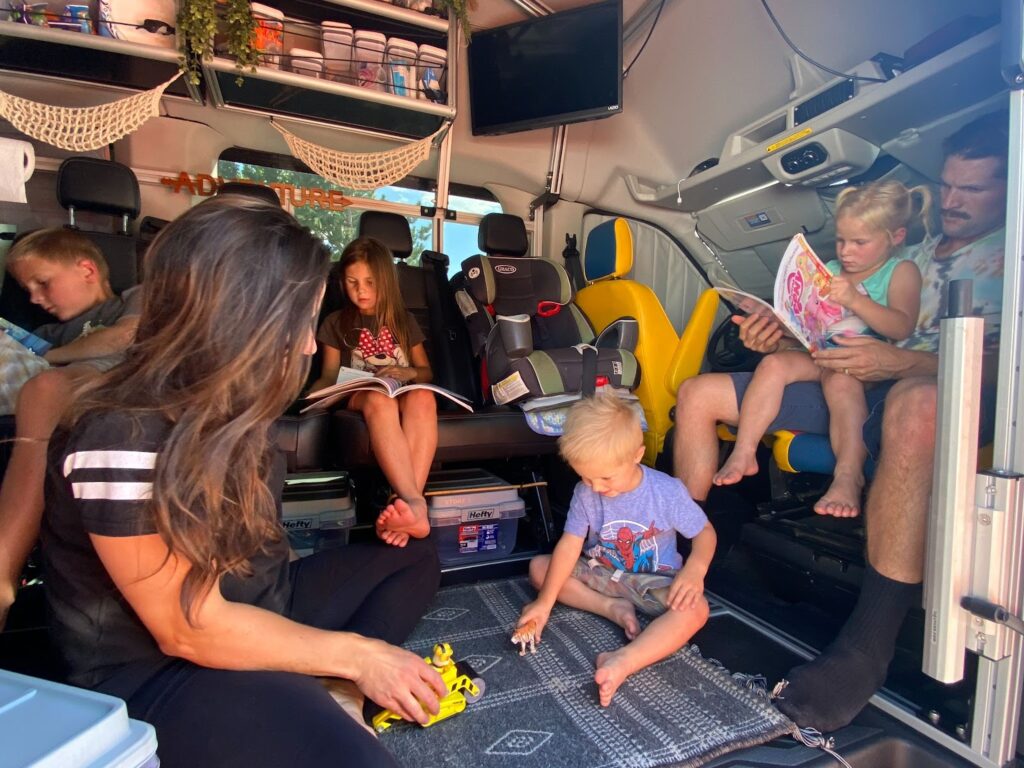
Space is a premium in any campervan, and the swivel seat feature can help optimize every square inch. When the seats are swiveled, it creates a more open layout, making it easier to move around inside the van–a key advantage for meal prep or when dressing and packing for a hike. Additionally, the swivel seats can serve as extra seating for passengers when you’re parked, maximizing the seating capacity of your campervan. This is a great addition for larger groups or families traveling together on top of the feature in Vandoit campervans for removable Ford factory seating.
Dynamic Living Space
Adventuring a campervan is all about freedom and experiencing the world on your terms. Swivel seats are a perfect integration. Whether you’re enjoying a meal, playing board games, or simply relaxing with a good book, the swivel seats create a dynamic environment that adapts to your needs.
In the world of overlanding, innovation continues to drive the evolution of comfort and convenience. The passenger and driver swivel seat option in a Vandoit campervan exemplifies this evolution by adding a touch of adaptability and functionality to your living space. The ability to transform your interior space, efficiently use every inch, and seamlessly integrate your lifestyle sets swivel seats apart as a must-have feature for any campervan enthusiast. When considering a campervan conversion, don’t overlook the transformative potential of swivel seats, and consider exploring options from experts like Vandoit for a truly exceptional campervan experience.
At Vandoit, our mission is clear: to provide every adventurous soul with a modular vehicle that unlocks the ability to experience life to its fullest. A life where you’re free to work, travel, and play without compromise.
Not Just Any Vehicle
Our campervans are not just vehicles; they are your home on the road, built to withstand the rigors of adventure while offering the flexibility you need. We achieve this by carefully selecting and integrating a range of top-quality materials into our campervan designs. By utilizing durable products such as high grade aluminum, bolts, vinyl flooring, and other marine-grade materials–while at the same time maintaining the quality of assembly with a 400+ point checklist–we ensure your van will have fewer malfunctions and increased quality. Here are the 7 best materials we use to ensure your van is built to last.
1. HDPE (High Density Polyethylene)
High density polyethylene is a thermoplastic polymer manufactured in sheets. We use HDPE to create rugged cabinetry, drawers, and storage compartments. This material is not only lightweight but also highly resistant to chemicals, making it perfect for withstanding the challenges of life on the road. It is used for cutting boards, counter tops, and shelves in our vans.
2. Polycarbonate
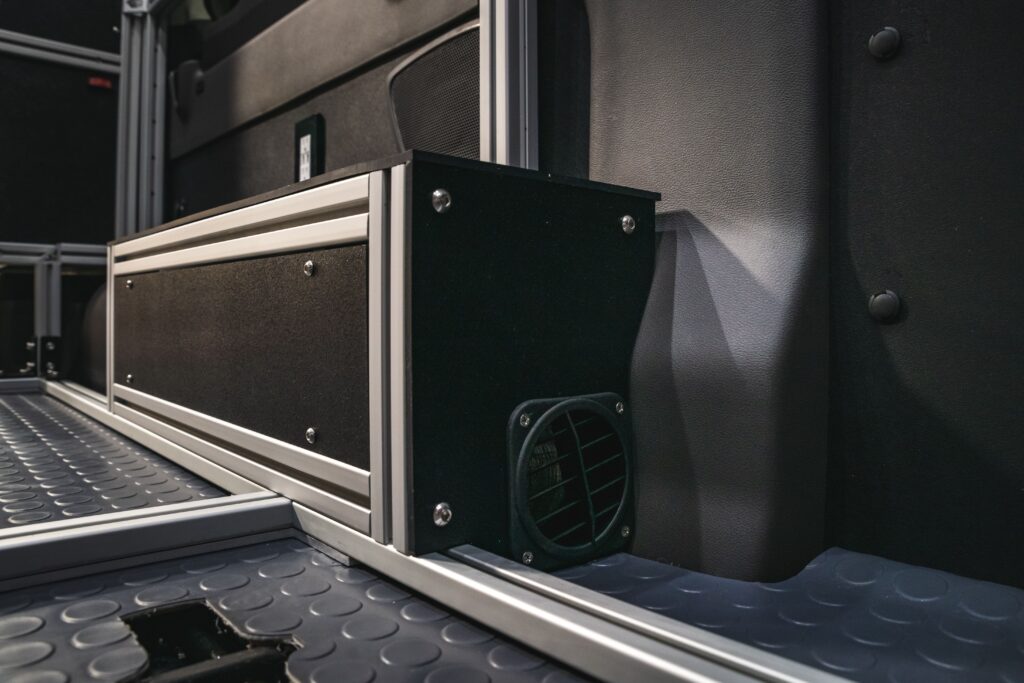
Polycarbonate is a transparent polymer that is manufactured in sheets and can also be molded or thermoformed. Some common brands are Lexan and Plexiglass. It has a high level of impact resistance and can be clear or tinted. This allows us to cover the electrical components in our power boxes while still being able to see inside, which is helpful for monitoring or troubleshooting your electrical system. These panels provide a protective barrier, shielding sensitive electronics from dust, moisture, and potential damage.
3. Aluminum Extrusion
The backbone of your campervan’s structure lies within the aluminum extrusion frame. This material allows us to create versatile and adjustable structures that can be easily customized to meet your specific needs. From installing shelves to creating storage solutions, aluminum extrusion provides the framework for a truly modular interior.
4. ABS (Acrylonitrile Butadiene Styrene)
Acrylonitrile Butadiene Styrene, also known as ABS, is a thermoplastic polymer that comes in different size sheets and thicknesses. It is strong, chemical resistant, and has excellent high- and low-temperature performance. ABS is easily machined, allowing us to use it for many applications in our vans such as cabinet sides and shelves, bed platforms, electrical box covers, mounting plates, and many others.
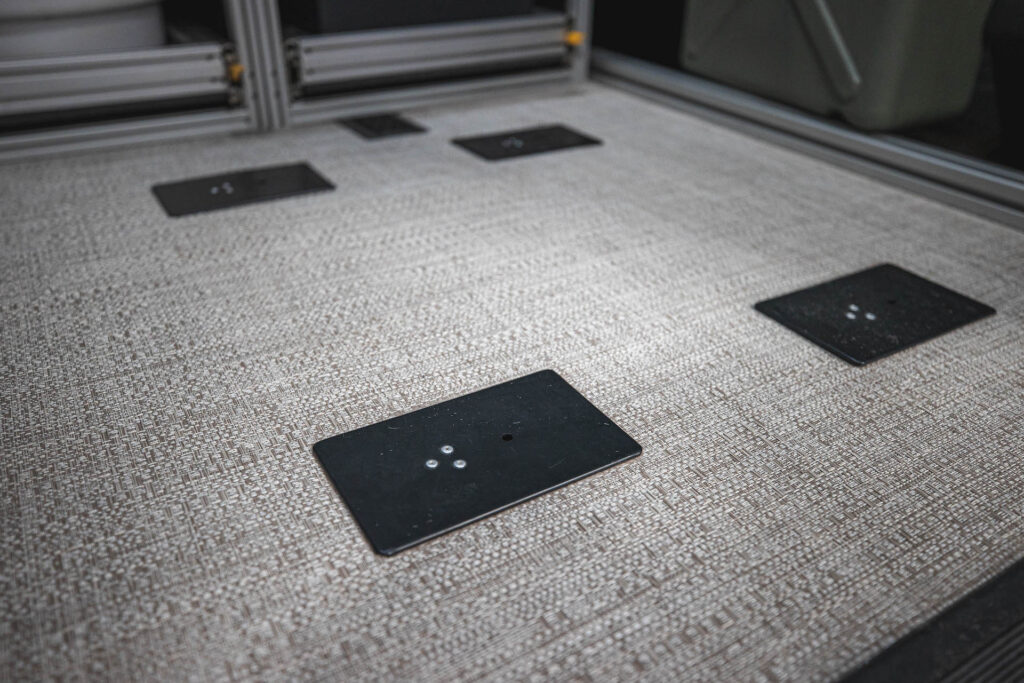
Our flooring is polyvinyl–flat or woven– that is waterproof and resistant to many chemicals, durable, and easy to clean up. It offers a comfortable surface underfoot, making it ideal for both living and adventure spaces within your campervan. We bond it with insulation foam to improve thermal insulation and reduce vibration and road noise.
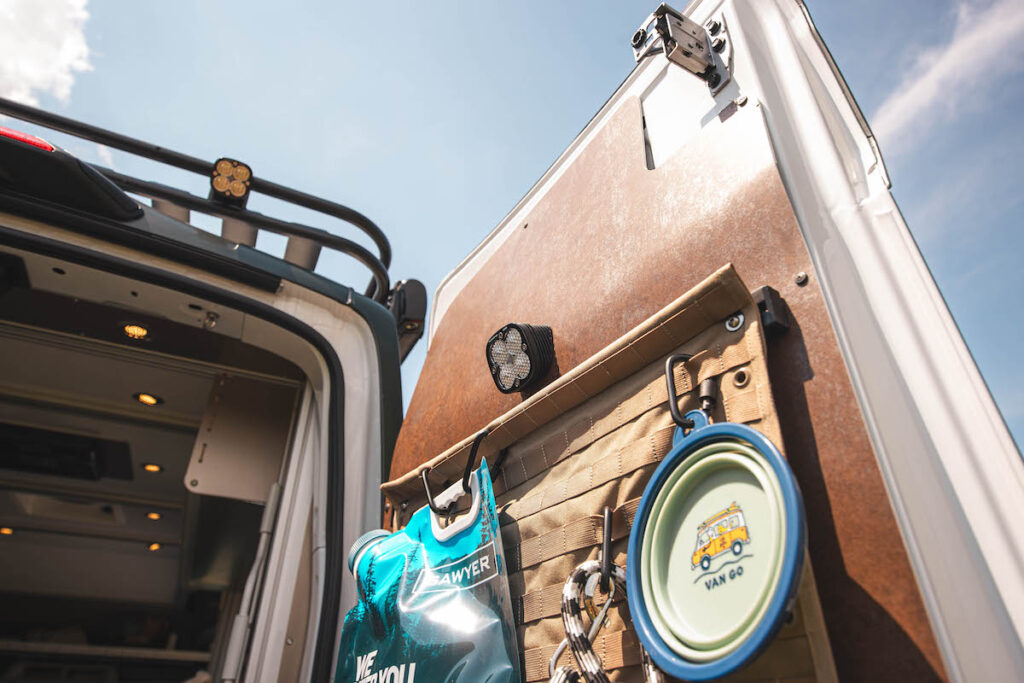
6. ACM (Aluminum Composite Material)
Aluminum Composite Material (ACM) is a thin aluminum sheet bonded to both sides of a composite core. The resulting panel is fireproof and resistant to weather, water, and chemicals. It is easy to machine and fabricate and is used in many applications in our vans both inside and outside. Our newest show van includes ACM on the rear doors accompanied by our aluminum extrusion for hanging gear. It comes in many different finishes and brings a clean and professional look to our vans.
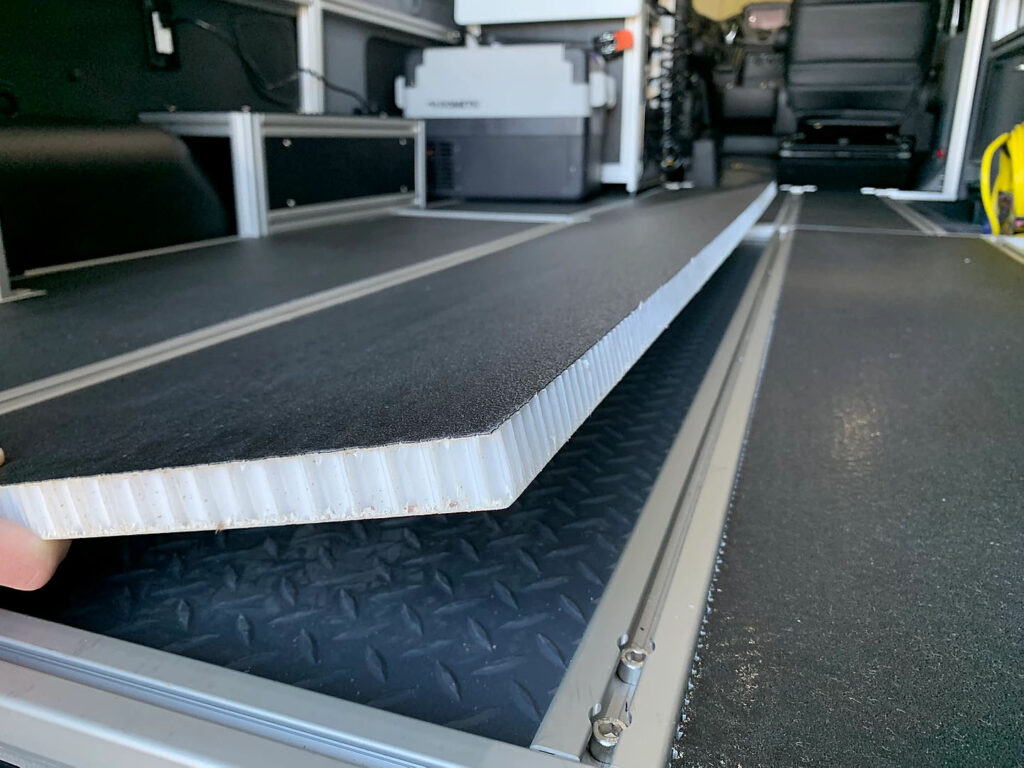
7. Honeycomb Panels
These lightweight panels consist of a honeycomb core sandwiched between durable outer layers. The result is a material that offers a remarkable strength-to-weight ratio. Honeycomb panels are used in various components of our campervans, contributing to their structural integrity and overall durability. Moreover, these panels support the modular design philosophy, allowing for easy customization and layout adjustments to suit your ever-changing needs.
From the day we sent out the very first Vandoit to today, quality has been top priority. Whether you’re seeking a mobile office, a weekend getaway, or a home on wheels, these materials come together to create a campervan that adapts to your desires and supports your adventures. At Vandoit, we don’t just build campervans; we craft opportunities for you to seize life’s moments and make memories that last a lifetime. Experience the freedom to work, travel, and play, all while journeying in a vehicle that’s as reliable and dynamic as you are. Your adventure starts here!
If you’ve taken a trip in a campervan, then you know one of the keys to a successful journey–and successful relationships with road trip buddies–is storage.
There’s nothing worse than waking up in the middle of the night and needing that one small item buried at the bottom of a bag. Where is the bag? And where is my flashlight so I can search for that bag?
If you’ve been around Vandoit long enough, you’ve picked up on the fact that the signature feature of our design is modularity.
*editor’s note: Modular: MAAH | ju | ler, adj. constructed with standardized units or dimensions for flexibility and variety in use
A modular design can make storage flexible and a breeze. Forget backpacks or duffel bags. Vandoit provides camper van storage options that keep your necessities at your fingertips.
Vandoit Galley And Storage Modules
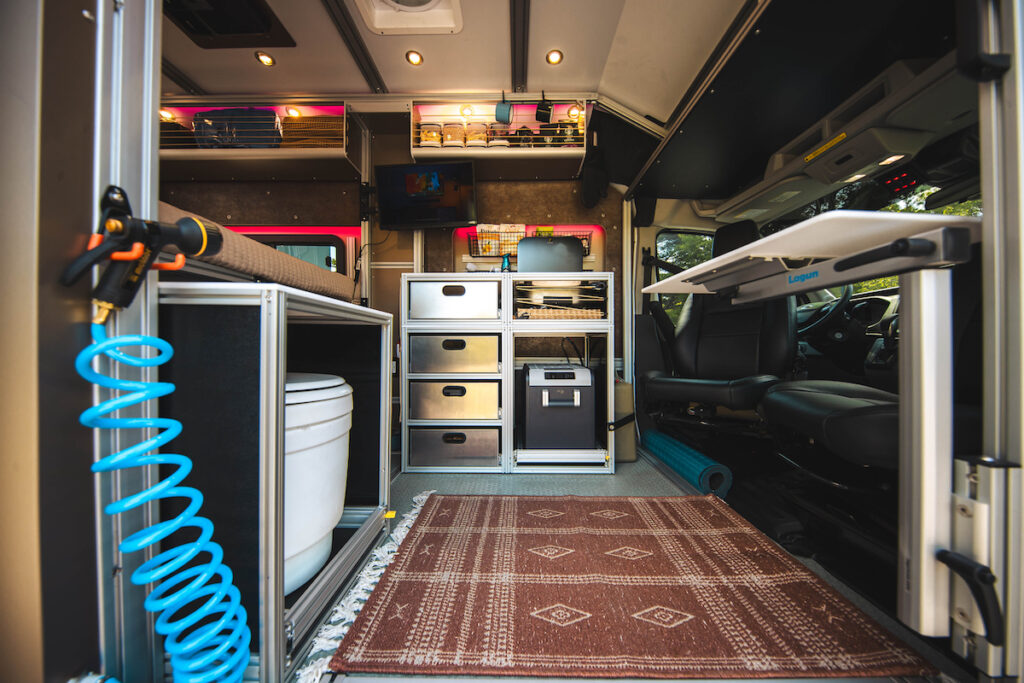
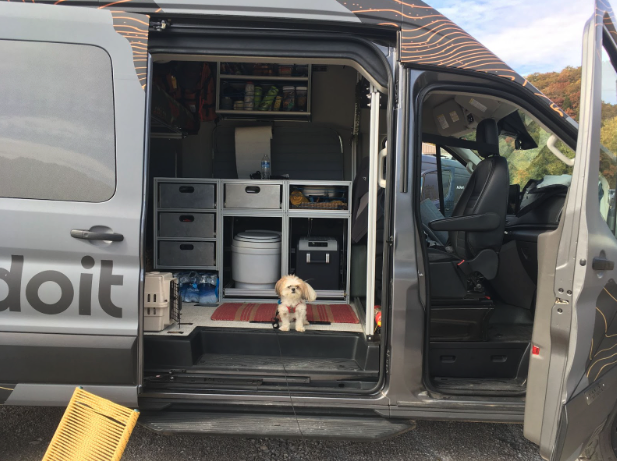
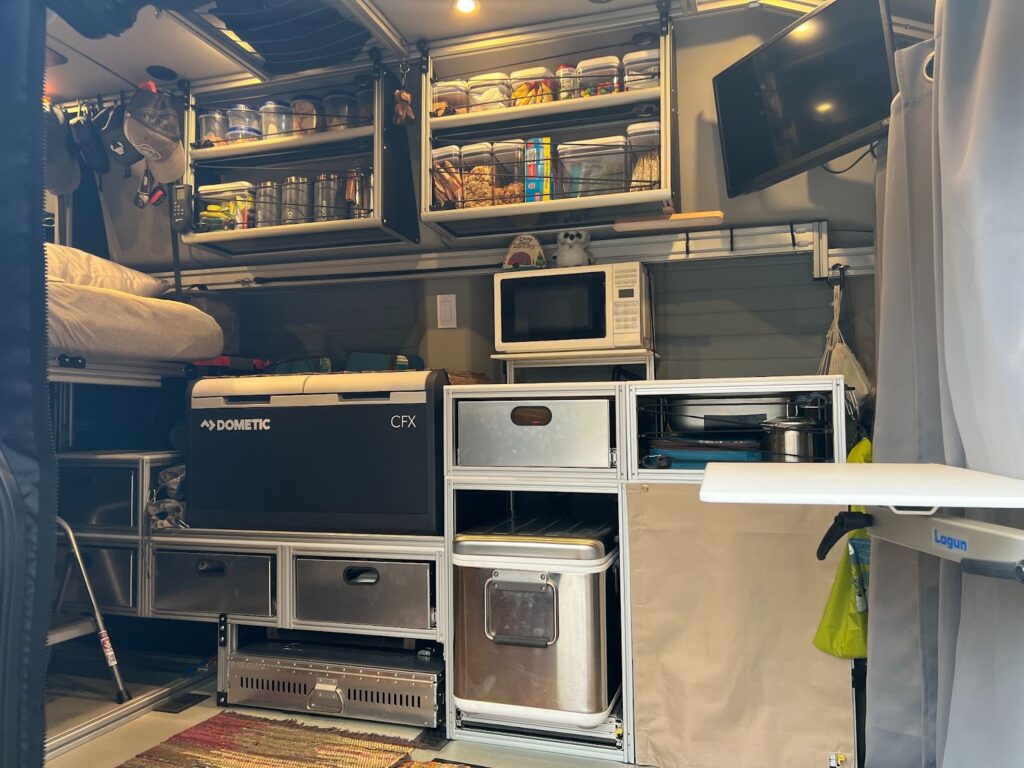
One of the perks of working at a campervan company is that I get to borrow one occasionally. On our most recent mountain bike race trip, my husband and I got to try out a LIV camper van. The van had Vandoit’s new Galley & Storage Modules configured like this:
Two Slide-Out Storage Cabinets were perfect for storing the Dometic powered cooler and Dry Flush toilet out of the way.
The four metal drawers made it easy to keep everything we’d typically have stuffed in bags. One drawer for my husband, one for me. Another drawer for the dog’s supplies and first aid kit, and one for kitchen utensils and our Jetboil.
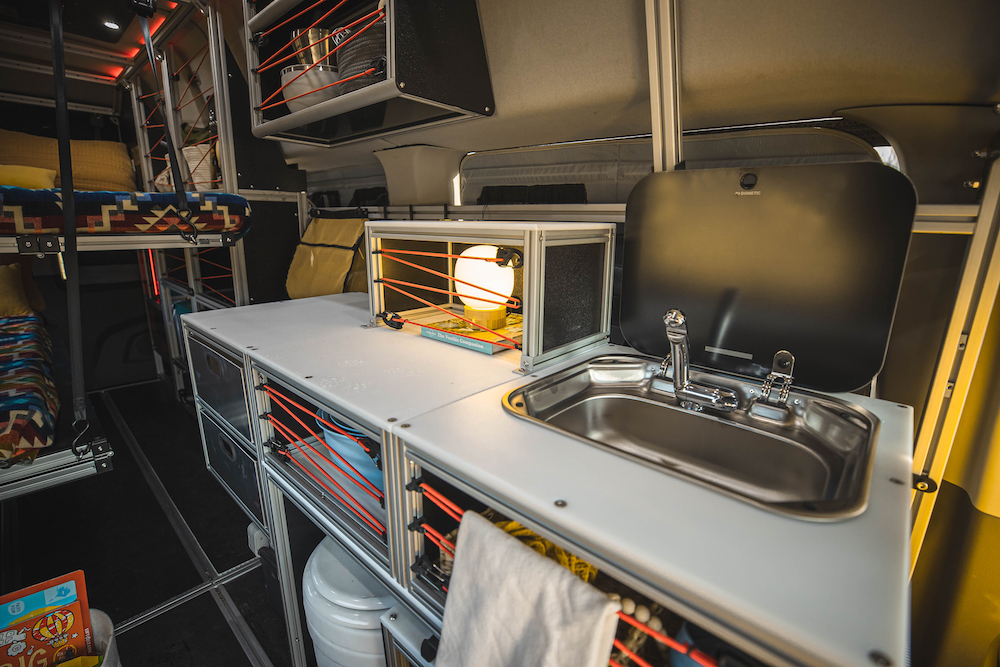
With a Single Sink Module on the top right of the configuration, we had continuous counter space on the top of the three modules. It made prepping meals easier than finding a spot in the van to set things down.
At night, turning the counter space into tooth-brushing and face-washing stations before bed was super simple. And clean-up of everything took no time since the module tops are food-grade cutting board material.
(This isn’t the only module configuration, though–check out this web page for plenty more setups!)
Hanging Cabinet and Shelves
The Galley & Kitchen Module setup was a big game-changer for us. Also, having the hanging cabinet with a shelf just above the modules completed the kitchen setup.
We put biking water bottles on the bottom shelf with energy drink packets, jerky, nuts, and granola bars for my husband’s biking fuel. The top shelf was for coffee, camping meals, and mugs.
Having all our food and drink items hanging above the galley setup made meal prepping much smoother. No more digging through bags and boxes to find that all-crucial bag of sugar to sweeten my coffee in the morning!
And while we were driving, bungees across the front of the cabinet kept everything safely in place.
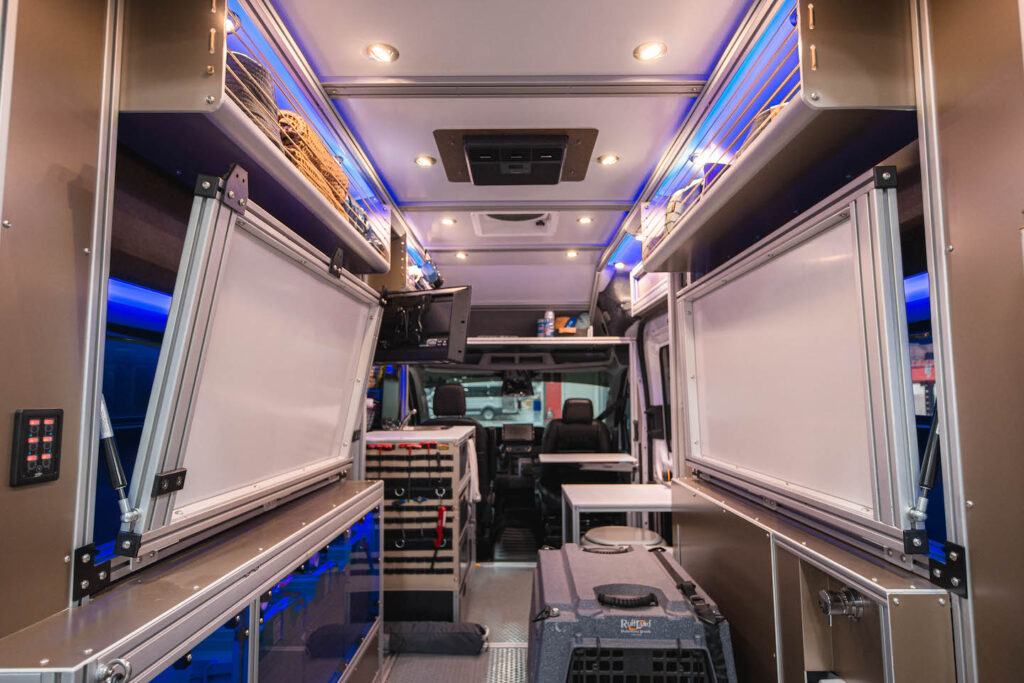
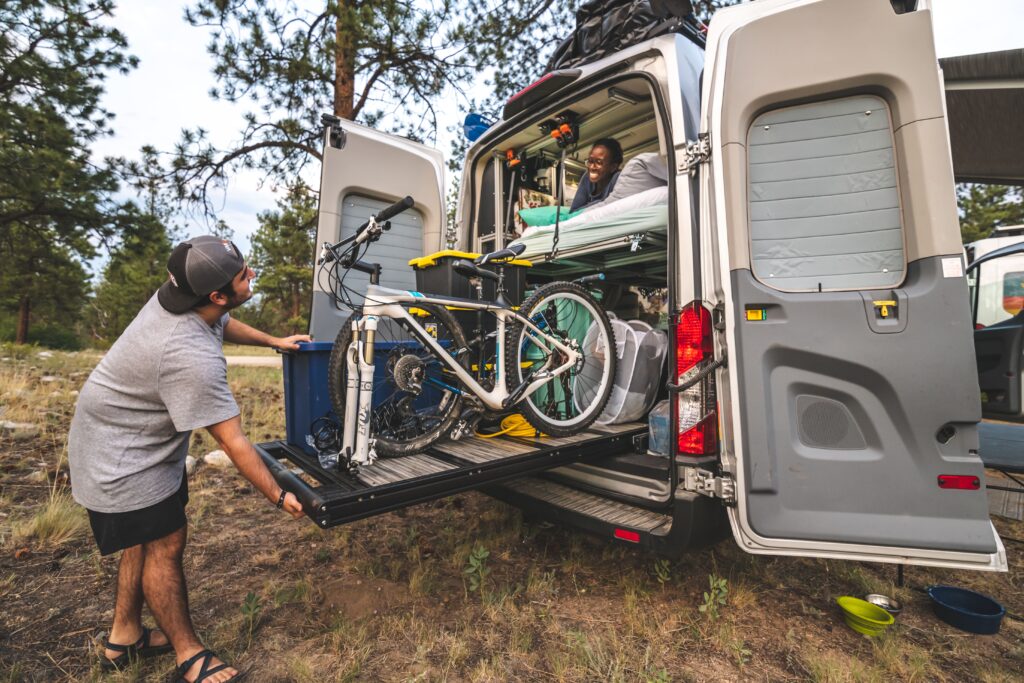
The Vandoit Gear Slide
The Gear Slide is by far my favorite Vandoit feature. This cargo platform slides in and out of the back of the van. This makes it easy to secure, access, and remove all those large but essential items.
It holds up to 750 pounds of cargo. We’ve used it to store our tandem bike, my husband’s mountain bike, a toolbox, cases of water bottles, and a few other odds and ends on a trip to Bentonville, Arkansas.
The extruded aluminum track, metal eyelets, and bungee cords made it simple to tie everything down–and remove everything quickly.
A more petite person like me could easily slide the platform in and out to reach everything. I’ve even used a gear slide to transport ⅔ of a pallet of water bottles to a charity biking event!
Vandoit equips the LIV with lights in the cargo area to make it easier to find supplies on the Gear Slide at night.
Front Bulk Head Storage Shelf
I’ve lost track of how many items I kept on this shelf. Vandoit installs this above the driver and front passenger’s seats. Shoes, hats, electronics, books, snacks–you name it, I’ve tossed it there!
It’s the perfect place to put those items you don’t want to forget to grab on your way out for a day of adventure.
Molle Panels
Continuing the modular theme, MOLLE (modular lightweight load-carrying equipment) panels are perfect for strapping small bags or clipping items using carabiners. The panels mount on the walls or the camper van’s ceiling. This ensures the stored items are out of the way but easy to reach when needed.
I liked having a MOLLE panel mounted on the ceiling above the bed. It makes nighttime items like my flashlight, glasses, and phone easy to find.
Thermal Curtains with Pockets
Vandoit’s thermal curtains regulate the van’s internal temperature and provide privacy, and the set with mesh pockets adds a ton of storage space.
I put our dog’s leash and supplies in the pocket just behind the slider door, so those items were easy to grab when on our way out. I used the pockets on the curtains above the kitchen area as extra food item storage options. And the pockets on the rear doors were perfect for bike helmets and other bike gear.
Vandoit Under-Bed Bin Storage
The under-bed bins are a new storage option from Vandoit. The system great for organizing smaller items you want to keep track of in the van’s garage, like tools, shoes, or even clothing items.
Three large plastic storage bins are suspended on a track underneath the bed and slide out the back or the front of the bed for access. You also have the option to swap out one bin to suspend a 26-inch bike wheel there instead.
I liked this storage system’s use of space. It’s worth mentioning that having the bins under the bed created a height limitation. I had to raise the bed reasonably high to allow enough space for the containers and tall items like bikes, or you’ll need to lay them on their side.
Ratcheting Paper Towel Holder
This item might not sound like it qualifies as a storage option, and you’re probably wondering why the paper towel holder is a ratcheting one. First, I can’t tell you how often I’ve spilled something in a van and needed a paper towel in a pinch.
Vandoit mounts the paper towel holder on the ceiling just behind the driver’s seat. It was within easy reach of the kitchen area but didn’t take up counter space.
Secondly, if any wind blew through the van and your paper towel roll was not on a ratcheting holder, I got a long banner of paper towels flying out the door. The ratcheting paper towel holder Vandoit offers keeps the roll from unraveling. It’s a minor, simple feature that made a big difference.
But wait…that’s not all!
This certainly isn’t a complete list of Vandoit’s storage options. These eight are some of my favorites, and I haven’t even touched on the exterior storage options like the Aluminess Deluxe Box or 1Up Double Bike Rack.
If you’re ready to dive deeper into the world of campervan storage, check out these web pages:
There may be times where your Vandoit goes through a period of non-use. Whether it be bringing it out of storage, non-use due to the busyness of life, etc., we want to make sure your Vandoit and all components are working correctly. Our customer support team put this Vandoit Operational Checklist to simplify the process of running through you van’s components.
Vandoit Operational Checklist
Check under the hood for any loose connections or frayed wires (i.e. evidence of pests)
Check tires for cracks or punctures and make sure they’re inflated to the proper pressures
Make sure the backup camera is operational and all brake, turn and hazard signals are working
View the roof to make sure solar panels are clean and to inspect for any disconnected wiring or damage
Check for cracks in sealant on the roof around the MaxxAir fan and/or air conditioner; apply a new layer of sealant as needed
Open and close the awning, check for tears or holes
Check the Vandoit battery terminal cables
Check shore power plug and cord for damage
Verify the Vandoit battery system can charge while the car is running
Turn on inverter and test outlets by plugging devices in and turning them on
Test the TV and make sure audio can be heard
Check that all speakers or subwoofers are working in the stereo system
Check for sun icon and incoming amperage on the solar monitor while van is parked in the sun or through the mobile app
Check all interior and exterior lights
Test MaxxAir fan
Test air conditioner
Test Espar heater. Make sure there is at least ¼ tank of fuel in the van beforehand
Test the water system: fill the water supply can, turn on the pump, operate the sprayer and kitchen faucet. Inspect each connection for leaks.
If you have a LIV bed, make sure the bed crank raises and lowers the bed evenly
Check DO bed cargo buckles for loose bolts
If you have a gear slide, check to make sure it extends, stops, and retracts properly
Tighten all bolts in the aluminum extrusion and cabinets
Click link to download a copy of the Vandoit Operational Checklist. If you have any issues after running through the checklist, please reach out to our customer support team.
To make sure your Espar continues to work the way is it supposed to, it may require some periodic general Espar maintenance.
Recommended Periodic Maintenance
Remove the glow pin and inspect for carbon build up. Clean or replace.
Remove the glow pin screen and inspect for carbon build up. Replace.
Make sure the vent hole is not clogged.
Inspect the ducting, the air intake screen, and air outlet for restriction or blockage.
Inspect the combustion air intake and exhaust for blockage.
Operate your heater for a minimum of 20 minutes each month.
Maintain your batteries and all electrical connections in good condition. With insufficient power the heater will not start. Low and high voltage cutouts will shut the heater down automatically.
Use fuel suitable for the climate (see fuel supplier recommendations). Blending used engine oil with diesel fuel is not permitted.
Be sure the van’s battery system is receiving sufficient voltage; check the incoming voltage on your van’s inverter monitor screen. If the battery system has low voltage, the Espar will not be able to start.
Know whether your Espar runs on gasoline or diesel and use the appropriate fuel when refueling your van.
Periodically do a visual check of all electrical lines and connections for damage or corrosion.
Periodically do a visual check of the fuel line for leaks.
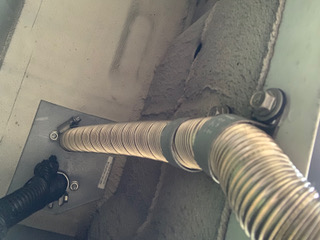
Make sure the exhaust pipe (photo below) is not touching the electrical or fuel lines, as it may cause these lines to melt.
Periodically check and replace the fuel filter inserts.
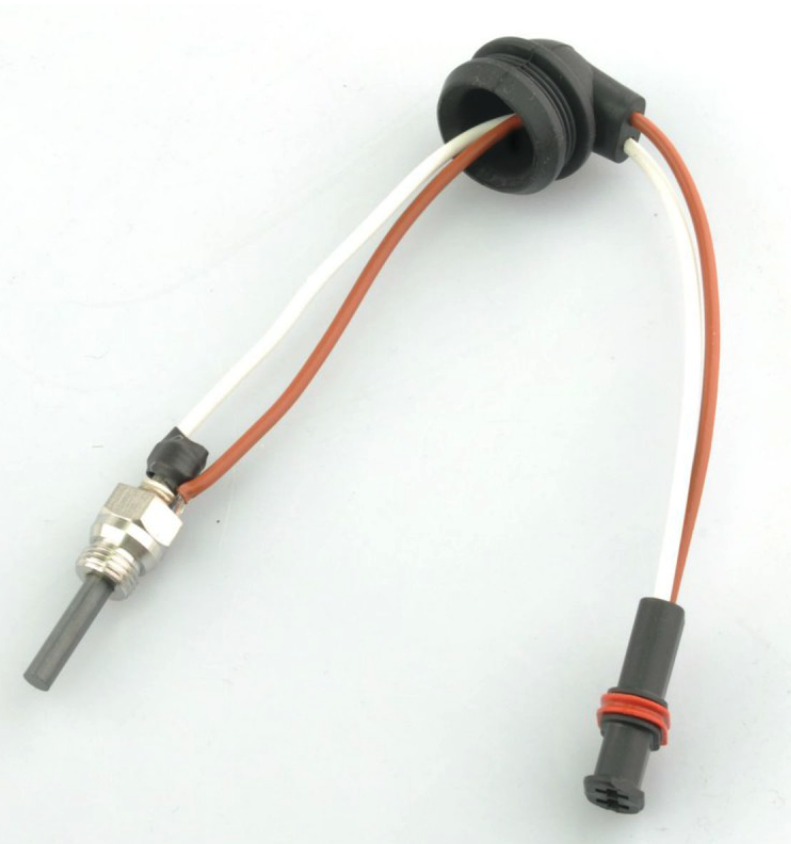
Periodically check the glow pin (photo below) and replace as necessary.
Once a year, replace the screen, filters, and gaskets.
Periodically inspect the blower motor for visual signs of damage.
Periodically inspect the duct system, and make sure there is no contamination, dust, or blockages.
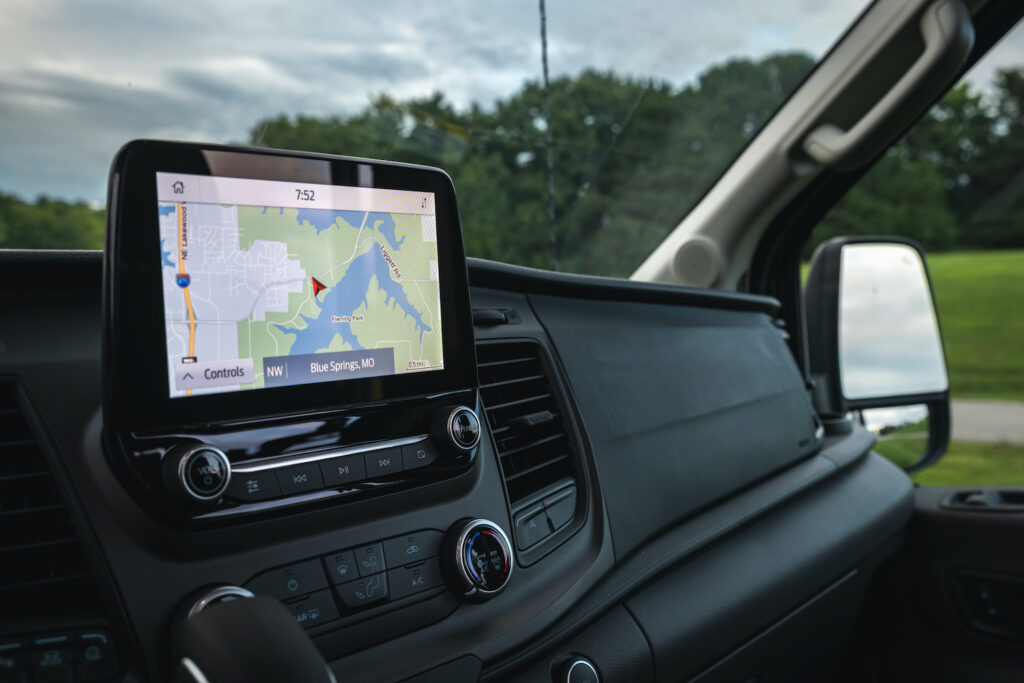
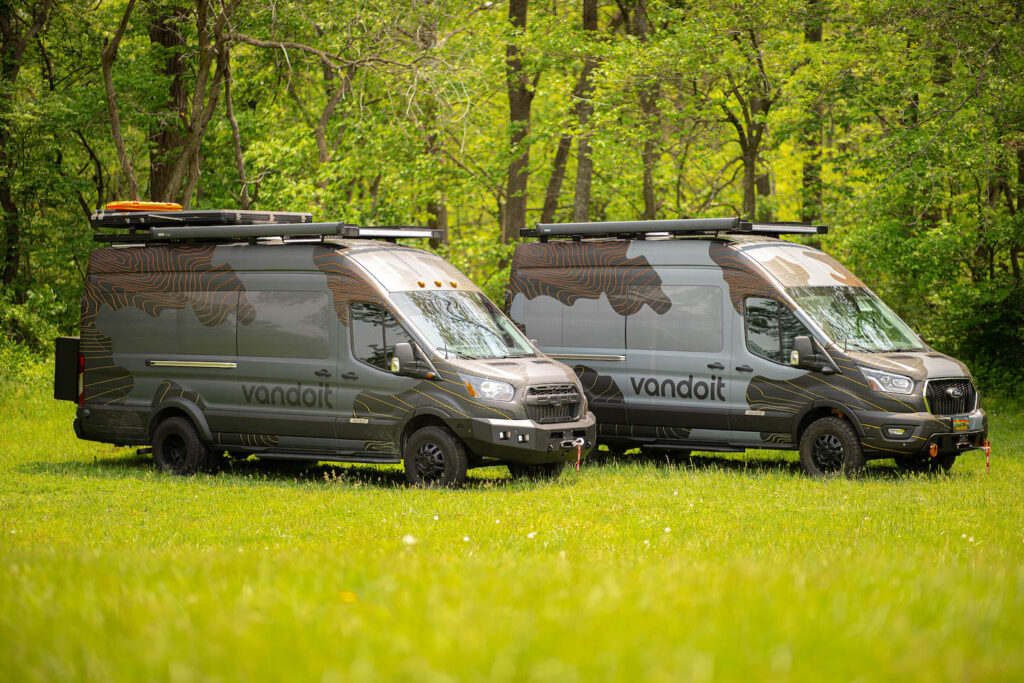
One of the more exciting days of our lives was when my wife Lana and I picked up our new first Vandoit camper van in Blue Springs, MO, almost 4 years ago. Another almost as exciting day occurred when we traded the first van in for our second Vandoit. We went from a LIV model (GO model back then) to a DO model.
So why the change? What is the difference between the two models?
It’s easy to visit the Vandoit website and see the technical difference between both. And there are definitely some differences and potential trade-offs between the two.
For example, the DO model has a full-sized bed, whereas the LIV model has a queen size bed. So going to the DO, we gave up about 6 inches of bed space side-to-side. My wife and I, who typically sleep in at least a queen size bed, were worried about giving up sleeping space. But we found that if you need more sleeping room, you can agree to “surf your side,” and that works well. So we have no regrets about going to a slightly smaller bed.
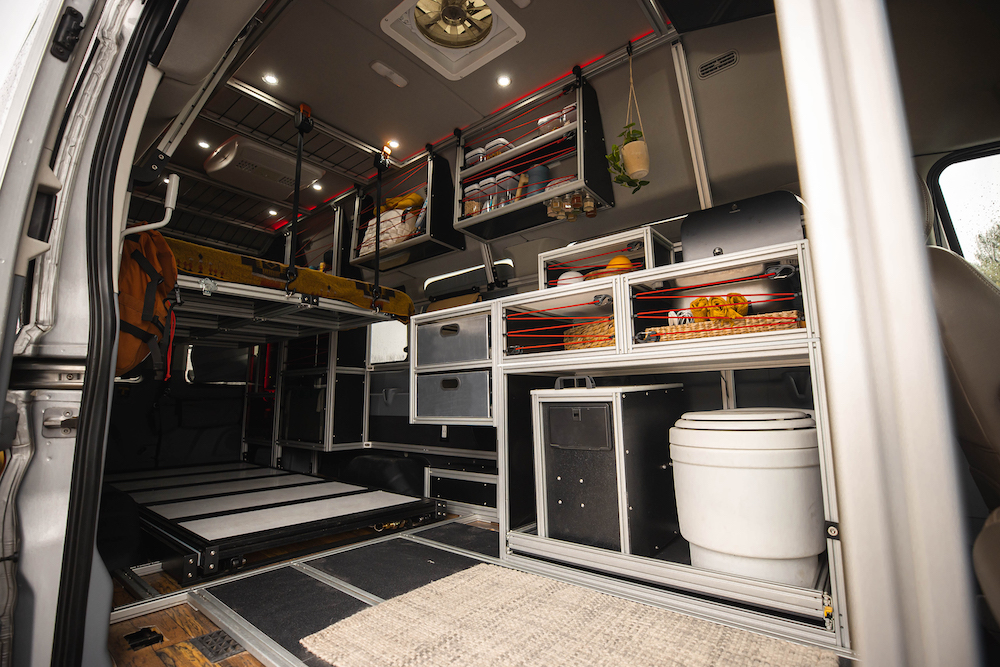
The DO offers some other benefits as well, such as a more open floor plan. The Murphy-style or drop-down beds allow for extra space inside to work, and you can even walk the full length of the inside van when the beds are folded to the side.
The DO bed can also be raised up and down on a strap system. We found this a bit more time-consuming than the hydraulic raise and lower system in the LIV. If you are going to be carrying bikes in the garage area (below the bed) and will be raising the bed up and down regularly, the hydraulic system in the LIV is the way to go because it’s almost effortless.
The DO also has unlimited attachment points for hooks, tie-downs, shelves, etc. The DO feels roomier than our LIV model did. However, the LIV model now has the option of a bed leaf that allows you to fold the front up for a bit more space when you aren’t using it. This leaf definitely provides more area to move about the galley.
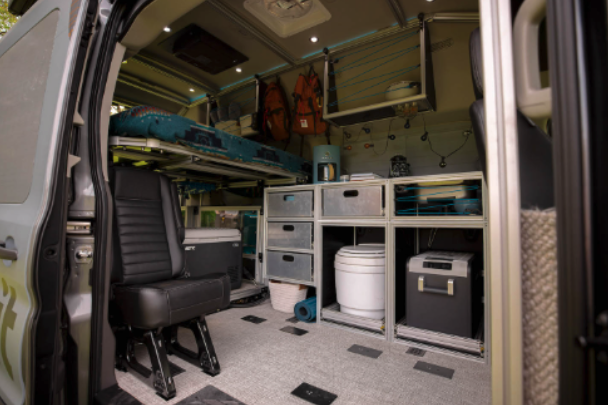
The LIV model also has a gear slide in the garage area. The slide allows easy access to equipment carried under the bed. You simply open the back doors, pull the knob and slide it out.
The DO model does not come with the slide; however, we’ve found that the DO configuration allows much easier access under the bed system without needing the slide. If the slide is just something you can’t live without, you can add it as an accessory to the DO model. However, the addition of the slide takes a few extra inches of space from the bottom floor of the garage area.
Either adventure van build is an awesome choice. Choosing which model best fits you is a matter of your needs space-wise, how much and what kind of gear you carry, and what your van-living preferences are.
Choosing Vandoit Camper Van Build Options
A couple of other things to consider when deciding on Vandoit camper van build options. Our first build was a medium roof. I am 5’11, and Lana is 5’7. I wish I could say that height never affected us. We both have bumped our heads on a shelf or crossbar a time or two. Also, I found it difficult to stand tall and put on a coat inside the medium-roof van.
The medium roof is workable if you are shorter or you learn to live with it. It’s definitely a less-expensive build than a high roof. On our second van, we chose to go with a high roof and decided it was a great decision for us.
We also went with an extended-length van (EL) the second time around because we wanted a larger kitchen galley. Lana likes more room to prepare meals, and the extended length definitely gave us that.
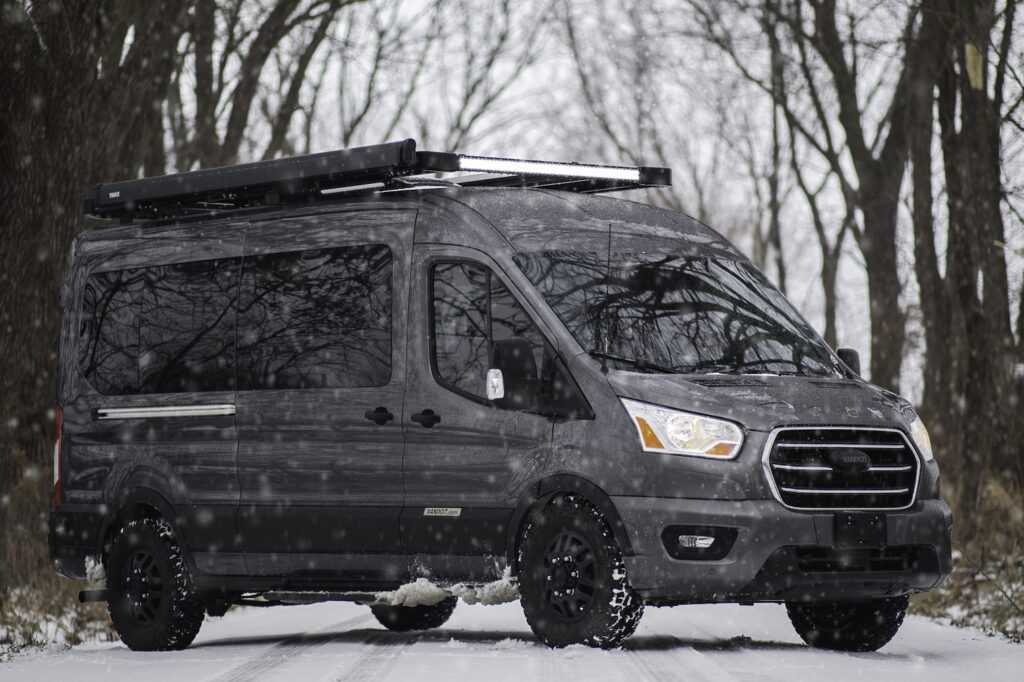
Something else to think about when you think about vans is the Ford Eco boost system. We live in the mountains of Colorado, and the EcoBoost has been phenomenal for climbing hills and passes.
We also went with a more substantial undercarriage build for the large potholes on some of the mountain highways.
No matter where you live or visit, you’ll definitely want to add the Espar heater. We don’t use it all the time, but it’s nice to fire up on cold mornings and heat the camper van a bit before getting out of bed and getting dressed. It’s a great heater! We’ve used ours over 11,000 feet, and it worked wonders.
With our second camper van, we also went with a lithium battery system as opposed to the AGM system in the first. We were able to operate a small microwave oven off of both. However, with the AGM batteries, the maximum cooking time is about 4 minutes, whereas lithium allows for substantially more cooking time. Both battery systems have advantages. The lithium system is stronger and allows for extended use, including using an air conditioner.
However, the lithium battery takes a bit longer to charge. The AGM system didn’t allow as much overall output but recharged very quickly. We are definitely pleased with our decision to go with the lithium battery system, but all-in-all we managed effectively with the AGM.
A final suggestion is not skimping on solar. We highly recommend going with solar power. It will make your van life much simpler, to say the least, and you’ll be glad you did.
The most difficult thing we found in choosing our new adventure van was deciding between the many cabinets, shelves and pods that Vandoit now offers. Their selection is pretty amazing and just short of mind-boggling.
Final Vandoit Adventure Van Thoughts
We’ve loved both camper van models, and when the time comes, we will be brain-storming our third Vandoit. We looked at many other van build companies before going with Vandoit, but I can promise you there is no upfitting company that is better than Vandoit. You’ll never be sorry.
So take it from us: we’ve both LIVed and DOne. Now the choice is yours!
Winter is coming. For some parts of the country, winter weather has been here for weeks. This means you should be taking some steps towards winterizing your van. This guide will show you how to winterize the lithium battery system for all types of van users
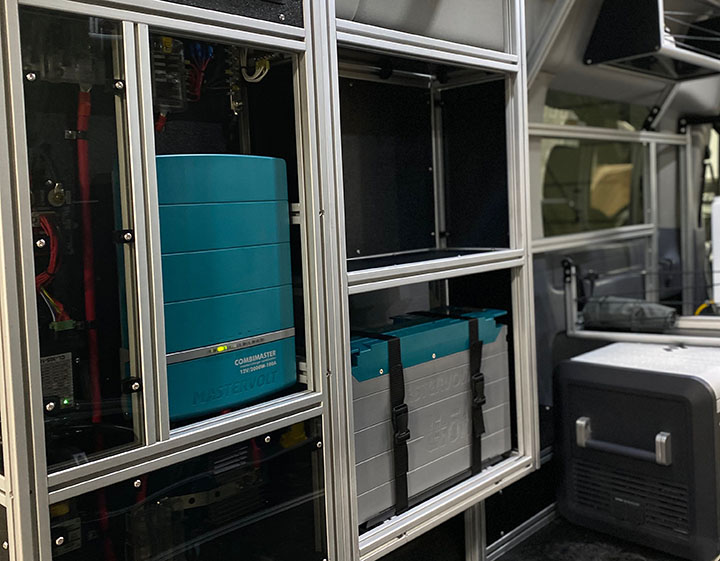
Confirmed Issue: The Mastervolt lithium system is designed to operate during cold weather. However, cold weather can impact the operation of the lithium electronic system. Symptoms include batteries not accepting a charge current, CombiMaster Inverter not turning on, Mastervolt Control Panel not turning on, AC and/or DC power not working, and not charging from the alternator.
The purpose of this article is to educate you about how your lithium system operates in cold temperatures. It includes measures you can take to preserve the health of the system and protect your investment.
Affected Units: Any Vandoit van with a lithium battery system
Note: Vans built after September 2021 have a heating pad installed on the lithium battery/ies. The heating pad is hard-wired to the battery system and will automatically turn itself on at 45°F. It will also turn off when the battery temperature reaches 68°F. The heating pad should prevent the battery/ies from becoming too cold to operate. However, as explained below, the operating temperatures of other parts of the lithium system can impact the system’s ability to function. Specifically, the CombiMaster Inverter/Charger shuts off at a higher temperature than the batteries do. When it shuts off, the heating pad will gradually deplete the battery bank. If the CombiMaster shuts off, the battery level can be restored/maintained by driving the vehicle regularly.
Maintaining The Entire Mastervolt Management System
Issue Explanation: To begin, what one first needs to understand is that maintaining your lithium system does not solely include the batteries, but the entire Mastervolt management system.
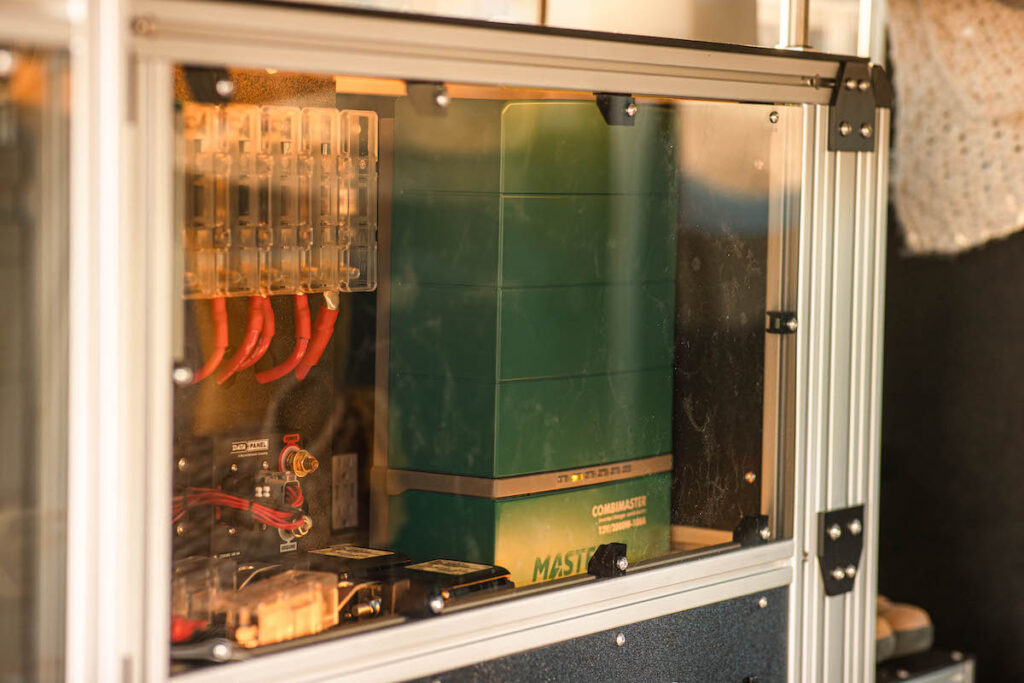
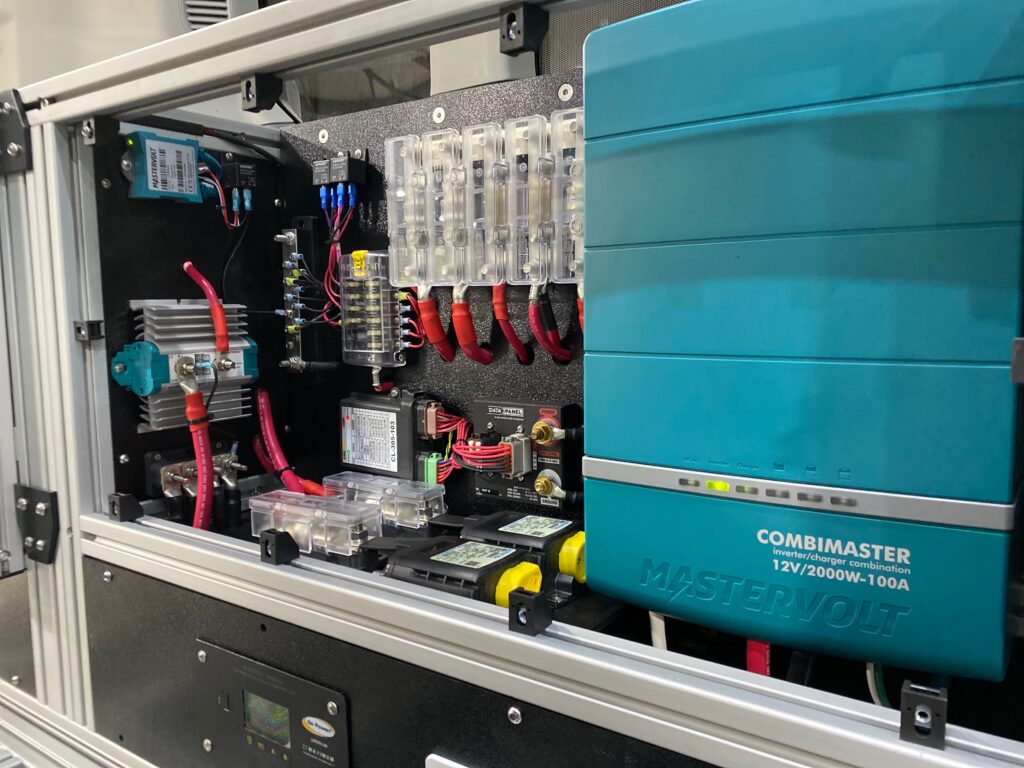
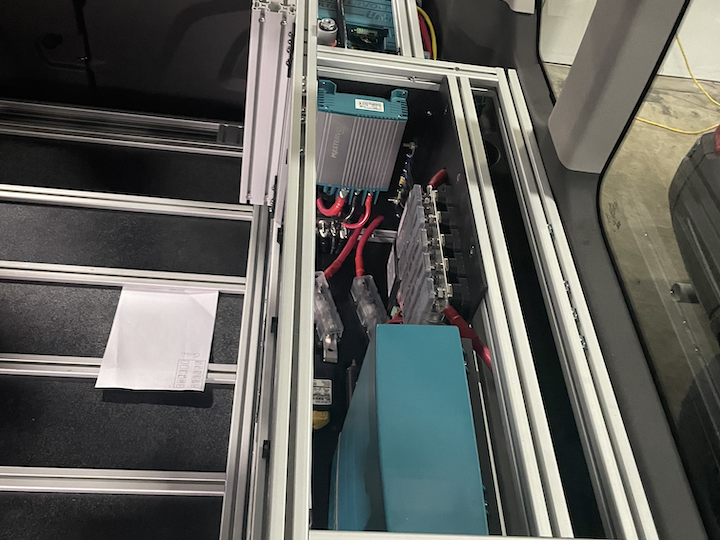
The Mastervolt system employed in your van includes the Mastervolt CombiMaster 120V series (Inverter/charge controller), ML-RBS Remote Battery Switch (controls flow of power in and out of the battery), Mac Plus (Charges from alternator), and MLI Ultra 12/2750 or 5500 Lithium Battery Series (Lithium Batteries). Each of these components has a different operating temperature:
Component Operating Temperatures:
CombiMaster: 14°F to 140°F <— (Highest Threshold Temperature)
ML-RBS Remote Battery Switch: 14°F to 140°F
Mac Plus: -4°F to 140°F
MLI Ultra Lithium Battery: -13°F to 122°F
Please note that these operating temperatures are distinct from the ambient temperature of the air in the van.
Note: Depending on what charge cycle the batteries are in, attempting a charge below 23°F may result in batteries not accepting charge current, but this does not mean the batteries are not operational or in danger of damage. The batteries are safe as long as they are above -13°F.
Because the CombiMaster (not the batteries) has the highest threshold for operating temperature, you will need to consider how you plan to utilize the van over the winter with this device in mind. Should the internal temperature of the CombiMaster go below operating temperature, your van will not be able to charge via shore power (which gives the impression that batteries may be damaged, but this should not be the case), the Mastervolt control screen may go blank, and AC power will not work. To bring the CombiMaster up to operating temperature, run the Espar heater (DC powered) or the Ford factory heater.
Secondly, the battle you are fighting, so to speak, is with battery discharge, not with cold. Keeping your batteries at a high charge is key in all situations. It is important with all setups and temperatures (hot or cold), to eliminate loads from both DC and AC-powered devices, as this eliminates power draw from the batteries. Higher power draw increases the use of battery cycles, which decreases the life of the battery. In summary, keeping your batteries fully or nearly fully charged and limiting power loads helps in all scenarios, not just cold temperatures.
Resolution: The approach to maintaining your lithium battery system during cold weather will depend on how long your van will go unused. Please find the approach below that best fits your time frame: 1) you will be driving the van daily, 2) the van will be unused for a short term (1 to 2 weeks in between uses), or 3) the van will be unused for a long term (2 weeks or more–van needs to hibernate with only necessary functions running).
Please note that these approaches–minus running the Espar heater or a space heater–may be used to maintain the lithium battery system in warmer weather conditions as well.
Winterizing For Daily Driving
1. Drive the van daily to maintain 80%+ state of charge on the battery system. A good rule of thumb for most van owners is approximately 1 hour of drive time will provide roughly a 20% increase in charge. These numbers will vary depending on what devices are turned on and drawing power in the van.
Note: Mileage/vehicle runtime needed to get the battery to 100% state of charge will vary.
2. When the van is parked, keep it plugged into shore power. This will give you a reliable charge until temperatures drop to the 14°F mark.
3. Run the Espar heater or a safe space heater inside the van to keep the batteries at an internal temperature of 23°F or warmer to accept a charge. (See step 4 in the next section for instructions on how to check the battery’s internal temperature.)
Note: Be sure that your gas tank has at least 1/4 tank of gas while running the Espar and the run time is set so that it will continue to heat the van until the next time you drive it. Electric space heaters will drain batteries very quickly when not plugged into shore power. Always double-check how much power you are using before leaving the van unattended. (You can accomplish this by viewing how many negative amps are displayed in the “Primary Current” box on the Mastervolt screen.) Ensure that you have enough stored power or that shore power is plugged in and charging.
4. Vans built after September 1, 2021 have a battery heating pad installed. The heating pad is hard-wired to the battery system and will automatically turn itself on at 45°F and turn off when the battery temperature reaches 68°F. Because the heating pad is hard-wired directly to 12 volt power, you can turn off the inverter and still keep the battery warm. However, the heating pad is another device that will be powered from the battery. Expect a higher amperage draw from the battery when the heating pad is connected and functioning, which means faster battery discharge.
Winterizing A Van That Is Used 2 Days To 2 Weeks
1. Keep the van plugged into shore power. Again, this will give you a reliable charge until temperatures drop to the 14°F mark.
2. Remove the black ABS panel from above the inverter and keep it off so it can stay warm from the van’s ambient temperature. You will ned a 5mm Allen wrench to remove the screws in the panel. To do this in a LIV model, remove the bed or raise it as high as possible to allow sufficient room.
DO model
LIV model
3. Run the Espar heater or a safe space heater inside the van to keep the batteries at an internal temperature of 23°F or warmer.
Note: Be sure that your gas tank has at least 1/4 tank of gas while running the Espar and the run time is set so that it will continue to heat the van until the next time you drive it. Electric space heaters will drain batteries very quickly when not plugged into shore power. Always double-check how much power you are using before leaving the van unattended. (You can accomplish this by viewing how many negative amps are displayed in the “Primary Current” box on the Mastervolt screen.) Ensure that you have enough stored power or that shore power is plugged in and charging.
4. Every 2-3 days, check the battery’s internal temperature and battery level:
A. To check the internal temperature: In the top right corner of your Mastervolt lithium monitor, look for an icon with three horizontal lines and a magnifying glass. Click the icon and it will take you to a new menu. From there, click BAT Primary. Scroll down until you see Temperature. Please note that the reading is in Celsius.
B. To check the battery level: On the first page of the Mastervolt lithium monitor, look for the square that displays a percentage for the “Primary State of Charge.”
Depending on when you received you van, the first page may have different data point boxes. If you cannot locate the correct box, contact Vandoit Customer Support.
Winterizing For Vans Unused Longer Than 2 Weeks
1. Plug the van into shore power and charge the battery bank to 100%.
2. Leave the battery/ies installed in the van; there is no need to remove them.
3. Turn the yellow RBS switches to the locked position; the word LOCKED is imprinted on the top of the black housing of the RBS.
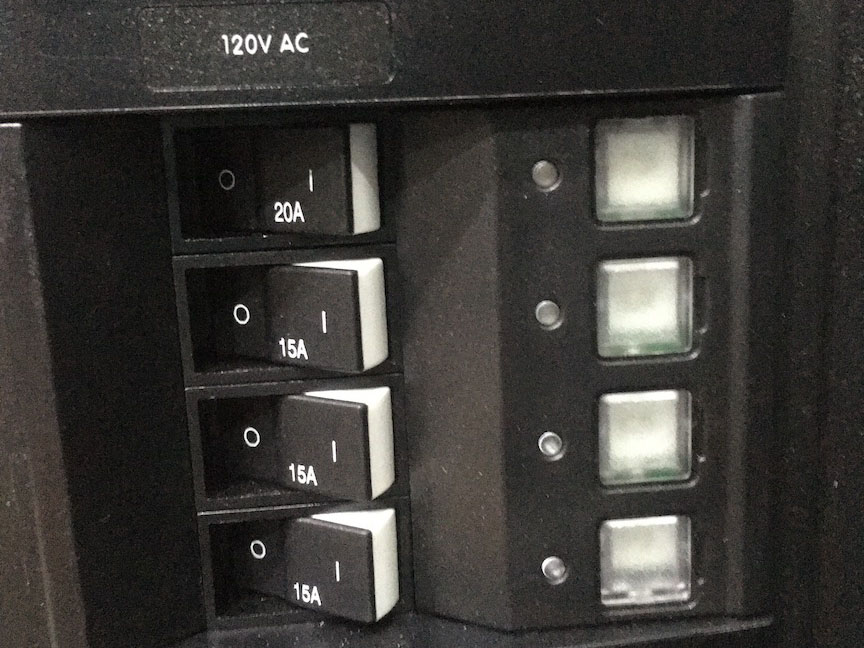
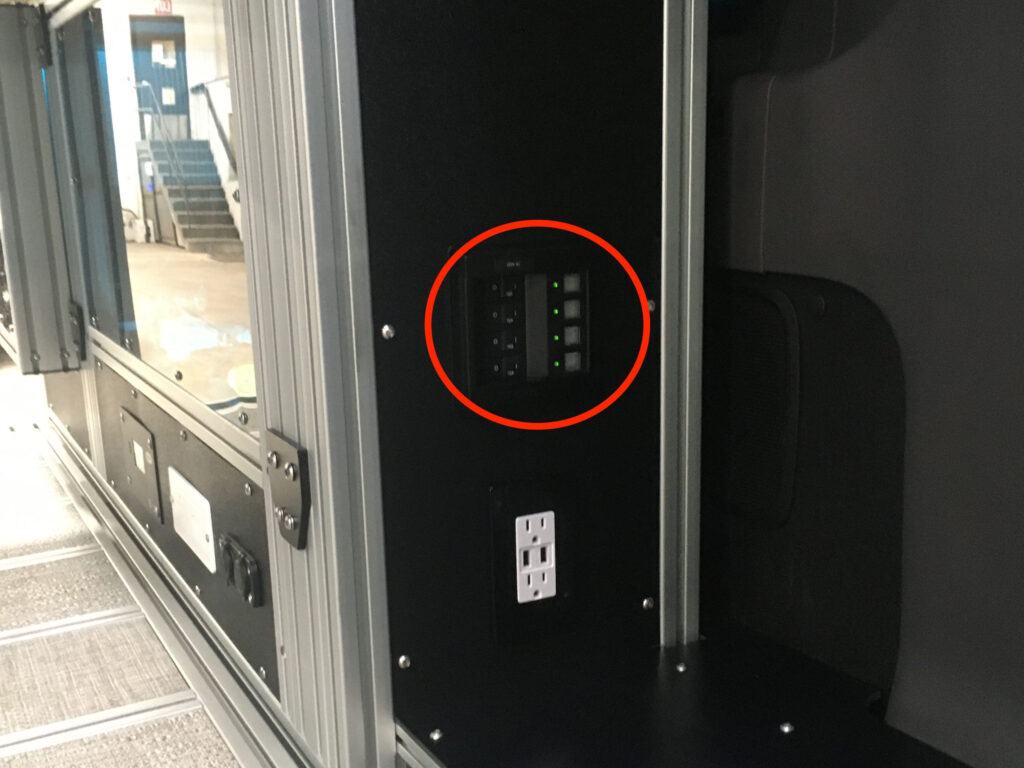
4. Turn off all circuit breakers. In the DO model, the circuit breaker panel is located on the power tower. In the LIV model, it is located on the front of the power box, behind where a 2-seat bench or kitchen pod may be installed in your van.
LIV circuit breaker location:
5. As often as is reasonable, check the internal temperature of the batteries and the battery level using step 4 above.
Note: Mastervolt batteries’ rate of self-discharge is less than 5% per month. Low ambient temperature affects the self-discharge rate of the batteries. Keeping batteries charged above 60% is key to their health.
To resume using your van after long-term non-use/storage:
1. Turn on all of the circuit breakers.
2. Turn the yellow RBS switches to the unlocked position.
3. Drive the van for at least 1 hour and then plug it into shore power. Driving will automatically press the top of the yellow switch(es) in to begin charging the battery. After long-term cold weather storage, we always recommend charging the battery all the way back up to 100%. Charge the batteries from either driving the vehicle or charging from shore power.
4. After 1 hour of being plugged into shore power, use the Mastervolt lithium monitor to check the battery level. If it is lower than 80%, please reach out to the Vandoit Customer Support team by submitting a ticket through the Customer Support portal or emailing support@vandoit.com . Please include photos of each page of the Mastervolt screen.
If your Mastervolt batteries reach a critically low level and the Mastervolt monitor displays a “Battery Safety Mode” message, stop and immediately contact Vandoit Customer Support.
If you experience any issues with maintaining your lithium system in cold weather, please reach out to the Vandoit Customer Support team by submitting a ticket through the Customer Support portal or emailing support@vandoit.com. Please include a description of how the system is performing and any relevant photos and videos of the Mastervolt screen and system components.
Was your van delivered before September 2021 with a lithium battery system? Are you experiencing issues with the system functioning during cold weather? Your van may be a candidate for needing a heating pad that can be installed on the battery/ies. Please submit a ticket to the Customer Support Team with your request for a lithium battery heating pad. Please include whether you live in or travel to cold climates for more than a few days at a time. This will help determine if your van is a candidate for needing the heating pad. Please also include a good shipping address where the heating pad can be sent.
Winter is coming. For some parts of the country, winter weather has been here for weeks. This means you should be taking some steps towards winterizing your van. This guide will show you how to winterize your Vandoit campervan AGM Power System
Confirmed Issue: Some van owners opt to store their vans over the winter rather than driving and using them. Long-term storage requires caring for the AGM battery system.
Affected Units: Any Vandoit van with an AGM battery system
Issue Explanation: A van that sits unused is always drawing power. Therefore, if you do not plan to use your van for a week or longer, you will want to take steps to prevent the battery system from draining so low that the batteries are in danger of being damaged.
What Steps Should You Take Towards Winterizing Your AGM Power System?
1. The best option for winterizing the AGM system is to keep the van plugged into shore power in a location where the rooftop solar panels can receive regular sunlight; this combination will keep the AGM system fully charged. Having both will serve as a backup incase any power issues with your shore power source.
2. If keeping the van plugged into shore power is not an option, parking the van in a location where the rooftop solar panels can receive regular sunlight is the next best option.
Note: You may wish to purchase ground solar panels that plug into the van next to the shore power plug. Ground solar not only adds to the incoming power the van can receives, but the panels can be placed on the ground near the van or on the windshield. This option is especially helpful when the van must be parked in shade or under a covering. Contact the Customer Support team (see below) for information on purchasing ground solar panels.
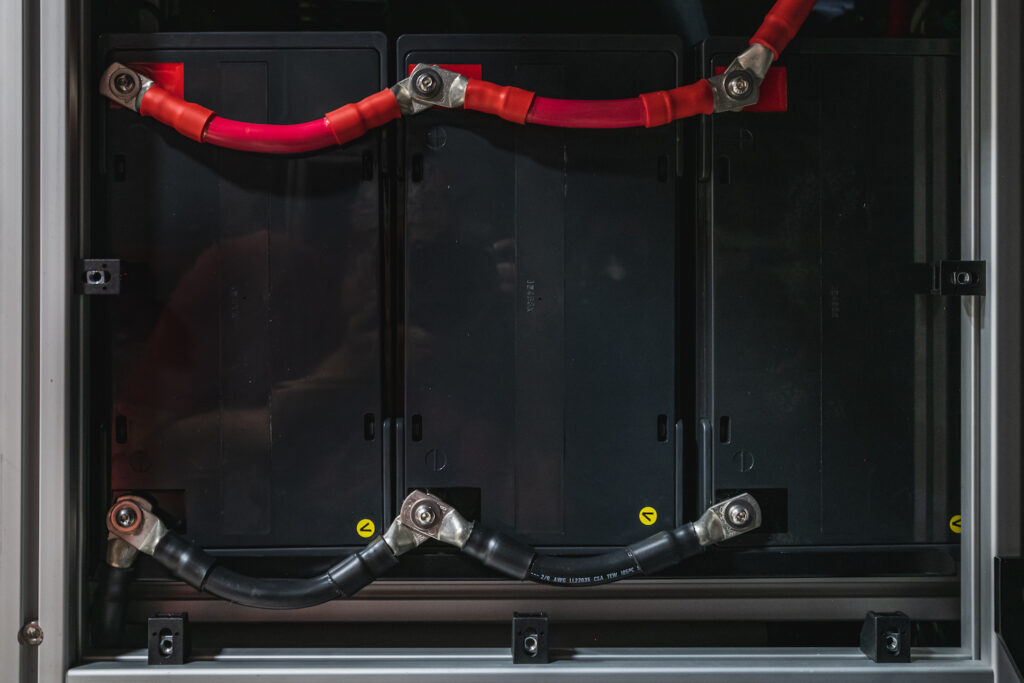
3. If keeping the van plugged into shore power or accessing solar power are not options, the Vandoit AGM batteries can be disconnected by removing the power cables from the battery terminals to stop the draw of power (This may require removing a panel from the power box using a 4mm Allen wrench).
Note: Make sure shore power is disconnected and the vehicle is turned off before removing rear AGM batteries.
4. Disconnect the power cables from the battery terminals starting with the positive first and then the negative. The longer positive red cable should be removed and covered with electrical tape or a rubber cap to prevent contacting metal when repositioning it to get the batteries out.
Be aware that it may take 2 people to remove the batteries safely due to their weight (approx. 60 lbs each).
5. Store the batteries in a warm, dry location such as a heated garage, and attach them to a battery tender (If batteries are only disconnected and not attached to a battery tender, they will lose up to 3% of charge per month).
6. When you are ready to use the van again, make sure it is not plugged into shore power. Detach the batteries from the battery tender and install back in the van. Then reconnect the power cables to the battery terminals the same way they were removed. Wait for the system to kick back on. Voltage readouts in the van should show around 12.8 volts.