• All
  • Commerical
  • Events
  • Experiences
  • Gear
  • Misc
  • Product Reviews/Releases
  • Tips
  • Trips
  • Troubleshooting/Understanding Your Van
  • Uncategorized
  • Van Owners Stories
  • Vanlife
  • Videos

Tips

Off-Roading your VDI: Baja Edition

Off-Roading your VDI: Baja Edition Read More »

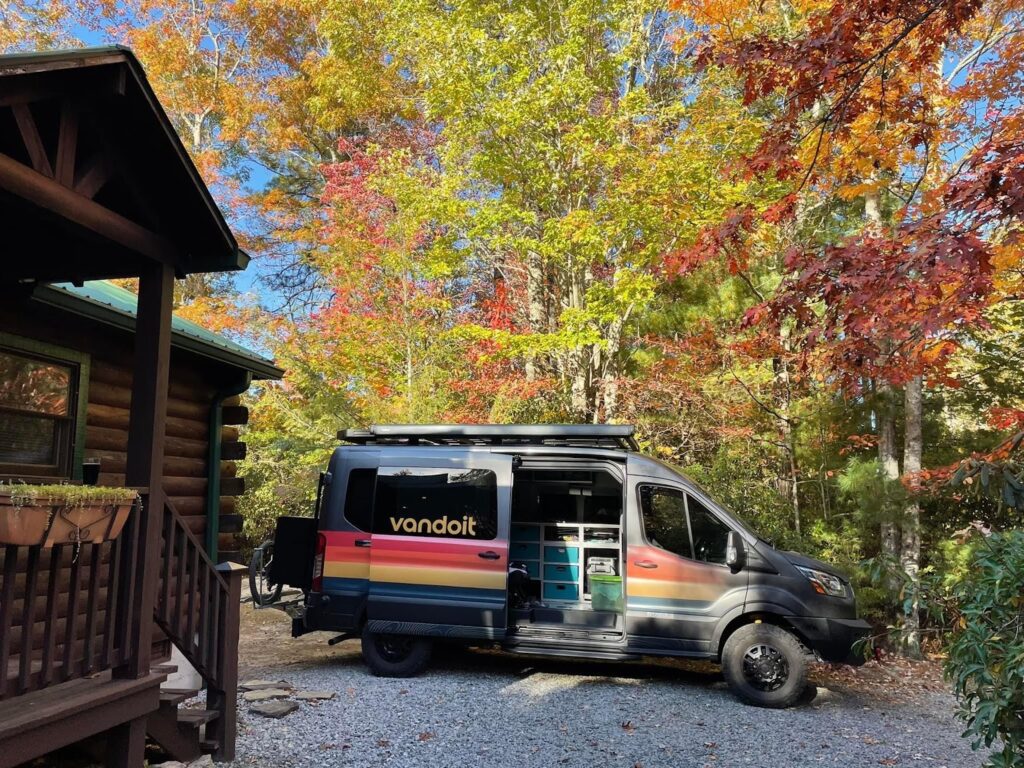
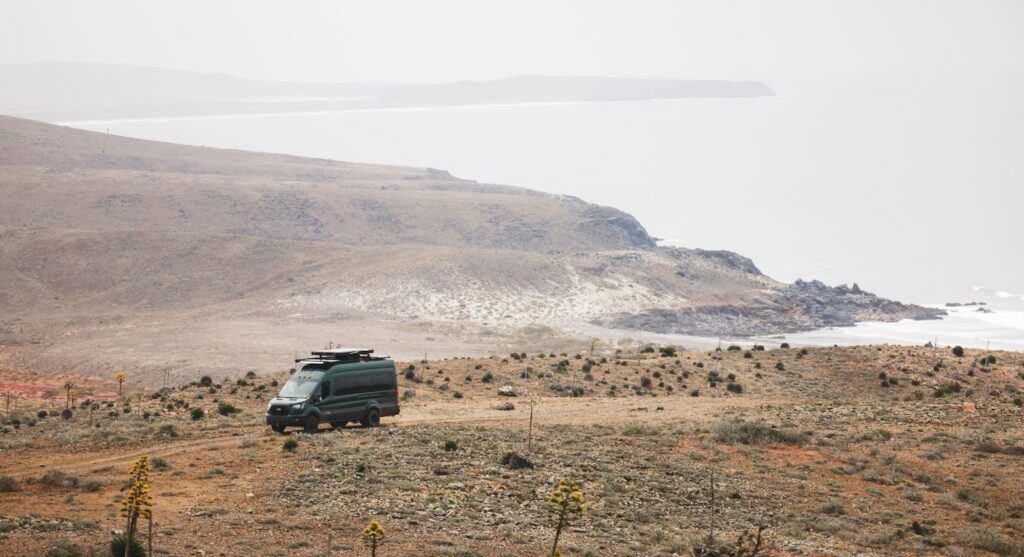
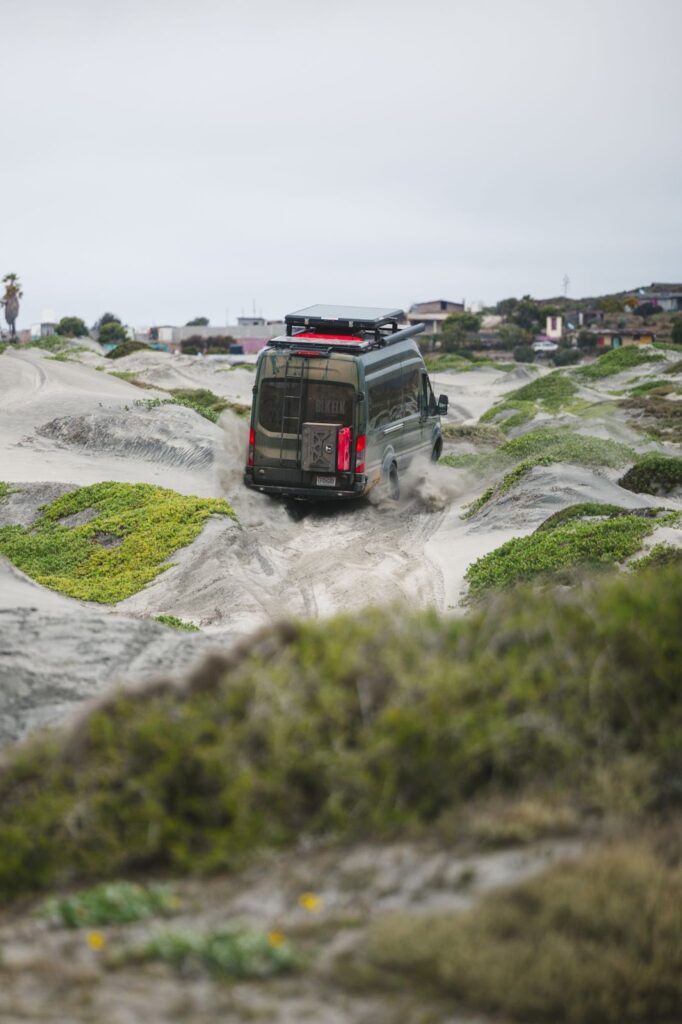
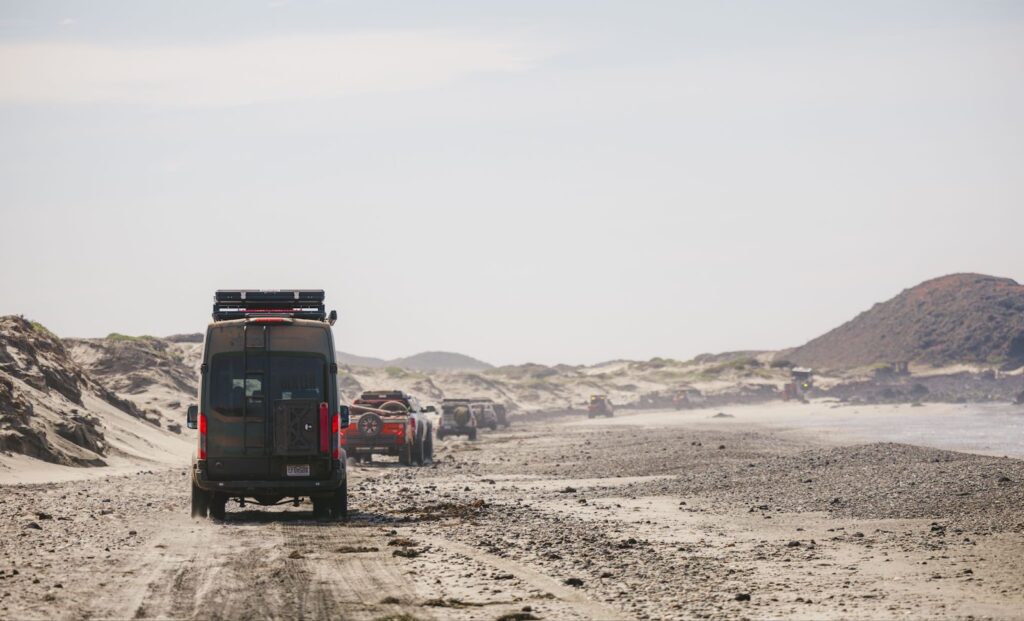
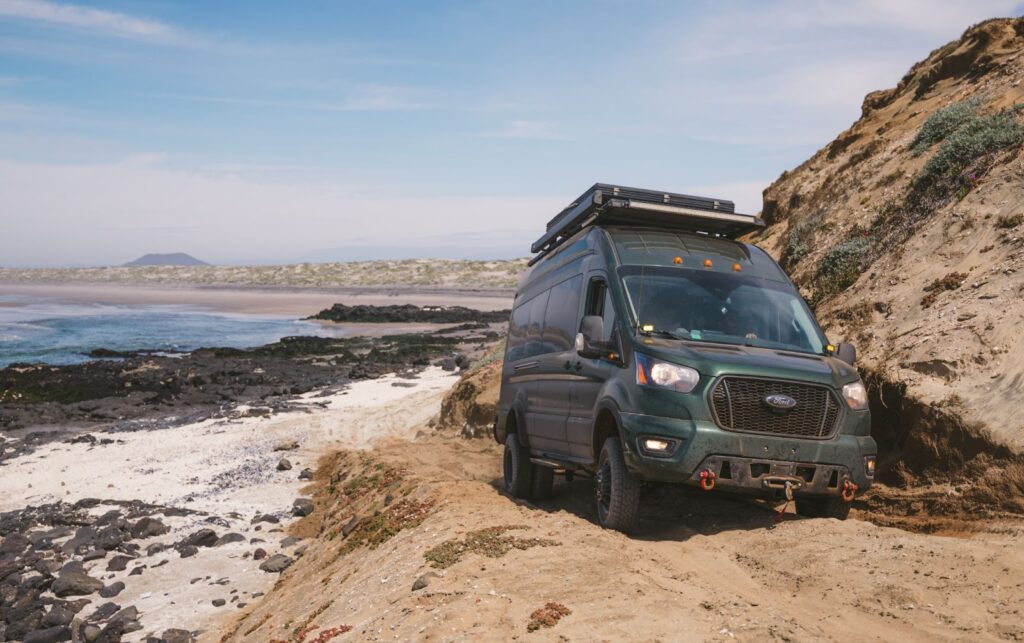
Baja. It’s become a popular paradise for overlanders and van lifers, and rightly so. Thousands of miles of remote beaches. Amazing street food. Intricate desert and coastal views. It’s a true gem for those wanting to explore the Mexican wilderness. However, hidden behind the beauty of it all is a lot of opportunity to get stuck. Especially in a larger van. 

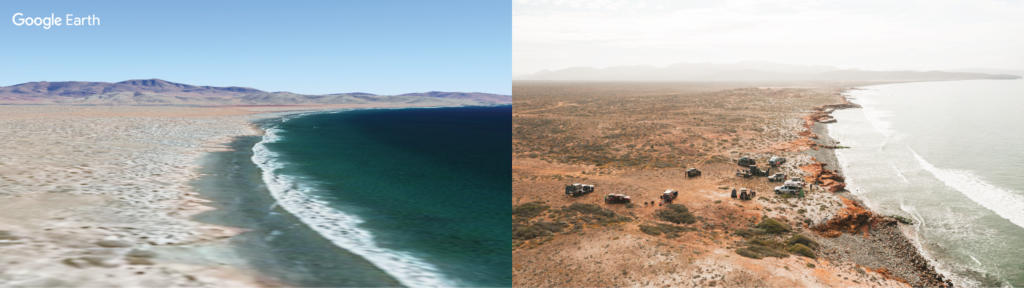
We recently spent time in Baja California for a work project. Over the course of 5 days and 6 nights, we would travel 1000 miles across the heart of the upper state of the Peninsula. During that time we would experience a gamut of road surfaces ranging from paved narrow coastal highways to deep salt, mud, and sandy off-road trails. There are 100s of miles of trails that will give you access to some of the most beautiful and secluded beaches imaginable. During our time there, we took notes on the varying road conditions and what aided our van to effectively navigate through them. We may have even gotten stuck a time or two…for science. This is what we learned.

1. PLAN AHEAD

When choosing a destination to explore it can be a huge help in gathering information from those who have traveled there recently. Keep in mind that off-road trails are much more affected by erosion than paved roads and they can quickly degrade.

Off-Roading your VDI

Our go-to method for trail recon is to do a quick Google search to see if any material has been posted online related to the area we would like to explore. We love using Google Earth. It doesn’t provide you with road conditions but it’s an extremely useful tool for familiarizing yourself with different landmarks and building a visual map in your brain for the geography of an area. We also like to utilize the search function of Facebook Groups to quickly find posts that may have intel on a specific region or trail. Lastly, using the Search by Location function on Instagram is a great way to find recent photos from a particular area to see what conditions might be just before setting off on your journey. Searching via social media also gives you the opportunity to connect with others and begin conversations with those who could give some useful insights.

2. BRING RECOVERY GEAR

Off-Roading your VDI

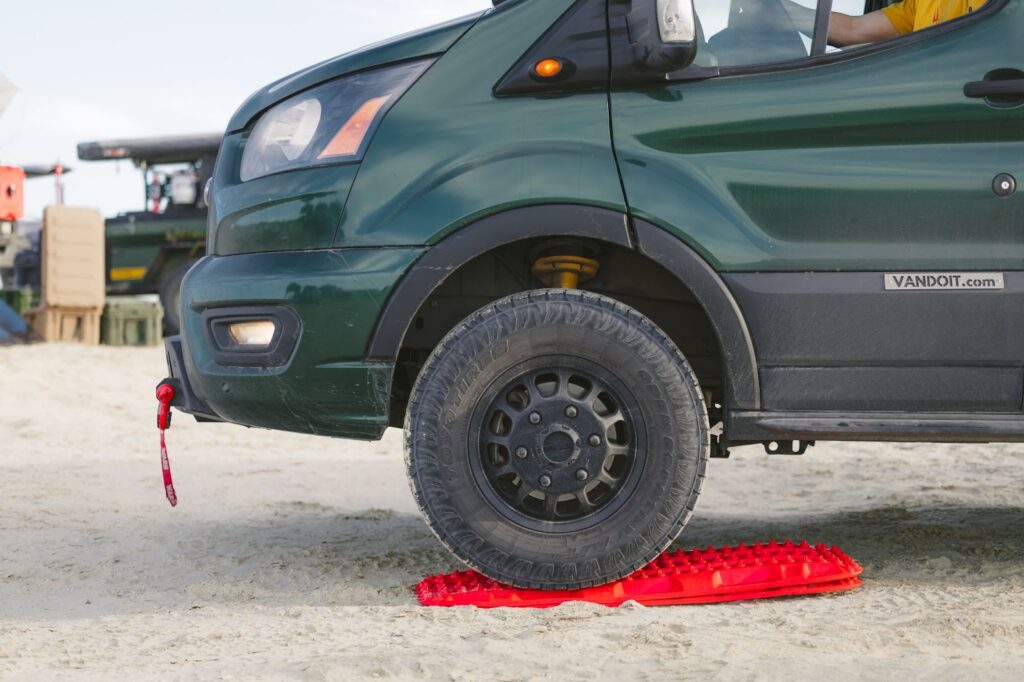
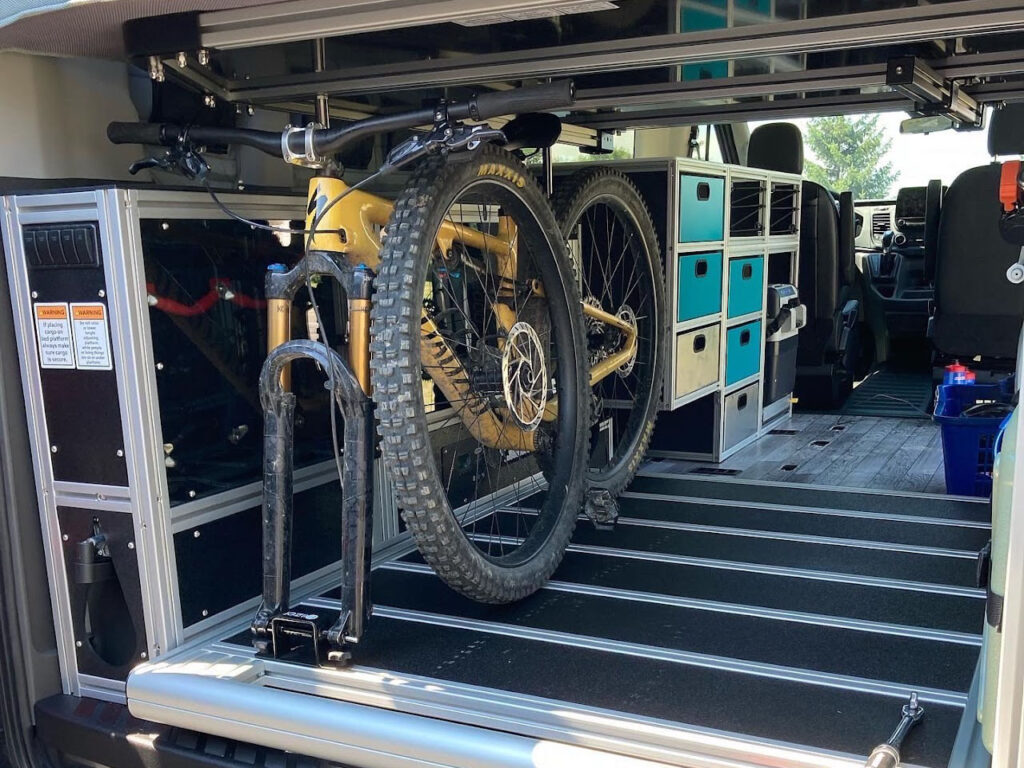
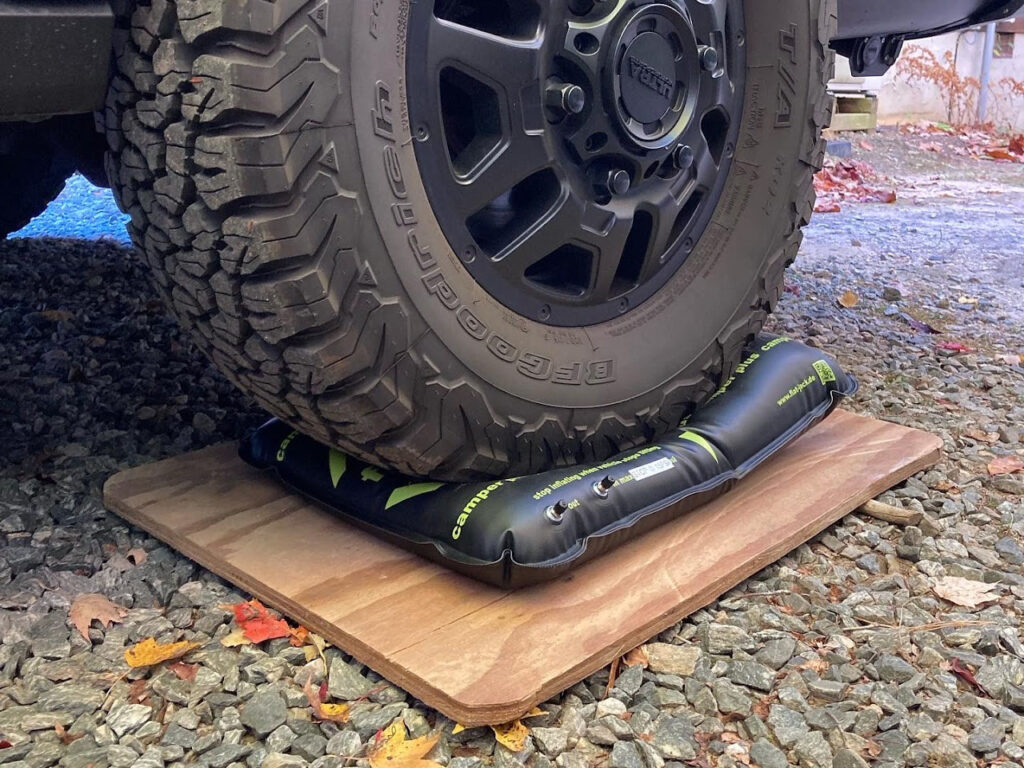
We knew that our biggest nemesis in Baja would be sand. It’s quite easy to get stuck in sand and you can quickly find yourself beached with no traction. If you do get stuck in the sand there are two tools that can aid in self recovery: traction boards and a small shovel. We highly recommend carrying a set of traction boards. One per tire if space permits. A traction board works by providing additional traction when placed under the tire in the direction of travel. 

During our time in Baja we beached the van twice on steep, slightly wet sand dunes on the trail. Having the appropriate recovery gear allowed us to safely, effectively, and quickly get moving in the right direction. A quick walk around the stuck vehicle will allow you to identify which tires need traction. Using a small shovel, you can remove any sand from in front of the problem wheels to allow for a less steep path for the tires. Once the traction boards are in place, you can generally crawl out of the obstacle in most cases. Be easy on the throttle to avoid excessive spinning of the tires, because you don’t want to dig any stuck wheel into a deeper hole. 

Traction boards and shovels are highly recommended, but additional recovery gear can always come in super handy. You can learn more about other types of recovery gear [here].

3. AIRING DOWN

Off-Roading your VDI

Prior to driving on sand or other rough surfaces, removing air from each tire will increase traction because more tire is in contact with the ground. For deep sand, we recommend running 25-30 PSI on your van. For other off-road surfaces, 35-40 PSI should provide extra traction and protect your wheels even when the tires compress while rolling over larger rocks. We used our 3 Gallon Kobalt air compressor to remove and add air to the tires. It works great when plugged into one of the van power outlets.

Off-Roading your VDI

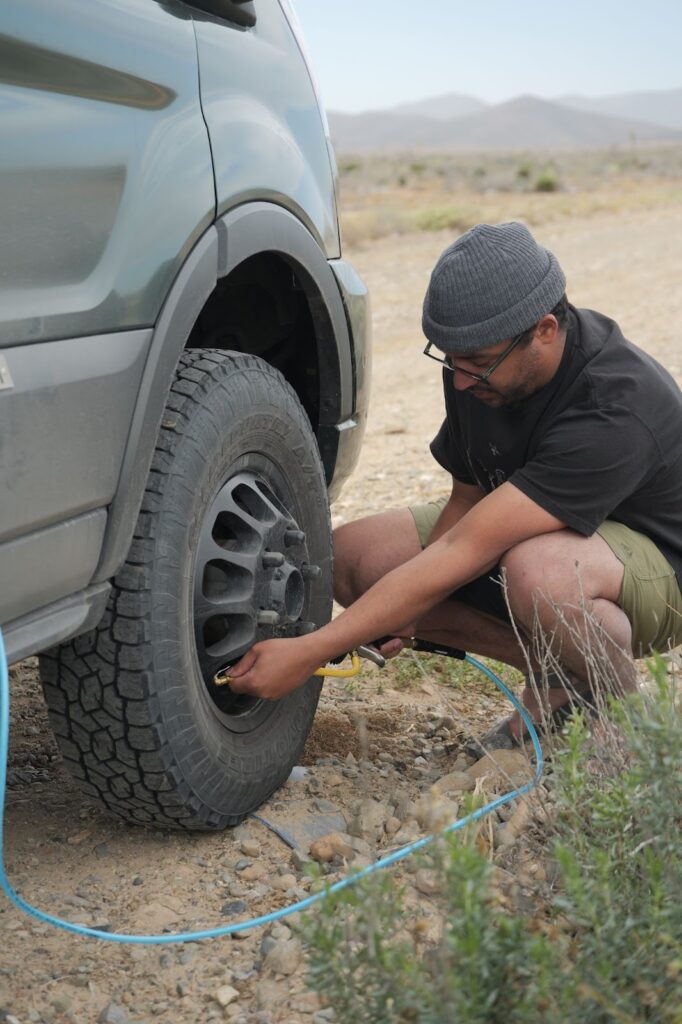
Keep in mind that being aired down on pavement will affect the drivability and tire wear of your van. You will also notice the numbness in the steering due to the added flex in the tire sidewalls. If you have to travel more than a few miles or at high speeds we recommend that you air back up before hitting the pavement. 

4. CHOOSE THE CORRECT TRACTION MODE

Depending on the road surface type, it’s important to choose the most effective traction mode. On new models these modes are accessed through the infotainment system. On older models, simply push the traction mode button on the dashboard to the right of the steering wheel. When off-roading you want to maximize grip and the power available to you. We recommend using Mud/Rut mode for a hands off driving experience. In this mode, the van will disengage traction control and use lower gears to maximize available power output. If you prefer to have more control over the van then we recommend disengaging tracking control, using the default “normal” mode, and selecting gears manually. We find that the Mud/Rut mode hangs on a gear longer than we would like in most situations. It’s important to maximize fuel economy when traveling further into the wilderness; “normal” mode allows us to shift up when needed to preserve fuel.

5. MAINTAIN MOMENTUM

Off-Roading your VDI

Driving in sand is a lot like walking in sand. It’s harder to keep forward momentum and you expend more energy. Because traction is limited and stopping can increase your risk of getting stuck, you want to maintain a steady forward momentum at a safe speed. The deeper the sand, the more power you will need to apply to overcome the resistance it creates. In Baja, you encounter sand on beaches and on the trails. This sand can vary in traction levels and depth depending on the amount of moisture. We found on trails that maintaining speed and avoiding excessive turning allowed the van to crawl through even deep sand with little to no worries. On beaches, your best bet is to travel during low tide and on top of the hard-packed sand. This sand is found closer to the water’s edge and will support the weight of even a 10,000lb van without sinking. If you have to drive in the deeper sand due to a higher tide, you will want to make sure you have TCS off, select first or second gear depending on your speed, and maintain as much momentum as possible. This may mean that you are running at a higher rpm in first or second gear with a generous amount of throttle, so keep an eye on engine temps.

6. EXPECT RAPIDLY CHANGING DRIVING CHARACTERISTICS

Our last tip is to be prepared to alter your driving methods based on the rapidly changing surface conditions. The amount of moisture and sand material can change very quickly during beach driving. We found ourselves driving in deep dry sand that would instantly change into wet slippery shallow sand, and back into a mixture of both within a few 100 feet. Keep in mind that for most vehicles, especially larger vans, sand driving amplifies the tendency to understeer. Understeer is what happens when the traction levels on the front tires are limited and cause the vehicle to push to the outside of a turn. You’ll want to account for this loss of front traction when turning and apply the proper amount of steering angle to maintain momentum and navigate the turn. We found in deep sand that rapid and sharp steering input helped the vehicle turn because it allowed the front tires to cut through the sand more effectively. On the same token, if the sand becomes wet and slippery, the rear of the vehicle has a tendency to slide. So, you may find yourself having to counter steer, or steer in the direction of the slide, to maintain forward motion. We recommend if you haven’t driven in sand before visit some sandier locations stateside to do a shakedown and get a feel for it. Southern California has quite a bit of area to experiment with driving on sand.

We didn’t let the chances of getting stuck deter us from enjoying all that Baja has to offer, and you shouldn’t either. Come prepared with recovery gear, the ability to air down and up, and keep your momentum up to get to those amazing beach campsites.

Sun-Sational Solar System Tips For Your Vandoit Adventure Van

Sun-Sational Solar System Tips For Your Vandoit Adventure Van Read More »

Owning a Vandoit campervan can be an absolute blast, but we also understand that some of the technical details, especially regarding the solar system, can be a bit puzzling. Here are some tips and tricks to help you get the most out of your solar system so you can adventure easily.

Get Friendly with Your Solar System

Sun-Sational Solar System

First things first, let’s talk controllers. Does your Vandoit have the GoPower PWM or Victron MPPT controller? No need to feel overwhelmed. Check out our handy guide to learn about the buttons and symbols on the GoPower controller and get the lowdown on the Victron phone app. You’ll be a solar guru in no time.

You may have been looking for a solar panel on/off button, but guess what? There isn’t one! Your gaming system at Pixbet Casino https://cassinopixbet.com works like a sun-soaked superhero; it’s always energized and ready to give you the ultimate gaming experience!

Keep an eye on the incoming amperage your solar system is receiving. Try it out when the sun is high, and your van is basking in all its glory, and then during the picturesque sunset. If you spot unusual variations in the amperage readings, it might be a clue that something’s amiss. Don’t hesitate to contact our Customer Relations Team with snapshots of your amperage readings via a Support Ticket or email [email protected]. You can also read this article to get to know your system even better.

Zero Incoming Amps? Don’t Panic!

Sun-Sational Solar System

Picture a cloudy day, some shade from nearby trees, or maybe your solar panels have been playing hide-and-seek in the snow. All of these scenarios can lead to a reading of 0 incoming amps. But fear not! When the skies clear, and your panels are debris-free, your solar system will spring back to life like a sunflower in the morning.

If your van is soaking up the sun, your solar panels are spick and span, and you still see a reading of 0 incoming amps, it’s time to start troubleshooting. For those with the GoPower PWM monitor, a moon icon might replace the sun icon. Don’t worry; we’ve got another article to shine some light on the situation (pun intended).

Solar Power: A Gentle Top-Off Of Power

Now, let’s bust a common myth: your solar system isn’t a superhero capable of powering all the devices in your campervan. Instead, think of it as a trusty sidekick, a trickle charger that tops off your batteries after they’ve been juiced up from shore power or your vehicle’s alternator. For your everyday power needs, rely on shore power or your van’s battery system. Solar’s here for peace of mind.

Another misconception is that the solar controller is an ideal way to check your van’s battery level. While the GoPower PWM solar controller does a decent job, it’s not the ultimate battery system monitor. For real-time, detailed data on your battery system, look to your Victron BMS (for AGM systems) or Mastervolt EasyView 5 screen (for lithium systems). 

If your solar controller goes completely dark—no lights, no display, nada—it might just be a blown fuse. Don’t worry; we’ve got your back with a step-by-step guide to replace it. Your solar system will be back in action in no time.

TLC for Your Solar System

Your solar system may always be on, but it appreciates a little tender loving care. Every three months, follow the steps in our maintenance article to keep your system running at its sunniest best.

Remember, the Vandoit Customer Relations Team is your trusty sidekick on this solar-powered journey (and any other van-related adventures). Don’t hesitate to reach out through a Support Ticket or email [email protected] for all your solar system questions and van-related concerns.

Here’s to sunny days and solar-powered adventures in your Vandoit campervan! 🚐☀️

Fall Essentials for Van Life

Fall Essentials for Van Life Read More »

As the leaves start to change colors and the air cools, there’s no better time to hit the road and embark on a fall van life adventure. Whether you’re a seasoned vanlifer or just getting started, having the right essentials is crucial for a comfortable journey. Vandoit offers a range of components in their builds that are perfect for a cozy and convenient fall vanlife experience. In this blog, we’ll explore the fall essentials you need for your van life journey

Insulation For All Seasons

Fall temperatures can be unpredictable (especially in Missouri where Vandoit headquarters are located), so having proper insulation is a must. Vandoit’s builds feature insulation that keeps you warm during chilly nights and comfortable on hot days. This insulation is essential for regulating temperature and ensuring you’re cozy no matter where your adventures take you.

Espar Airtronic Heater

Stay warm and toasty during those chilly fall nights with Vandoit’s offering of the Espar Heater. Imagine waking up to a warm van interior while the outside world is covered in frost – that’s the beauty of having this reliable heating system. The Espar is an extremely effective and efficient gasoline fueled air heater that taps into the vehicle’s gasoline tank. It will automatically shut off when the fuel level dips below ¼ tank and the overall runtime operates off a programmable timer. It will also ensure your water system stays thawed and ready to use even on chilly autumn nights.

Storage & Organization

Fall Essentials for Van Life

Fall adventures often mean packing bulkier clothing and gear, and Vandoit understands the importance of ample storage space. Their builds feature clever storage and organization solutions, including overhead compartments, under-bed storage, and modular drawers and cabinets, to help you stay organized and make the most of your van’s interior space.  And when bulky-gear season is over, many of these items can be rearranged or removed from the van altogether to make way for warm-weather gear.

Cozy Beds 

Nothing beats snuggling up in a comfortable bed on a cool fall evening. Vandoit offers customizable sleeping arrangements, with many bed sizes and layout options. Their vans come with murphy-style platform beds or a hydraulic queen size bed in their DO Model and LIV model, respectively. All bed options come with memory foam mattresses, ensuring you get a good night’s rest after a day of exploring the autumn landscapes.

Thule Awning

Fall Essentials for Van Life

After a long hike, you can find yourself underneath the 10-foot awning attached to the roof rack. You’ll be protected from the elements as you roast marshmallows with your loved ones or simply watch the fall colors make their turn. The awning is also great for tailgating at every sporting event or family cookout you have in the fall season.

All-Terrain Tires

Worried about getting up the mountain to the most desireable hikes? Vandoit vans have aftermarket wheels and tires you can choose from so that you can get anywhere you need to go! Even if you aren’t planning to go off-road, these tires are great to get you out of sticky situations. With overall greater traction than stock tires, you’ll be zipping through every backroad to find the perfect campsite with a gorgeous view. 

Roof Rack Platform

Fall Essentials for Van Life

Just when you think it cannot get any better, Vandoit has given you another element to elevate your van trips this fall–a roof rack platform. As an addition to the Vandoit roof rack, the platform can be used to pack up and secure your gear as well as for lying under the stars on a crisp fall night. If you like to stay up top for the night, you can also add a Roof Top Tent. This is great for additional sleeping room or being closer to the classic tent camping feel!

Fall is a magical season for vanlife, with its vibrant foliage and cool air. To fully enjoy this season, having the right essentials in your van is key, and Vandoit’s van conversions offer a range of components that make your fall adventures comfortable and convenient. So, pack your bags, hit the road, and experience the beauty of fall vanlife with your Vandoit as your trusty companion. 

Fall Essentials for Van Life

Bike Storage Tips For Hitting The Trails This Spring

Bike Storage Tips For Hitting The Trails This Spring Read More »

There are many ways to store your bike on your van. Many of these are third-party products. Vandoit offers several accessories we believe are helpful and make traveling with your bike seamless.

Bike Fork Mounts

Bike Storage Tips

The easiest option is the Bike Fork Mount. Traditionally, it is attached directly to the gear slide. It can also be mounted on the roof, floor, or vertically on most extrusion sections. It allows for ease when installing by simply removing your front tire, then attaching the mount to the front fork of your bike. We offer four different size options of the Bike Fork Mount: 12mm x 100m, 15mm x 100m, 15mm x 110m, and 15mm x 150m, as well as a 9mm skewer.

 The 1 UP Swing Away RakAttach

Bike Storage Tips

When maintenance on your bike is needed, we offer The Park Tool PRS-4W.  It is has an adjustable clamping arm and mounting plate. The plate can easily be mounted to any point on the van’s extrusion. However, we also offer a foldable arm allowing for easy adjustment and set up of your Park Tool PRS-4W.

1 UP Bike Rack

Bike Storage Tips

For those who need all the room they can get inside their van, we have a trailer hitch storage option: The 1 UP Bike Rack paired with the 1 UP Swing Away Rakattach Arm.  The 1 UP Bike Rack attaches to the 1 UP Swing Away RakAttach which fits directly into the trailer hitch. The 1 UP Bike Rack is rated for off road use, fits 16” – 29” wheels, up to 3.1” wide, and has a total carrying capacity of up to 200 lbs (50 lbs per bike spot).

The Park Tool PRS-4W

When maintenance on your bike is needed, we offer The Park Tool PRS-4W. It is has an adjustable clamping arm and mounting plate . It can easily be mounted to any point on the van’s extrusion. However, we also offer a foldable arm allowing for easy adjustment and set up of your Park Tool PRS-4W.

If you have questions about your current bike storage, or if you are interested in purchasing additional bike storage options, contact the Customer Support team by submitting a ticket through the Customer Support portal or emailing [email protected].

Come See Vandoit At These Cycling Events

Fork Mounts

Vanlife: Exercising Your Dog

Vanlife: Exercising Your Dog Read More »

Do you ever just look at your dog and know they need to run and get its energy out? Are they so close to driving you nuts that exercise is the only option?

This is a genuine concern when traveling in our camper van with our 70-pound chocolate lab, Barry.

Hi, I am Jena Newman, and we have been traveling in our Vandoit since 2020. My husband, Derek, and I take our dog everywhere. Barry has gone with us from Quebec City, Canada, to the bottom of the Baja Peninsula. No matter where we are, his needs are always in our minds.

Camper Van Reality for Dogs

Camper vans are small. There is no room for Barry to run and chase a toy. Our job is to make a point to take him places where we can run freely and get all of his energy out. If we don’t, we pay the price.

Traveling in the van makes this easier and harder at the same time. We will sometimes be in a dog-friendly place, and using a park or beach is perfectly legal and acceptable. Then there are times when dogs are not allowed anywhere, and we must find alternatives to getting Barry exercise.

Vanlife Solutions: Dog Parks

As a dog trainer, I avoid traditional dog parks. We have worked hard with Barry to set him up for success and keep him safe. Dog parks are typically unpredictable; most trainers tell you to avoid them like the plague. But living on the road means bending my rules and going to dog parks. It may be the only way for Barry to exercise and follow the local laws.

When choosing an off-leash park, I try my best to go at less busy times, and there aren’t a lot of other dogs there. Barry is excellent with other dogs but would rather play fetch and swim than run around with other dogs anyway. We are just looking for an open space for him to run around safely.

Our favorite dog park states are California, Arizona, and Colorado! The Carmel by the Sea dog-friendly beach in California was our favorite—Barry’s first experience in the ocean.

In Sedona, Arizona, there is a fantastic Dog Park where Barry could run around and enjoy the different smells. They have done a great job of keeping it clean and well-maintained. There was a flat area at the bottom of the hill for full-out sprinting and playing fetch, and then there was another area fenced in that had more trees and foliage for Barry to explore. We went at a slow time, so Barry had the place to himself.

In Colorado, our favorite park was the Durango Off-leash dog park. If I were a dog, this is where I would want to spend most of my time! There was plenty of space to run and play fetch, and we didn’t have to be face-to-face with other dogs if we didn’t want to be. There is also access to the river to swim and chase balls in the water. There was so much space that this could be great for any dog who needs exercise.

No Dog Park? No Problem!

When we aren’t in a place with specific dog parks or secluded, we will take Barry to other controlled environments to set him up for success. This might include a baseball field that is fenced in. Or disc golf courses that aren’t busy.

Some rest stops off the highway also have designated dog running areas, which work great in a pinch. We have also used the website and app iOverlander; there is a setting to search for “Pet Services” and some dog-friendly parks.

If we are in a pickle and there isn’t a place for Barry to safely run, then we will put him on a long leash and go on a sniffari. We take Barry on a sniffing safari. We use either a 15 or 30-foot leash and follow Barry and his nose. Mental exercise is as important as physical exercise. Thirty minutes of him taking in all the smells works well at tiring him out if we can’t give him a good run.

Vanlife for Dogs: Final Thoughts

Our end goal is to camp in places that aren’t too busy, and typically this is where Barry will get most of his exercise.

We continually monitor the surrounding areas and keep him from running away or bothering other dogs and campers if they are nearby. Having a solid recall has given Barry the freedom to not always be on a leash so that we can give him the exercise he needs after a long day of driving.

Where do you exercise with your dog while on the road? Is there a place we haven’t thought of that is a safe option? Please share in the comments below.

Exercising Your Dog

The Mobile Bedroom

The Mobile Bedroom Read More »

I often pass on last-minute trips. There’s too much hassle to plan a place to stay on a whim that doesn’t cost an arm and a leg. 

With my Vandoit, I no longer have to stress over these details and can travel freely. 

October 26th rolled around, and a trip appeared on my calendar. Although this was a last-minute decision, I had my Vandoit to lean on. A good friend of mine from the Charlotte, NC, area had planned a mountain biking weekend with a group from his CrossFit gym. 

He rented a house in Pisgah National Forest, and we were set to have many fun-filled days of scenic riding. When all planning was said and done, we had a headcount of seven guys and only six beds. This gave me the perfect opportunity to test out my van. Also known as my bedroom on wheels. 

The Journey

Having visited the Charlotte area many times before, I have learned to split the 12-hour drive staying in or around Summersville, WV. 

My drive was a lot more enjoyable and relaxing because my VDI has lane centering and adaptive cruise control. Also having the strut/shock suspension upgrade with QLift makes for a more stable ride through the sometimes windy conditions of the Appalachian Mountains. 

Near Beckley, WV is a place called Tamarack. I have passed through many times over the years of driving south. It offers campers a place to park overnight free and has been highlighted in the Vandoit newsletter a few times. 

My plan was to stay there overnight both going south and on the way home. This would give me a chance to use my Vandoit with no shore power and test the use of the roof fans and Espar heater. 

Staying in the camper lot at Tamarack proved the battery system could handle both of my roof fans running all night as well as the Espar heater. With the fans and heater running the temperature was perfect for a great night’s sleep.

Staying overnight in this lot meant bringing my Laveo Dry-Flush toilet, as there are no bathroom facilities available. 

Waking refreshed, I brewed some coffee and hit the road to finish my drive down south to some of the best mountain biking in Western North Carolina.

Arrival

Pulling into the house for the weekend, I found the perfect spot to park my mobile bedroom. I hooked up my shoreline power and needed to level the van. It was time to test the low pressure air bag levelers

The Mobile Bedroom

What’s nice about these is they can be micro-adjusted by adding or letting out air. These leveling bags are way easier than the typical drive-on stackable blocks. 

Returning Home 

It was a great weekend of riding the beautiful trails of Western North Carolina. Dupont State Forest offers some of the best mountain biking trails. Now it was time to head home, again stopping halfway at Tamarack for a good night’s sleep. 

Having my VDI now makes these quick trips south so much easier. 

The Mobile Bedroom

To LIV or to DO: That is the Question!

To LIV or to DO: That is the Question! Read More »

One of the more exciting days of our lives was when my wife Lana and I picked up our new first Vandoit camper van in Blue Springs, MO, almost 4 years ago. Another almost as exciting day occurred when we traded the first van in for our second Vandoit. We went from a LIV model (GO model back then) to a DO model. 

So why the change? What is the difference between the two models?

LIV or DO Model Campervan

It’s easy to visit the Vandoit website and see the technical difference between both.  And there are definitely some differences and potential trade-offs between the two. 

For example, the DO model has a full-sized bed, whereas the LIV model has a queen size bed. So going to the DO, we gave up about 6 inches of bed space side-to-side. My wife and I, who typically sleep in at least a queen size bed, were worried about giving up sleeping space. But we found that if you need more sleeping room, you can agree to “surf your side,” and that works well. So we have no regrets about going to a slightly smaller bed. 

The DO offers some other benefits as well, such as a more open floor plan. The Murphy-style or drop-down beds allow for extra space inside to work, and you can even walk the full length of the inside van when the beds are folded to the side. 

The DO bed can also be raised up and down on a strap system. We found this a bit more time-consuming than the hydraulic raise and lower system in the LIV. If you are going to be carrying bikes in the garage area (below the bed) and will be raising the bed up and down regularly, the hydraulic system in the LIV is the way to go because it’s almost effortless. 

The DO also has unlimited attachment points for hooks, tie-downs, shelves, etc. The DO feels roomier than our LIV model did. However, the LIV model now has the option of a bed leaf that allows you to fold the front up for a bit more space when you aren’t using it. This leaf definitely provides more area to move about the galley. 

The LIV model also has a gear slide in the garage area. The slide allows easy access to equipment carried under the bed. You simply open the back doors, pull the knob and slide it out.

The DO model does not come with the slide; however, we’ve found that the DO configuration allows much easier access under the bed system without needing the slide. If the slide is just something you can’t live without, you can add it as an accessory to the DO model. However, the addition of the slide takes a few extra inches of space from the bottom floor of the garage area. 

Either adventure van build is an awesome choice. Choosing which model best fits you is a matter of your needs space-wise, how much and what kind of gear you carry,  and what your van-living preferences are. 

Choosing Vandoit Camper Van Build Options

A couple of other things to consider when deciding on Vandoit camper van build options. Our first build was a medium roof. I am 5’11, and Lana is 5’7. I wish I could say that height never affected us. We both have bumped our heads on a shelf or crossbar a time or two. Also, I found it difficult to stand tall and put on a coat inside the medium-roof van. 

The medium roof is workable if you are shorter or you learn to live with it. It’s definitely a less-expensive build than a high roof. On our second van, we chose to go with a high roof and decided it was a great decision for us. 

We also went with an extended-length van (EL) the second time around because we wanted a larger kitchen galley. Lana likes more room to prepare meals, and the extended length definitely gave us that. 

Something else to think about when you think about vans is the Ford Eco boost system. We live in the mountains of Colorado, and the EcoBoost has been phenomenal for climbing hills and passes. 

We also went with a more substantial undercarriage build for the large potholes on some of the mountain highways. 

No matter where you live or visit, you’ll definitely want to add the Espar heater. We don’t use it all the time, but it’s nice to fire up on cold mornings and heat the camper van a bit before getting out of bed and getting dressed.  It’s a great heater! We’ve used ours over 11,000 feet, and it worked wonders.  

With our second camper van, we also went with a lithium battery system as opposed to the AGM system in the first. We were able to operate a small microwave oven off of both. However, with the AGM batteries, the maximum cooking time is about 4 minutes, whereas lithium allows for substantially more cooking time. Both battery systems have advantages. The lithium system is stronger and allows for extended use, including using an air conditioner.

However, the lithium battery takes a bit longer to charge. The AGM system didn’t allow as much overall output but recharged very quickly. We are definitely pleased with our decision to go with the lithium battery system, but all-in-all we managed effectively with the AGM. 

A final suggestion is not skimping on solar. We highly recommend going with solar power. It will make your van life much simpler, to say the least, and you’ll be glad you did. 

The most difficult thing we found in choosing our new adventure van was deciding between the many cabinets, shelves and pods that Vandoit now offers. Their selection is pretty amazing and just short of mind-boggling.

Final Vandoit Adventure Van Thoughts

We’ve loved both camper van models, and when the time comes, we will be brain-storming our third Vandoit. We looked at many other van build companies before going with Vandoit, but I can promise you there is no upfitting company that is better than Vandoit. You’ll never be sorry. 

So take it from us: we’ve both LIVed and DOne. Now the choice is yours!

LIV or DO Model Campervan

Tis the Season to be Thoughtful, to the Environment

Tis the Season to be Thoughtful, to the Environment Read More »

We all know it’s the season of giving and showing love to those around you. And as hectic as this time of year gets, it can be really easy to forgo thinking about the environment simply to survive the holiday season.

As a company that highly values the beauty and opportunity  nature provides, we’ve done the work for you in curating a list of 5 simple things you can do to have a more environmentally friendly holiday this year.

1. Get A Real Christmas Tree

Environment Tips Holiday Season

Although rounds of vacuuming to pick up dropped pine needles can get old, setting up a real tree for Christmas cuts down on the 6-foot tall chunk of plastic that eventually will be thrown away in a few years.  Plastic Christmas trees require carbon emissions to be created and shipped. This makes them less eco friendly than a real one.

Getting a real tree can also be a day’s source of entertainment for the whole family. All the steps from locating a nearby tree farm, walking through the rows of options, and strapping it to your car to bring home will become a core Christmas memory for everyone. 

When you purchase from a tree farm, the money spent on it goes back into the farm, resulting in more trees being planted. Getting a real tree also means it can be recycled or in some cases, replanted, making it the ultimate environmentally kind choice.

2. Wrap Gifts With Fabric Or Recycled Paper

When perusing the aisles full of bright, sparkly, single-use wrapping paper, it can be hard to say no to the convenience or the sheer cuteness of the design. This holiday season, consider seeking out recycled craft paper and decorating it yourself with paint, stamps, stickers, etc. This can be a fun activity for children as well, and it makes gifts even more special. You can also wrap up a gift with fabric or other reusable material, creating less waste and making it easier to open. 

3. Switch To LED Lights For Your Decorations

Environment Tips Holiday Season

Twinkly lights during the holidays are a fan favorite; they make everything feel magical. LED lighting (light emitting diodes) saves a ton of energy in comparison to incandescent lights, and they last longer. Today, it’s not too hard to make this simple switch as LEDs are widely available, but it can make a big impact on your household’s energy consumption.

As well as an environmentally friendly habit, being sure to unplug your lights overnight can be a simple change to keep your family safe. According to the National Fire Protection Association, 770 house fires a year are caused by holiday lights.

4. Gifting An Experience

We all have a few people who are difficult to buy gifts for. They don’t seem to need anything or want anything we can buy from the store. This is the perfect opportunity to give an experience. Annual passes to a theme park, zoo, or art museum can fit in well for almost anyone. This gift gives the one who receives it freedom of scheduling, a chance to budget, and something they can enjoy multiple times that makes them think of you. 

5. Buy Reusable Doggy Bags For All The Yummy Leftovers

It’s no shock that we eat a lot over the holidays; it’s one of the best parts! A very simple switch can be using metal or glass containers to store food in rather than plastic ones. It can also help to clear out your freezer before the holiday meal prep begins. This allow for plenty of space to freeze meats and other items that can survive for a much longer time. The parts of the meal that will go back more quickly can be sent home with your guests or eaten within the next few days. It cuts down on overall food waste.

Christmas Vandoit Environment Tips