
If you’ve been shopping for a camper van, chances are good that you have read up on the advantages a camper van provides when it comes to maintenance, especially in comparison to the care required for an RV. Vandoit owners often comment on how the water system is much easier to maintain and winterize than on other RVs.
To give you an idea of what to expect when you choose a Vandoit or to help maintain yours, here is Vandoit’s General Maintenance Checklist. We divided the checklist into items that require maintenance at different intervals: before each trip, monthly, every three months, every six months, and as needed.
Before Each Trip:
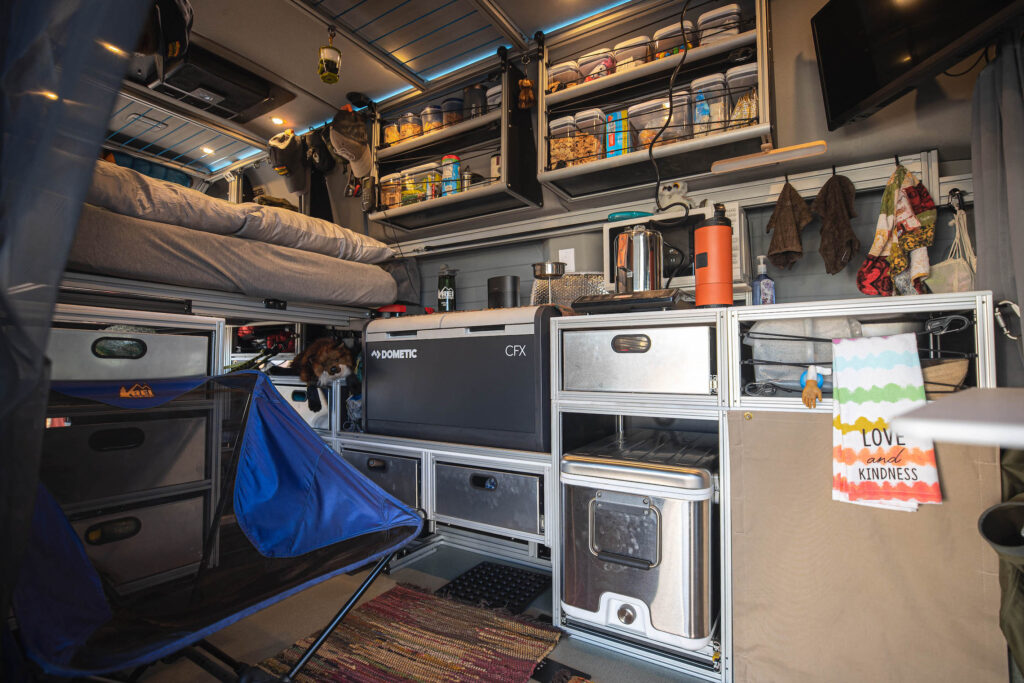
Water System:
Before each trip, turn on your water pump and test water flow and pressure by spraying the shower hose or turning on the kitchen pod faucet. If the water sputters or does not work, Vandoit has published troubleshooting steps in the online Vandoit Knowledge Base, like this article for a DO model.
For winterizing the water system, follow the steps in this article.
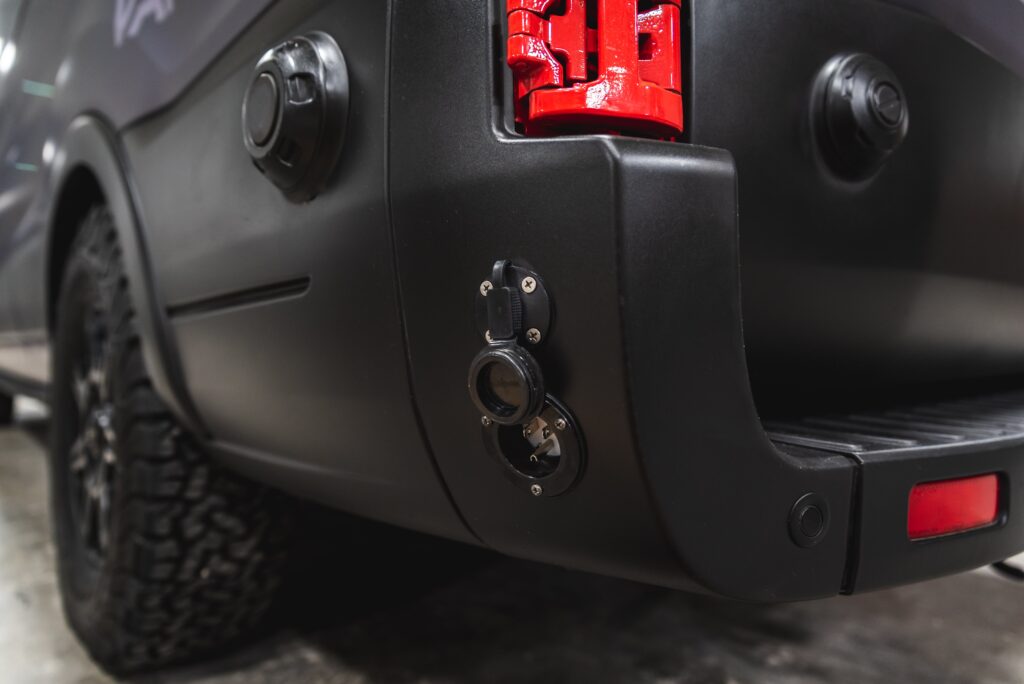
Shore Power Plug and Cord:
Before each trip, open the cap on the shore power plug to inspect the prongs. Make sure they are not bent or broken and are free from debris. Test your shore power cord by plugging it into a different device and checking that it receives power.
While the shore power cord is plugged into the van, check your inverter screen to ensure the van gets a charge from shore power.
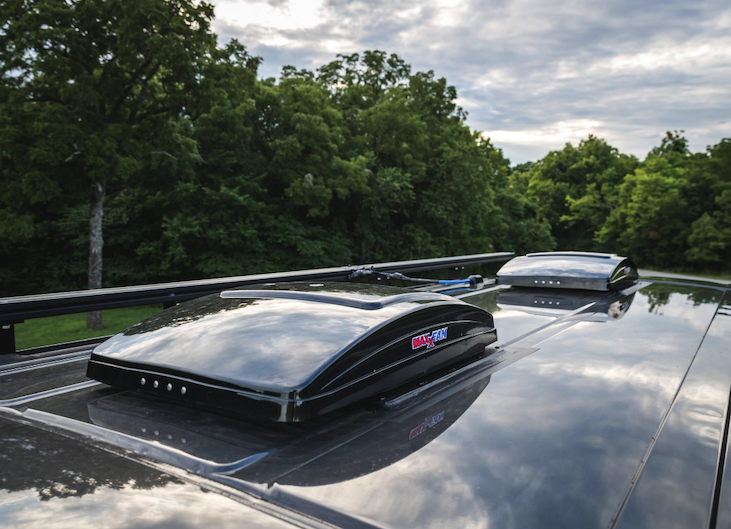
MaxxAir Fan:
Press the power button on the keypad and verify the fan opens and spins freely with no binding or squeaking. Check the charge level on the handheld remote by viewing the battery indicator at the top of the screen.
Periodically check the condition of the air vent seal around the air vent on the van’s roof for leaks or damage.
Dometic Air Conditioner:
Turn on the air conditioner and verify that the system kicks over from the fan to the cooling setting and feels cold. Let it run for 20 minutes, and then check to ensure no leaks exist around the inside flange.
Seeing condensation from the exterior on the ground around it is normal. An external drain hose exits the roof, and condensation drains down the steepest part. If the van has a DC-powered air conditioner, check to ensure the remote’s batteries are still working.
Espar Heater:
First, verify you have more than a 1/4 tank of fuel in your van. Nothing should be within 1 foot of the air vent on the Espar box, and the external exhaust pipe on the driver’s side should not be pinched or blocked.
Set the thermostat to higher than the ambient temperature, and press the power button. Wait a few minutes for the Espar to start and get warm. Eventually, the Espar should change to a lower fan speed or cycle off when it achieves the requested temperature.
Inverter/Outlets (AC Power):
Turn on your inverter and test each outlet in your van with a device such as a phone charger. If any outlets are not powered, check the AC breakers to ensure there isn’t one that’s tripped.
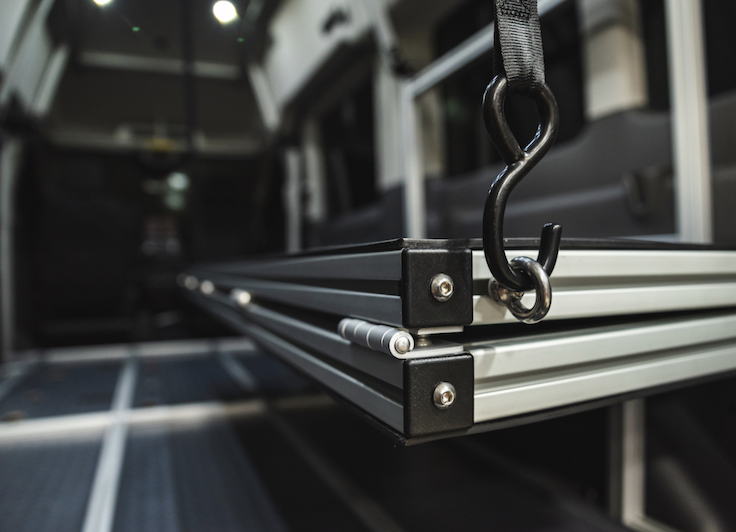
Gear Slide:
Test the gear slide by pulling the red release knob and then pulling it out. Verify that the gear slide moves smoothly and clicks into each catch point along the rail system. With the red knob still pulled, verify that the endpoint stoppers prevent the gear slide from going too far in or out of the van.
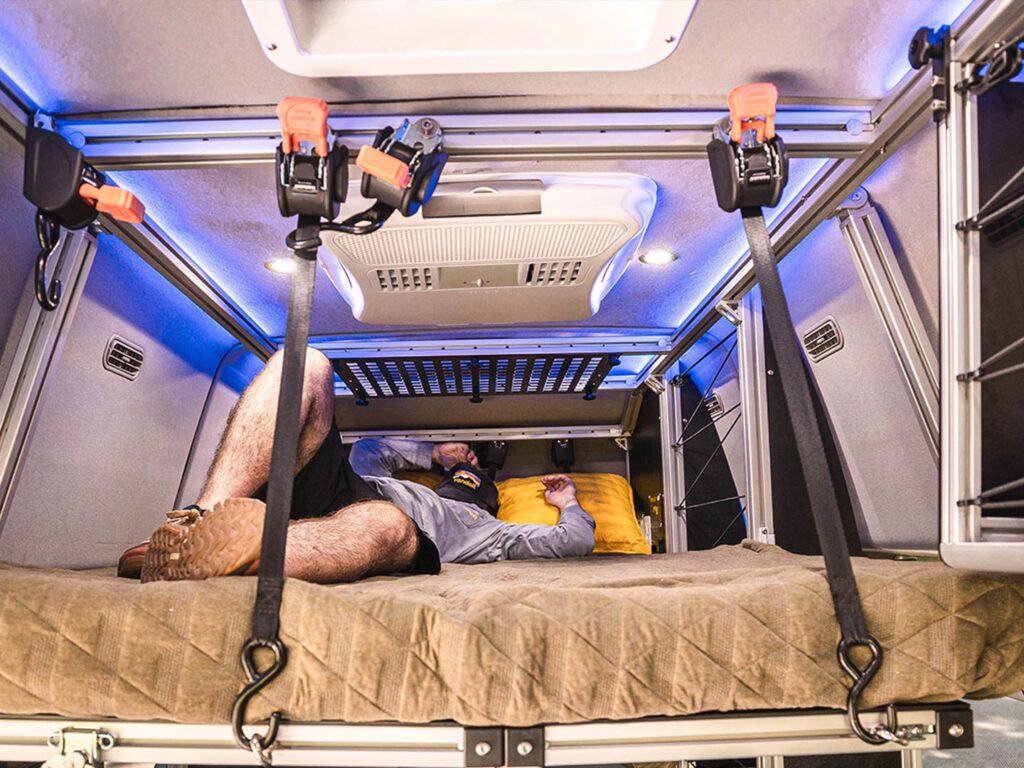
LIV Bed Lift System:
Test the system by turning the handle clockwise to raise the bed. The bed should ascend evenly and not bind at any point. Spin the handle counterclockwise to verify the bed lowers evenly. (Tip: Sometimes, you may need to add a little pressure or weight on top.)
Wipe the actuator shafts clean of any dust or debris that has built up, so they raise and lower freely.
DO Bed System:
Ensure the black turn knobs are tight on the bed brackets attached to the skeleton. The brackets on the beds should also be secure. Make sure you have enough eyelets on the beds and they are tight. Wiggle the cargo buckles attached to the ceiling to verify they are secure.
Factory Ford Seats:
If you’re moving seats in and out of the van for your trip, make sure you have pull tabs on the bottom before installing. Once fully seated, test each seatbelt to ensure it feeds freely and retracts smoothly.
Every Month:
Dometic Air Conditioner:
Once a month, remove the return air filter behind the return air vent grille to make sure it is clear of debris and anything that might block airflow.
If it is dirty, wash it with soap and water and let it dry completely before reinstalling or replacing it.
As needed, clean the ADB (Air Distribution Box) housing and the control panel with a soft cloth dampened with mild detergent.
Espar Heater:
Run the Espar monthly for about 20 minutes, even in warm weather. See this article for additional recommended maintenance on the Espar heater.
Every 3 Months:
Espar Heater:
Inspect the Espar exhaust pipe (under the driver’s side of the van) to ensure it is perpendicular to the van’s length and undamaged.
MaxxAir Fan and Dometic Air Conditioner Seal:
Check the seals around these components every three months by viewing them from the roof of your van using a safe ladder or scaffolding. Check for cracks or gaps in the seal.
If your fan or air conditioner exterior flange has Flexseal, clean the existing sealant with rubbing alcohol and apply a new layer of Flexseal every three months. If gaps or cracks are visible, replace the Flexseal immediately.
If your fan or air conditioner exterior flange has Dicor Lap Seal, apply a new bead of Lap Seal if gaps or cracks are visible or if moisture leaks into the van.
Solar Panels:
Use a safe ladder or scaffolding to inspect the rooftop solar panels. Ensure they are clear of debris (i.e., leaves, snow, dust, etc.) to ensure maximum solar input.
If you cannot wash the van, wipe them off with window cleaner.
Inspect the panels for any cracks or breaks. Broken/cracked panels will likely become problematic as the solar cells experience moisture. This will shorten the panel’s life and probably decrease its energy output.
Every 6 Months:
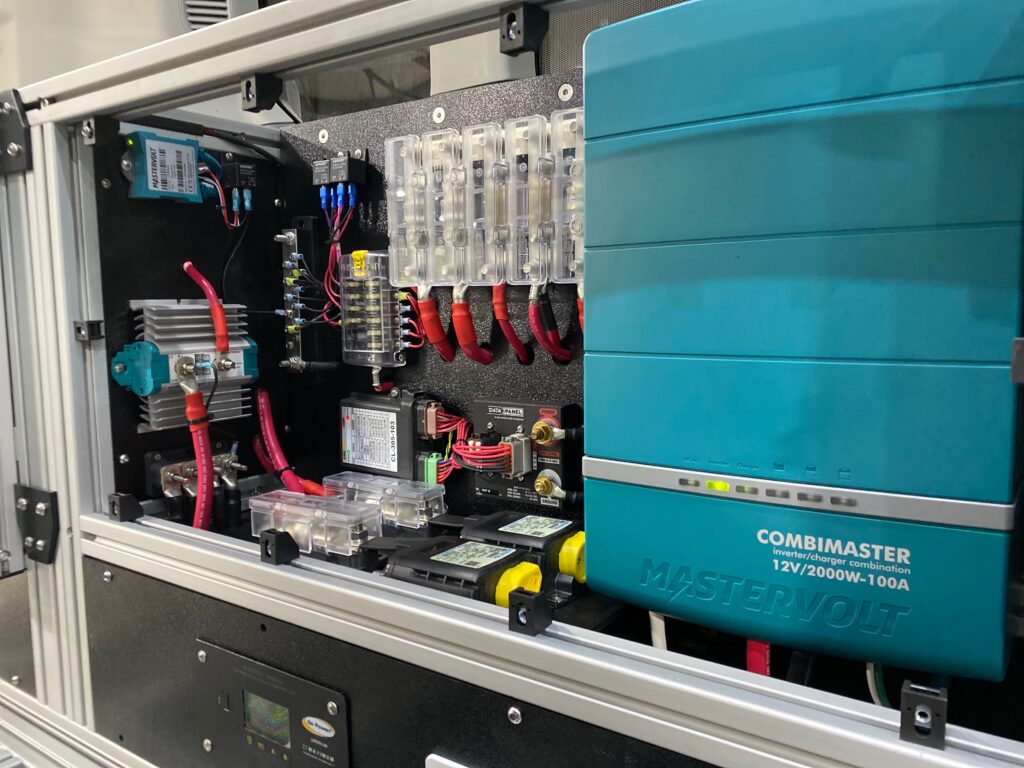
Battery Terminals:
In a Vandoit van with an AGM system, visually inspect the terminals on the batteries in the power box to ensure they are securely attached. In a Vandoit van with a Mastervolt lithium system, check the ethernet cables on the top of the batteries to ensure they are fully seated.
Bolts in Vandoit Frame:
The bolts at the joints of the Vandoit aluminum t-track frame are M5 and M6. They may loosen over time due to movement and vibration.
Use a low-profile ratchet wrench or a stubby L-style Allen wrench to tighten bolts. Standard sizes are 4mm, 5mm and 6mm for the bolt heads.
Once a Year:
Dometic Air Conditioner:
Once a year, check for the following:
- Inspect the unit from the roof of the van for debris or damage
- Wash the inner coils, including the condenser and evaporator
- Clean drains
- Replace gaskets and filters
- Perform amp-draw tests
Espar heater:
Use this article as a guide to annual Espar maintenance.
As Needed:
Battery health:
If batteries in your Vandoit power system are not holding a charge or seem to be losing charge quickly, remove them from the rear power box in your van and take them to a local Batteries Plus or auto parts store for testing. If recommended, replace the batteries.
Outlets:
Test the wall outlets by turning on the inverter and plugging an item like a phone charger into each outlet.
Awning:
Ensure the awning crank handle for the Thule awning is in the van. Loosen the collar on it to lengthen the handle, and then tighten the collar to secure the handle.
Next, ensure the crank fits up in the awning keyway, and try extending and retracting. Both movements should be smooth. Once completed, remove the crank from the awning and put it back in the van.
A note on Ford vehicle maintenance:
Vandoit built our adventure vans on the Ford Transit for several reasons, including dealership warranty and availability, affordable maintenance and repair costs, quality, van availability, and affordability.
For Ford vehicle maintenance, speak with your local Ford dealership or use this link to find a Ford maintenance schedule tailored to your specific vehicle: https://www.ford.com/support/maintenance-schedule/