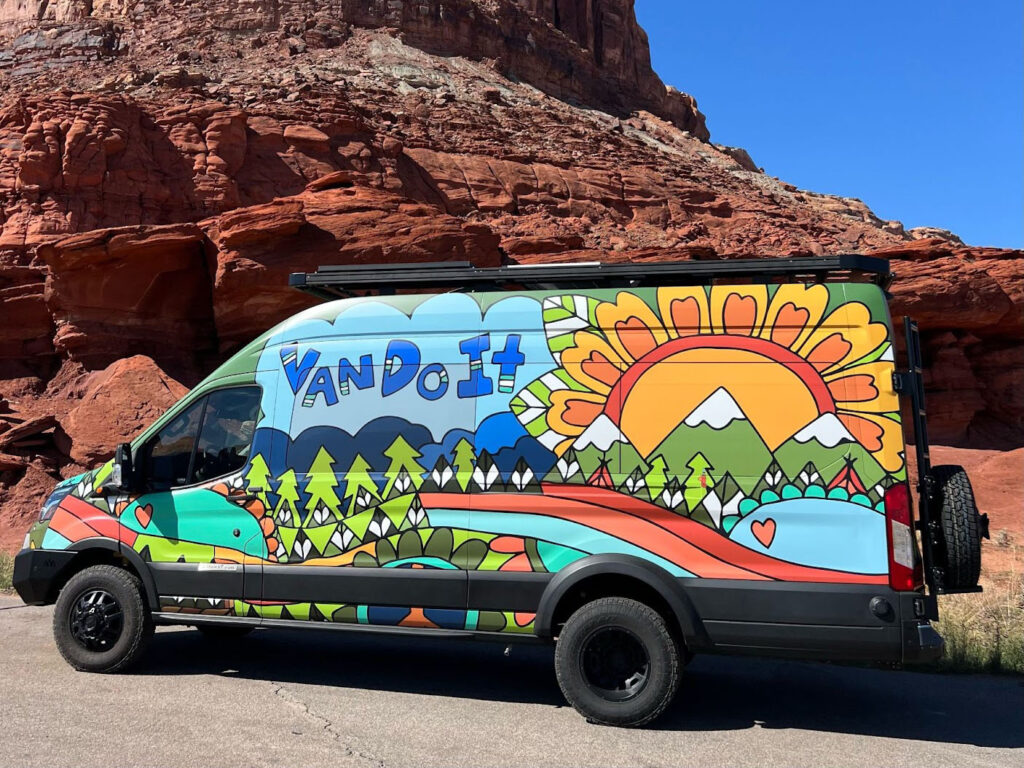
One of the more exciting days of our lives was when my wife Lana and I picked up our new first Vandoit camper van in Blue Springs, MO, almost 4 years ago. Another almost as exciting day occurred when we traded the first van in for our second Vandoit. We went from a LIV model (GO model back then) to a DO model.
So why the change? What is the difference between the two models?
It’s easy to visit the Vandoit website and see the technical difference between both. And there are definitely some differences and potential trade-offs between the two.
For example, the DO model has a full-sized bed, whereas the LIV model has a queen size bed. So going to the DO, we gave up about 6 inches of bed space side-to-side. My wife and I, who typically sleep in at least a queen size bed, were worried about giving up sleeping space. But we found that if you need more sleeping room, you can agree to “surf your side,” and that works well. So we have no regrets about going to a slightly smaller bed.
The DO offers some other benefits as well, such as a more open floor plan. The Murphy-style or drop-down beds allow for extra space inside to work, and you can even walk the full length of the inside van when the beds are folded to the side.
The DO bed can also be raised up and down on a strap system. We found this a bit more time-consuming than the hydraulic raise and lower system in the LIV. If you are going to be carrying bikes in the garage area (below the bed) and will be raising the bed up and down regularly, the hydraulic system in the LIV is the way to go because it’s almost effortless.
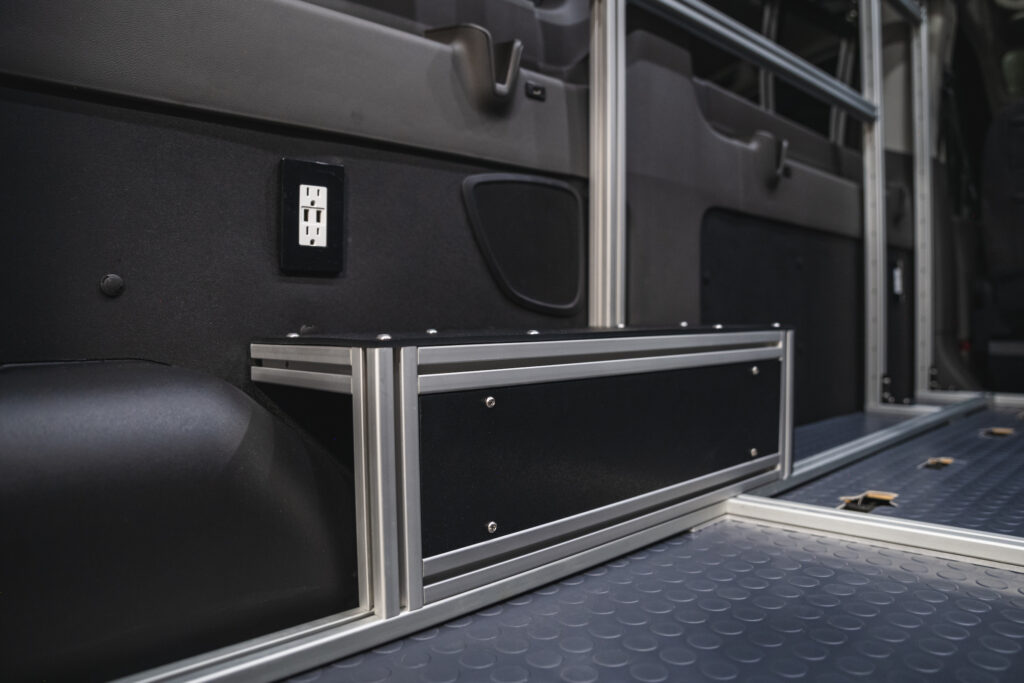
The DO also has unlimited attachment points for hooks, tie-downs, shelves, etc. The DO feels roomier than our LIV model did. However, the LIV model now has the option of a bed leaf that allows you to fold the front up for a bit more space when you aren’t using it. This leaf definitely provides more area to move about the galley.
The LIV model also has a gear slide in the garage area. The slide allows easy access to equipment carried under the bed. You simply open the back doors, pull the knob and slide it out.
The DO model does not come with the slide; however, we’ve found that the DO configuration allows much easier access under the bed system without needing the slide. If the slide is just something you can’t live without, you can add it as an accessory to the DO model. However, the addition of the slide takes a few extra inches of space from the bottom floor of the garage area.
Either adventure van build is an awesome choice. Choosing which model best fits you is a matter of your needs space-wise, how much and what kind of gear you carry, and what your van-living preferences are.
Choosing Vandoit Camper Van Build Options
A couple of other things to consider when deciding on Vandoit camper van build options. Our first build was a medium roof. I am 5’11, and Lana is 5’7. I wish I could say that height never affected us. We both have bumped our heads on a shelf or crossbar a time or two. Also, I found it difficult to stand tall and put on a coat inside the medium-roof van.
The medium roof is workable if you are shorter or you learn to live with it. It’s definitely a less-expensive build than a high roof. On our second van, we chose to go with a high roof and decided it was a great decision for us.
We also went with an extended-length van (EL) the second time around because we wanted a larger kitchen galley. Lana likes more room to prepare meals, and the extended length definitely gave us that.
Something else to think about when you think about vans is the Ford Eco boost system. We live in the mountains of Colorado, and the EcoBoost has been phenomenal for climbing hills and passes.
We also went with a more substantial undercarriage build for the large potholes on some of the mountain highways.
No matter where you live or visit, you’ll definitely want to add the Espar heater. We don’t use it all the time, but it’s nice to fire up on cold mornings and heat the camper van a bit before getting out of bed and getting dressed. It’s a great heater! We’ve used ours over 11,000 feet, and it worked wonders.
With our second camper van, we also went with a lithium battery system as opposed to the AGM system in the first. We were able to operate a small microwave oven off of both. However, with the AGM batteries, the maximum cooking time is about 4 minutes, whereas lithium allows for substantially more cooking time. Both battery systems have advantages. The lithium system is stronger and allows for extended use, including using an air conditioner.
However, the lithium battery takes a bit longer to charge. The AGM system didn’t allow as much overall output but recharged very quickly. We are definitely pleased with our decision to go with the lithium battery system, but all-in-all we managed effectively with the AGM.
A final suggestion is not skimping on solar. We highly recommend going with solar power. It will make your van life much simpler, to say the least, and you’ll be glad you did.
The most difficult thing we found in choosing our new adventure van was deciding between the many cabinets, shelves and pods that Vandoit now offers. Their selection is pretty amazing and just short of mind-boggling.
Final Vandoit Adventure Van Thoughts
We’ve loved both camper van models, and when the time comes, we will be brain-storming our third Vandoit. We looked at many other van build companies before going with Vandoit, but I can promise you there is no upfitting company that is better than Vandoit. You’ll never be sorry.
So take it from us: we’ve both LIVed and DOne. Now the choice is yours!
As I wrap up the year, I get a chance to go through the hard drives and reminisce on all the adventures we’ve had as a company. I have had the privilege of being Vandoit’s Content Creator since July of 2020. In that two and a half years, I have been to many places and met many people I wouldn’t have been able to otherwise. Here is a ranking of the top five places I went with a Vandoit. For more photos and videos of our journey, check out our instagram! @Vandoitco
5. Victor, Arkansas
The trip to Arkansas was a simple, but unforgettable trip. A couple of members from our marketing department, myself, BLK ELK Media, and our Lead Engineer, spent three days in November shooting with our colleague Aaron Paris from Switchback Outdoor Safety. Our trip primarily consisted of filming overlanding and the testing of our exclusive Backwoods Adventure Mods Front Scout Bumper. We also filmed a video showing hundreds of ways to organize the contents of your van to make it work for you.
4. Buena Vista, Colorado
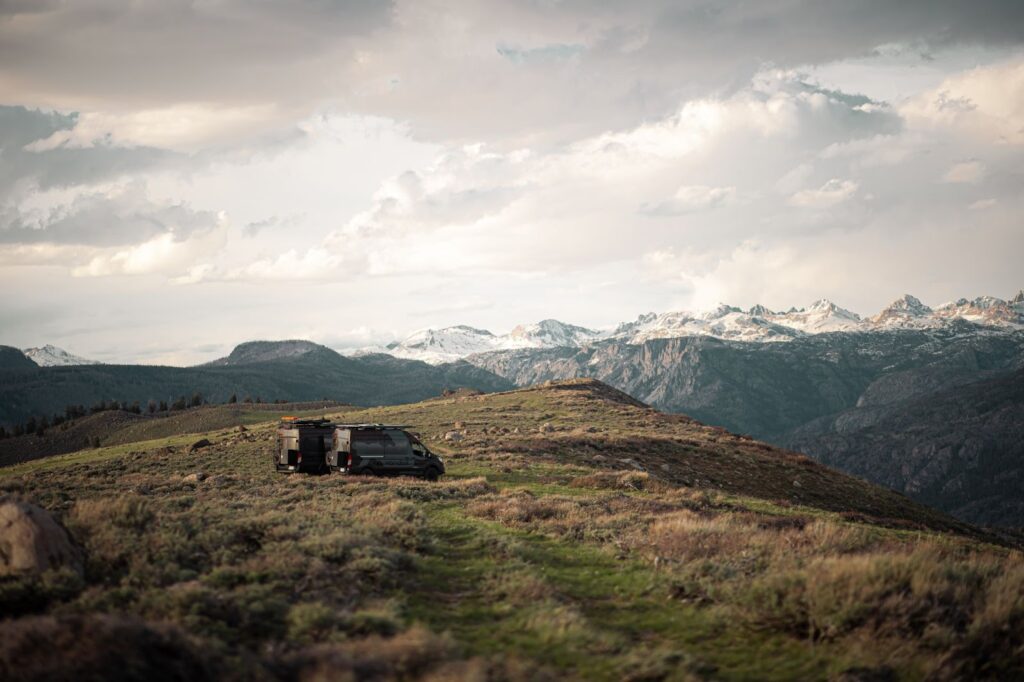
In August, we traveled to Colorado for Overland Expo Mountain West. A few days before, we made an early stop to see our good friend and Vandoit owner, Travis Brewer. This is where we got a majority of our content for Movement is Medicine, a short documentary about Travis and his journey from serious injury to prime athlete and performer. We got to spend five days with Travis in the small town of Buena Vista camping side by side with him and his van. The views in Colorado are wicked, but parking next to Twin Lakes was especially beautiful.
3. Flagstaff, Arizona
A little earlier in 2022, I went to Flagstaff, Arizona. Me and a fellow coworker helping with content met up with a couple of sales gurus who had been at Overland Expo West. By day we were riding motocross bikes and by night lounging in dispersed camping that overlooked Sedona. We also spent some time in Coconino National Forest and spotted a few free-range cows out our van windows. This trip was part of a nine-day excursion to several states including our next location, Jackson, Wyoming.
2. Jackson, Wyoming
Getting into Jackson Wyoming immediately washed us all over with the incredible views. We spent some time in Bridger Teton National Forest and got shots of the van in action. My personal favorite thing to shoot is drone footage. This allows me to get an aerial view of our roof rack, solar panels, roofnest tent and so much more atop the van. This trip was special too because of our Sales Guru’s attendance. Vandoit highly values letting their employees grow within the company and gain more hands-on experience through trips like this. Camping for three days in Wyoming–nine days total– brought us closer together and made coming to work feel even more like family.
1. Moab, Utah
My favorite place I went to this year is somewhere I have been several times before: Moab Utah. The trip in particular I want to share with you is when I went with my dad in early October. We took time to ride our dirt bikes and relax in each other’s company; it was nice to have some one-on-one time with my dad in such a beautiful place. While we weren’t riding 4×4 trails, we attended VOX’s (Van Owner’s Experience) yearly meetup in Moab. The VOX events are always so much fun to be a part of as we get to spend time with our owners and hear all about their life with a Vandoit. The community between us and our owners is always a blast. We went on a group Mountain Biking Rides, visited Canyonland and Arches National Park, and spent hours around a campfire telling stories.
As cheesy as it sounds, I love my job. I’m blessed to have the opportunities I have in traveling and capturing these moments with my camera. I cannot wait to see what 2023 has in store for Vandoit that I get to be a part of! Stay tuned for more.
We all know it’s the season of giving and showing love to those around you. And as hectic as this time of year gets, it can be really easy to forgo thinking about the environment simply to survive the holiday season.
As a company that highly values the beauty and opportunity nature provides, we’ve done the work for you in curating a list of 5 simple things you can do to have a more environmentally friendly holiday this year.
1. Get A Real Christmas Tree
Although rounds of vacuuming to pick up dropped pine needles can get old, setting up a real tree for Christmas cuts down on the 6-foot tall chunk of plastic that eventually will be thrown away in a few years. Plastic Christmas trees require carbon emissions to be created and shipped. This makes them less eco friendly than a real one.
Getting a real tree can also be a day’s source of entertainment for the whole family. All the steps from locating a nearby tree farm, walking through the rows of options, and strapping it to your car to bring home will become a core Christmas memory for everyone.
When you purchase from a tree farm, the money spent on it goes back into the farm, resulting in more trees being planted. Getting a real tree also means it can be recycled or in some cases, replanted, making it the ultimate environmentally kind choice.
2. Wrap Gifts With Fabric Or Recycled Paper
When perusing the aisles full of bright, sparkly, single-use wrapping paper, it can be hard to say no to the convenience or the sheer cuteness of the design. This holiday season, consider seeking out recycled craft paper and decorating it yourself with paint, stamps, stickers, etc. This can be a fun activity for children as well, and it makes gifts even more special. You can also wrap up a gift with fabric or other reusable material, creating less waste and making it easier to open.
3. Switch To LED Lights For Your Decorations
Twinkly lights during the holidays are a fan favorite; they make everything feel magical. LED lighting (light emitting diodes) saves a ton of energy in comparison to incandescent lights, and they last longer. Today, it’s not too hard to make this simple switch as LEDs are widely available, but it can make a big impact on your household’s energy consumption.
As well as an environmentally friendly habit, being sure to unplug your lights overnight can be a simple change to keep your family safe. According to the National Fire Protection Association, 770 house fires a year are caused by holiday lights.
4. Gifting An Experience
We all have a few people who are difficult to buy gifts for. They don’t seem to need anything or want anything we can buy from the store. This is the perfect opportunity to give an experience. Annual passes to a theme park, zoo, or art museum can fit in well for almost anyone. This gift gives the one who receives it freedom of scheduling, a chance to budget, and something they can enjoy multiple times that makes them think of you.
5. Buy Reusable Doggy Bags For All The Yummy Leftovers
It’s no shock that we eat a lot over the holidays; it’s one of the best parts! A very simple switch can be using metal or glass containers to store food in rather than plastic ones. It can also help to clear out your freezer before the holiday meal prep begins. This allow for plenty of space to freeze meats and other items that can survive for a much longer time. The parts of the meal that will go back more quickly can be sent home with your guests or eaten within the next few days. It cuts down on overall food waste.
In 2018 I decided that immediately following my 55th birthday, I’d retire and explore the USA. After spending over a year examining the best way to accomplish that, I found Vandoit’s website.
Within a few days of my initial consultation with Van Guru Josh, my deposit was in. My Vandoit LIV model (with Quigley 4×4 conversion) pickup date was scheduled for February of 2020. That delivery date gave me about 9 months, while still working, to do some test trips. These trips allowed me to better judge what I did or didn’t need for full time exploration. In November of 2020, I retired from corporate America, closed on the sale of my house, and began exploring.
The knowledge I gained on my short test trips was certainly helpful. Nothing really allows you to refine the van’s systems outside of using those systems long-term. I’ve now been full-time exploring for nearly 2 years and I continually find opportunities to further refine what I carry, how I store my stuff, and how I decide where I want to explore next.
Configuration of the van
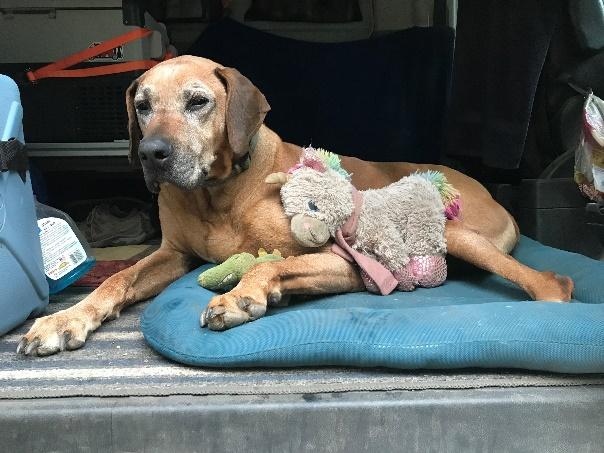
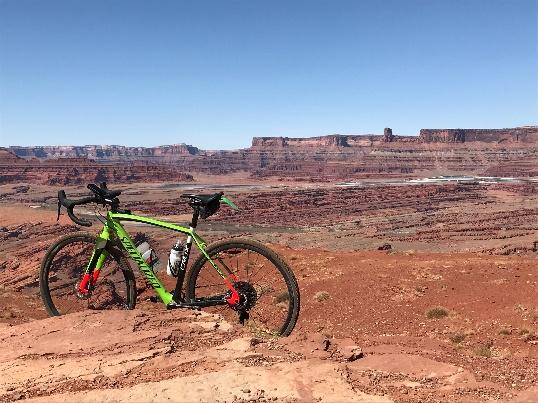
When configuring my Vandoit adventure van, I needed to address the basic functions of life. I would need to have methods to keep perishable food items, a water system, prepare food, and maintain personal hygiene. Further, I needed room for my dog Gunner (whom I lost in late 2021) and to carry the toys I would most enjoy while out exploring. This included a bicycle (and associated gear), an inflatable stand-up paddleboard, and hiking and running gear. The great part about the Vandoit adventure van is the great flexibility in setup, which allowed me to carry all of that and more.
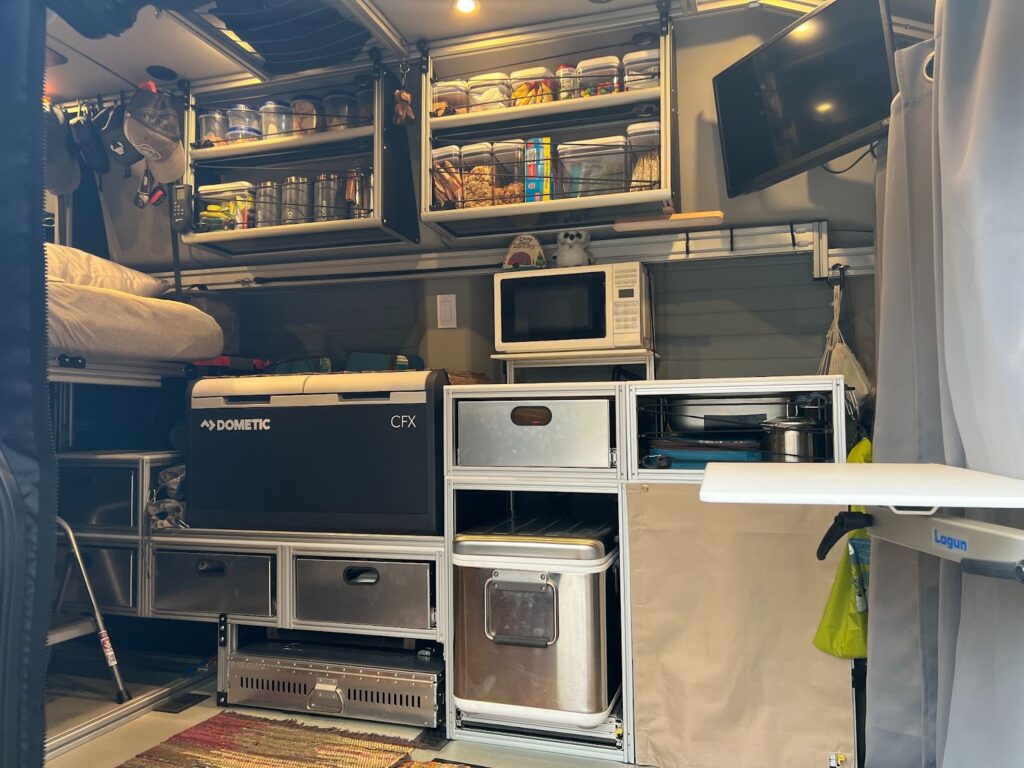
For the perishable food items, my van build sheet included the Dometic chest style refrigerator. I designed and built a small shelf on which to mount it. This shelf is placed above the Espar heater and attached to the track system. Later I ordered a small Alpicoo l fridge, which I use in freezer mode. Both of these items are mounted using the t-track that is part of the Vandoit LIV model’s design. A bonus of the freezer and fridge locations: they become steps to access the bed, with space under the Dometic to store shoes.
For the water system, the build sheet included the Vandoit kitchen pod and water pump/heater module. The pump/heater module fits inside the kitchen pod alongside the grey water tank. The freshwater supply is strapped to the side of the pod. This makes my water system completely contained – providing the advantage of all water lines staying contained within that pod. That also means I can put the water system wherever I can make it fit within the van. I chose to install it on the slider door side, secured to the LIV model’s passenger side cabinet.
I needed an option for outdoor cooking for my propane stove. I ordered the compact kitchen from Trail Kitchens. When set up, it provides space for the stove and gives plenty of counter space for food prep. If weather or another reason prevents me from setting up my outdoor kitchen, my hot food fallback is a backpacking meal that requires only boiling water. The only cooking I do in the van is using my backpacking stove to boil water. Of course, the fridge allows me to carry other cold meal options.
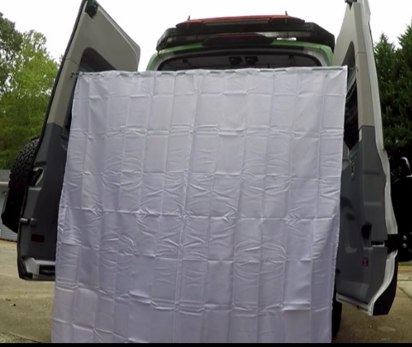
The only part of the water system that is outside the kitchen pod is the shower. I hung a shower curtain across the back doors and have a hose, supplied with the water pump/heater system, that stretches to the back of the van. I hang the shower head (a garden nozzle) on a bungee cord and place a mat on the ground. This gives me a semi-private shower space. There are plenty of times that a shower in this fashion is not practical so I’ve become quite adept at the “bird bath” inside the van.
Gunner was a big dog and he needed the entire space behind the driver and passenger seats. He, his bed and bowls fit in that space. Without the modularity of the Vandoit van, the placement of my water system and fridge/freezer would not have allowed this space for him. His food and other supplies were stored with the rest of our gear in the garage’s gear slide.
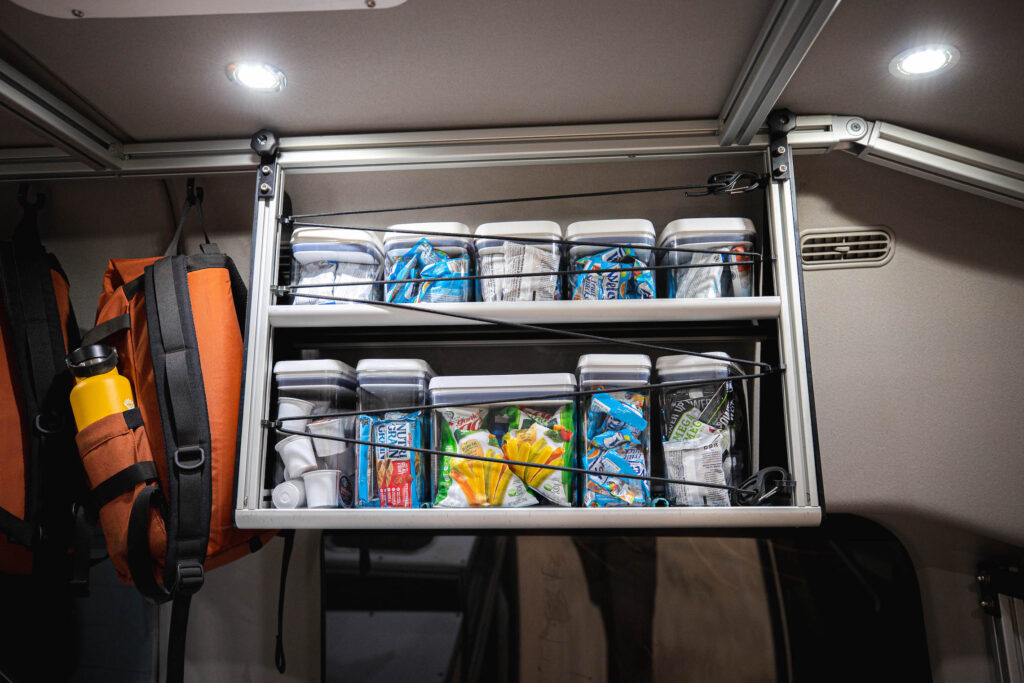
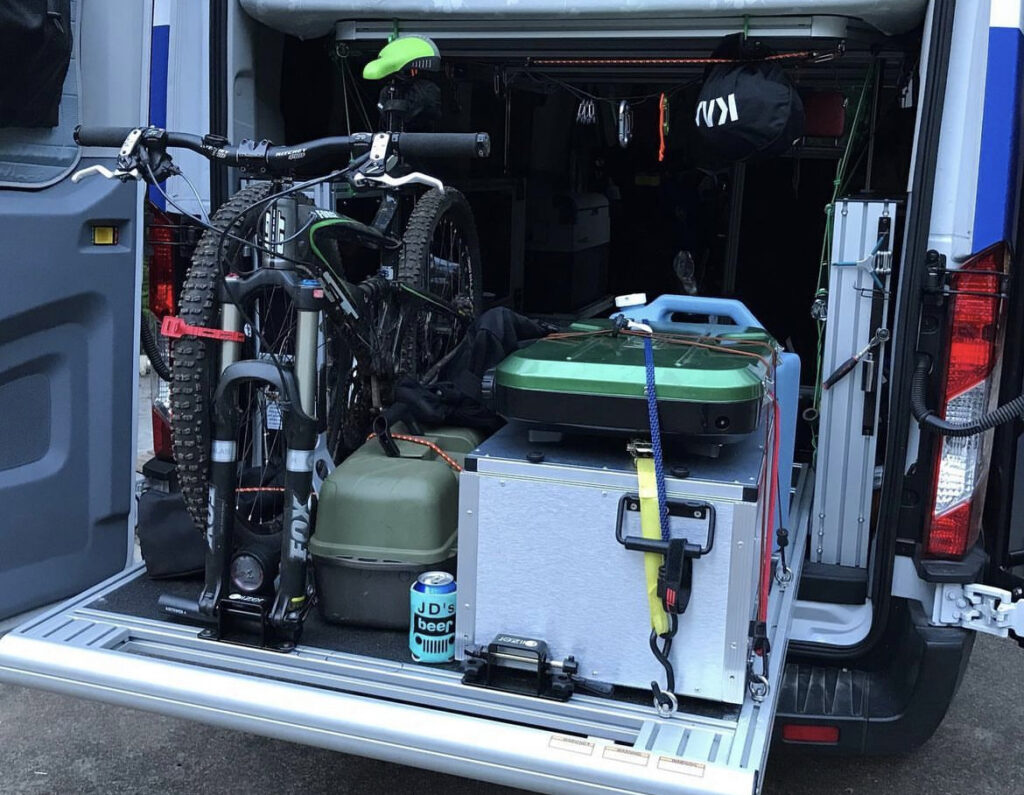
There is a lot of stuff stored on the gear slide. Since it is made of t-track, there are lots of options for making sure it stays secure. My job was to fit it all in there without having to completely unload it every time I wanted to get something out. This occasionally becomes a challenge. The work to pare down this load is continuous.
The Smallest Road Possible
I’ve never really seen anything when traveling over the interstate system. When I launched, I set my travel philosophy as “The Smallest Road Possible.” I rather enjoy this philosophy. Sometimes that does mean use of the interstate, more often paved back-country highways, but most often I’m traveling on dirt or gravel roads. I download maps for offline use to my iPad or iPhone, mounted on the dash or A-Pillar.
I mostly do short term planning in detail and long-term planning broadly. My goal for the summer of 2022 was to visit western South Dakota – one that I did accomplish. I spent September exploring the Black Hills and the Badlands. I was in western Nebraska in early June and I only decided to enter Wyoming when faced with the choice of heading north into the Black Hills or west into Wyoming. How long I stayed in Wyoming would be based on what I could find to explore. I found three months’ worth of exploration!
I try to get far enough into the forest with the van to leave a web of available routes to explore. I set basecamp long enough to explore the surrounding area by alternating riding and hiking on the available Jeep and hiking trails. The bike allows me to ride the ATV trails and other Jeep roads around an area. I have scouted routes for the van by bike numerous times–sometimes I drive the scouted road, and sometimes I don’t. It depends on the purpose. I scouted a 7 mile Utah section of the Rimrocker trail by bike one day, then drove that route the following day. Another time I rode up to Hurrah Pass after turning the van around lower on the road. The risks to the van became clear as I ascended to the pass. I was glad to have turned the van around when I did, and it made for a great bicycle ride!
In June of 2021 my brother flew across the country to meet me in Oregon for the Oregon Trail Gravel Grinder. For a week Jeff took care of the van and Gunner – at and between basecamps. I suffered in many ways but not because I was worried about Gunner or my van. Or my brother – the van was able to carry the additional equipment for him and he easily picked up on the few steps needed to go between “camp mode” and “drive mode” with the van and Gunner. After he left, I found an amazing campsite on a small lake in the Oregon Cascades. I paddled on that small lake every day for a week!
Not all Roads are Smooth
As much as I love taking my van deep into the woods, I have found some drawbacks. I’ve crossed sections of the Northern Rocky Mountains in Idaho and Colorado. I have driven across the state of Nevada almost exclusively on dirt and gravel roads. Gunner and I explored the La Sal Mountains on a forest service road that connected to Onion Creek Road and then down to the Colorado river. The other vehicles I encountered on that road were 4x4s, side-by-sides, and motorcycles. At an uphill, off-camber switchback, the driver front tire came off the ground. The potential for rolling the van was there – I always have to consider the risks of taking my van deep in the forest (or desert), especially because I’m almost always traveling solo.
While attempting to follow the Snake River, I spent almost 5 minutes trying to present – to myself – a convincing argument to continuing on my current path. The maps showed the road diverting up a side canyon, then crossing the Wallowa Whitman National Forest / Hells Canyon National Recreation Area. I continued up this rather narrow canyon on a rocky road for about 3 miles. Those 3 miles took 30 minutes – that’s roughly running pace! My maps indicated 10 more miles of this road before it connected to an improved Forest Service Road on the other side of the forest. I had less than 2 hours of daylight and I was looking at up to 10 more miles of the current road conditions. On the drive in, about a mile before the canyon narrowed, I had spotted a suitable spot for an overnight. Evaluating the risk of not finding a campsite and having to drive through the night lost to backtracking to get a good night’s sleep. The next morning, with a fresh head, I selected an alternate route.
I was exploring the area to the west of the Green River in Utah. I saw a side path off the main road and started following it. I engaged 4wd shortly after turning. The map showed the road heading to a bend in the Green River. I got within sight of the river. At the turn of a switchback at the very upper end of the descent to the river plain when I decided to scout on foot. I parked off the main trail and walked down the switchback. About 100 yards down the trail was an off-camber, downhill, rutted and bumpy curve. It happened that a group of side by sides came up the trail. As I watched them through that section, I realized that my 10’ tall van was not a good candidate for that section of trail. No problem–Gunner and I hiked the rest of the way.
All of this risk analysis is aimed at keeping my Vandoit healthy. I wish to continue traveling this country until I am tired of it. Keeping the van healthy is the biggest challenge and one that could cut short my ability to explore. I have to consider the potential for real damage to the van and compare that to the ability to explore an area with alternate means.
Scheduled maintenance comes up frequently with lots of miles traveled. I do my own basic maintenance, and finding a place to do those tasks becomes challenging. Any work that I can’t do has to be scheduled carefully. After all, I am a full time explorer and the van becomes home. If a repair can’t be made quickly, I have to have an alternate solution in what is likely a relatively unknown town. I’m sure I’m not the only full time traveler who has these concerns.
The Journey is the Adventure
My Vandoit adventure van allows me to really explore my country. With the Quigley conversion I have confidence to get off the beaten path. Staying off-grid isn’t an issue, as my power system is well maintained by the solar panels and all of my basic needs are covered. The Vandoit systems leave me relatively stress-free to work on the day-to-day details of exploration.
I minimize my stay at any one campsite. With few exceptions – when visiting family or friends – the longest I’ve camped is 7 nights. Once I’ve explored what I can from that basecamp, I can easily move to the next whether it’s dispersed camping in the National Forest or an established campground in a National Park. I spent 2 months exploring Southeastern Utah. I also spent over 2 weeks to crossing Nevada, more than a month exploring the Olympic Peninsula, and a another month just exploring Wyoming’s Snowy Range. My Vandoit adventure van allows me to explore this great country, basecamp to basecamp.
Winter is coming. For some parts of the country, winter weather has been here for weeks. This means you should be taking some steps towards winterizing your van. This guide will show you how to winterize the lithium battery system for all types of van users
Confirmed Issue: The Mastervolt lithium system is designed to operate during cold weather. However, cold weather can impact the operation of the lithium electronic system. Symptoms include batteries not accepting a charge current, CombiMaster Inverter not turning on, Mastervolt Control Panel not turning on, AC and/or DC power not working, and not charging from the alternator.
The purpose of this article is to educate you about how your lithium system operates in cold temperatures. It includes measures you can take to preserve the health of the system and protect your investment.
Affected Units: Any Vandoit van with a lithium battery system
Note: Vans built after September 2021 have a heating pad installed on the lithium battery/ies. The heating pad is hard-wired to the battery system and will automatically turn itself on at 45°F. It will also turn off when the battery temperature reaches 68°F. The heating pad should prevent the battery/ies from becoming too cold to operate. However, as explained below, the operating temperatures of other parts of the lithium system can impact the system’s ability to function. Specifically, the CombiMaster Inverter/Charger shuts off at a higher temperature than the batteries do. When it shuts off, the heating pad will gradually deplete the battery bank. If the CombiMaster shuts off, the battery level can be restored/maintained by driving the vehicle regularly.
Maintaining The Entire Mastervolt Management System
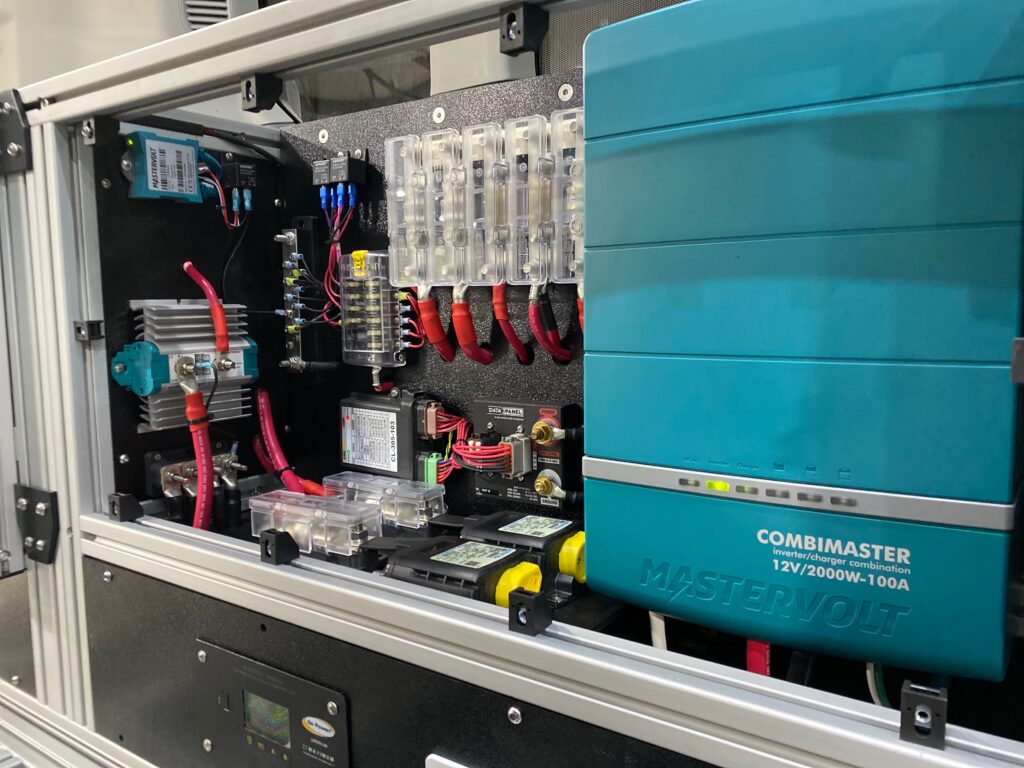
Issue Explanation: To begin, what one first needs to understand is that maintaining your lithium system does not solely include the batteries, but the entire Mastervolt management system.
The Mastervolt system employed in your van includes the Mastervolt CombiMaster 120V series (Inverter/charge controller), ML-RBS Remote Battery Switch (controls flow of power in and out of the battery), Mac Plus (Charges from alternator), and MLI Ultra 12/2750 or 5500 Lithium Battery Series (Lithium Batteries). Each of these components has a different operating temperature:
Component Operating Temperatures:
CombiMaster: 14°F to 140°F <— (Highest Threshold Temperature)
ML-RBS Remote Battery Switch: 14°F to 140°F
Mac Plus: -4°F to 140°F
MLI Ultra Lithium Battery: -13°F to 122°F
Please note that these operating temperatures are distinct from the ambient temperature of the air in the van.
Note: Depending on what charge cycle the batteries are in, attempting a charge below 23°F may result in batteries not accepting charge current, but this does not mean the batteries are not operational or in danger of damage. The batteries are safe as long as they are above -13°F.
Because the CombiMaster (not the batteries) has the highest threshold for operating temperature, you will need to consider how you plan to utilize the van over the winter with this device in mind. Should the internal temperature of the CombiMaster go below operating temperature, your van will not be able to charge via shore power (which gives the impression that batteries may be damaged, but this should not be the case), the Mastervolt control screen may go blank, and AC power will not work. To bring the CombiMaster up to operating temperature, run the Espar heater (DC powered) or the Ford factory heater.
Secondly, the battle you are fighting, so to speak, is with battery discharge, not with cold. Keeping your batteries at a high charge is key in all situations. It is important with all setups and temperatures (hot or cold), to eliminate loads from both DC and AC-powered devices, as this eliminates power draw from the batteries. Higher power draw increases the use of battery cycles, which decreases the life of the battery. In summary, keeping your batteries fully or nearly fully charged and limiting power loads helps in all scenarios, not just cold temperatures.
Resolution: The approach to maintaining your lithium battery system during cold weather will depend on how long your van will go unused. Please find the approach below that best fits your time frame: 1) you will be driving the van daily, 2) the van will be unused for a short term (1 to 2 weeks in between uses), or 3) the van will be unused for a long term (2 weeks or more–van needs to hibernate with only necessary functions running).
Please note that these approaches–minus running the Espar heater or a space heater–may be used to maintain the lithium battery system in warmer weather conditions as well.
Winterizing For Daily Driving
1. Drive the van daily to maintain 80%+ state of charge on the battery system. A good rule of thumb for most van owners is approximately 1 hour of drive time will provide roughly a 20% increase in charge. These numbers will vary depending on what devices are turned on and drawing power in the van.
Note: Mileage/vehicle runtime needed to get the battery to 100% state of charge will vary.
2. When the van is parked, keep it plugged into shore power. This will give you a reliable charge until temperatures drop to the 14°F mark.
3. Run the Espar heater or a safe space heater inside the van to keep the batteries at an internal temperature of 23°F or warmer to accept a charge. (See step 4 in the next section for instructions on how to check the battery’s internal temperature.)
Note: Be sure that your gas tank has at least 1/4 tank of gas while running the Espar and the run time is set so that it will continue to heat the van until the next time you drive it. Electric space heaters will drain batteries very quickly when not plugged into shore power. Always double-check how much power you are using before leaving the van unattended. (You can accomplish this by viewing how many negative amps are displayed in the “Primary Current” box on the Mastervolt screen.) Ensure that you have enough stored power or that shore power is plugged in and charging.
4. Vans built after September 1, 2021 have a battery heating pad installed. The heating pad is hard-wired to the battery system and will automatically turn itself on at 45°F and turn off when the battery temperature reaches 68°F. Because the heating pad is hard-wired directly to 12 volt power, you can turn off the inverter and still keep the battery warm. However, the heating pad is another device that will be powered from the battery. Expect a higher amperage draw from the battery when the heating pad is connected and functioning, which means faster battery discharge.
Winterizing A Van That Is Used 2 Days To 2 Weeks
1. Keep the van plugged into shore power. Again, this will give you a reliable charge until temperatures drop to the 14°F mark.
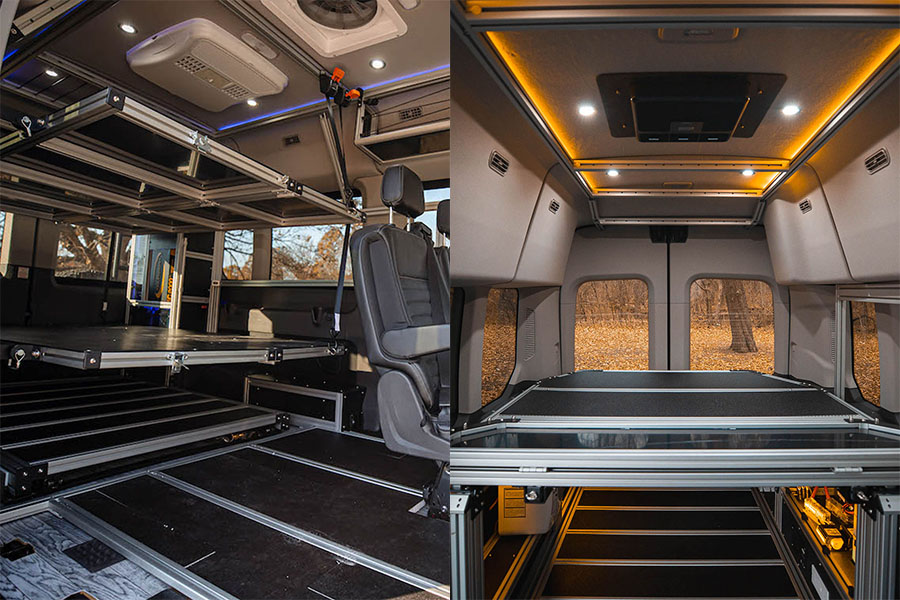
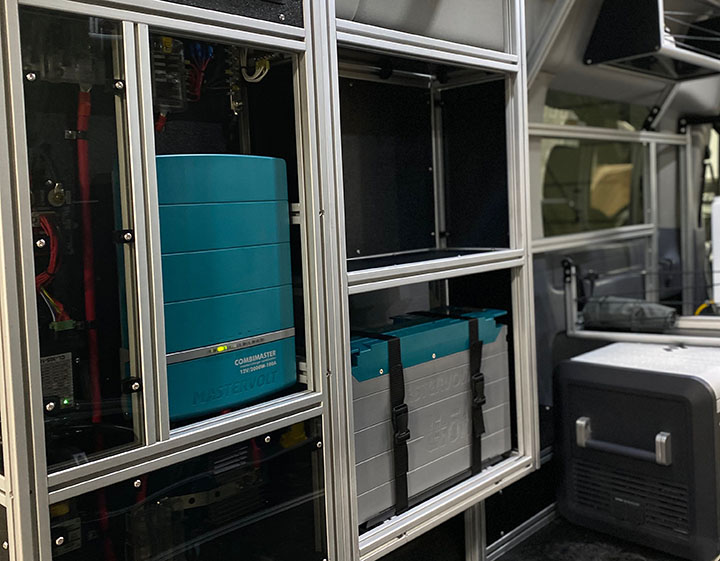
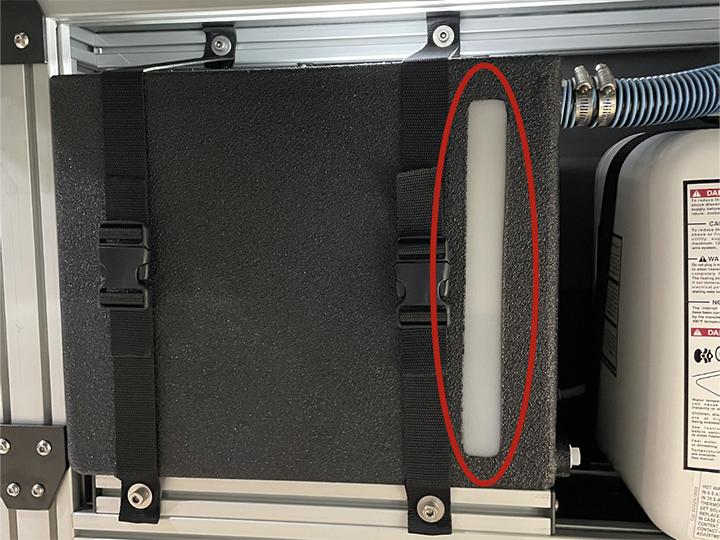
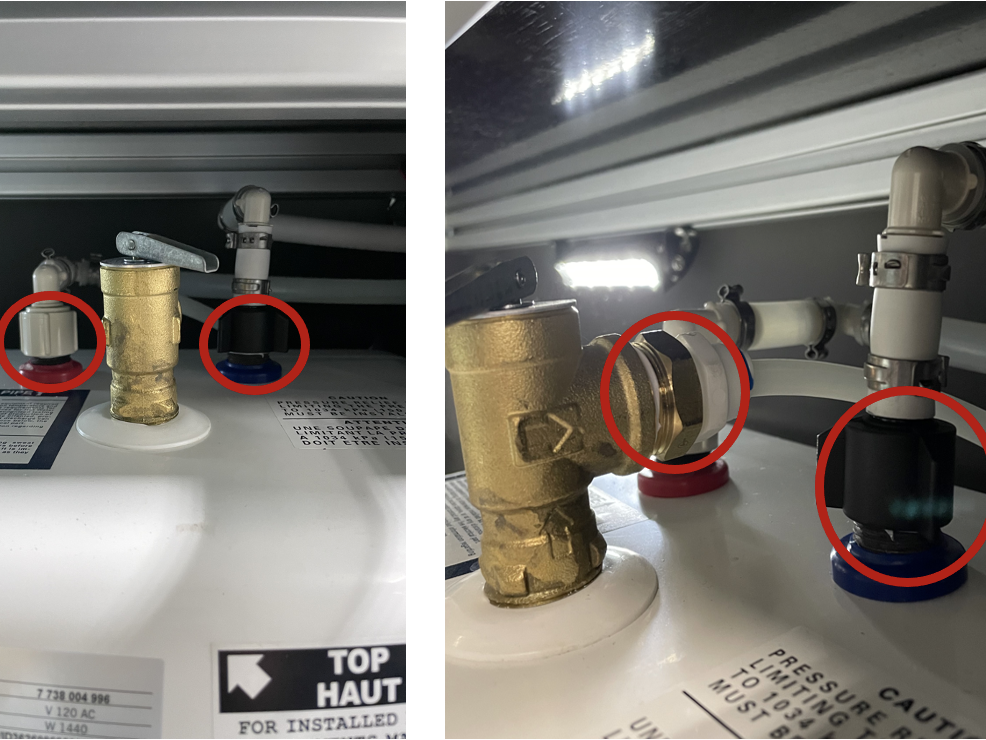
2. Remove the black ABS panel from above the inverter and keep it off so it can stay warm from the van’s ambient temperature. You will ned a 5mm Allen wrench to remove the screws in the panel. To do this in a LIV model, remove the bed or raise it as high as possible to allow sufficient room.
DO model
LIV model
3. Run the Espar heater or a safe space heater inside the van to keep the batteries at an internal temperature of 23°F or warmer.
Note: Be sure that your gas tank has at least 1/4 tank of gas while running the Espar and the run time is set so that it will continue to heat the van until the next time you drive it. Electric space heaters will drain batteries very quickly when not plugged into shore power. Always double-check how much power you are using before leaving the van unattended. (You can accomplish this by viewing how many negative amps are displayed in the “Primary Current” box on the Mastervolt screen.) Ensure that you have enough stored power or that shore power is plugged in and charging.
4. Every 2-3 days, check the battery’s internal temperature and battery level:
A. To check the internal temperature: In the top right corner of your Mastervolt lithium monitor, look for an icon with three horizontal lines and a magnifying glass. Click the icon and it will take you to a new menu. From there, click BAT Primary. Scroll down until you see Temperature. Please note that the reading is in Celsius.
B. To check the battery level: On the first page of the Mastervolt lithium monitor, look for the square that displays a percentage for the “Primary State of Charge.”
Depending on when you received you van, the first page may have different data point boxes. If you cannot locate the correct box, contact Vandoit Customer Support.
Winterizing For Vans Unused Longer Than 2 Weeks
1. Plug the van into shore power and charge the battery bank to 100%.
2. Leave the battery/ies installed in the van; there is no need to remove them.
3. Turn the yellow RBS switches to the locked position; the word LOCKED is imprinted on the top of the black housing of the RBS.
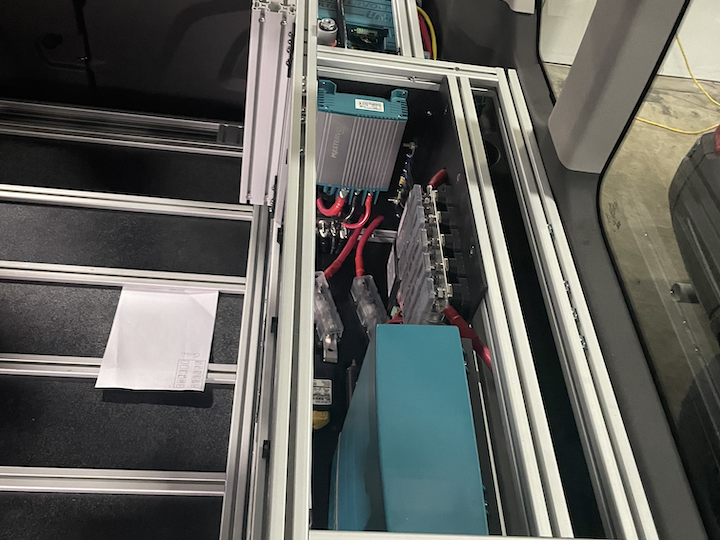
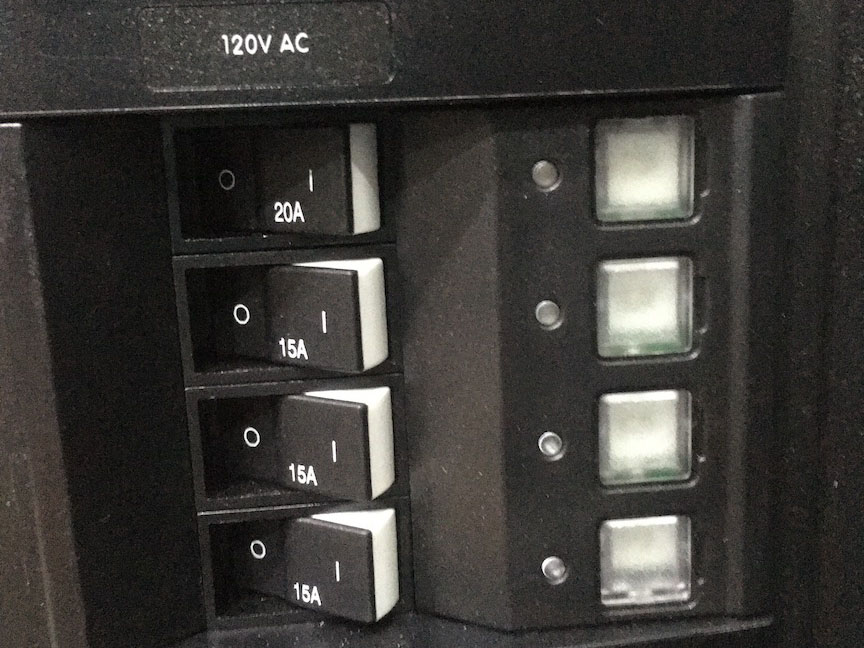
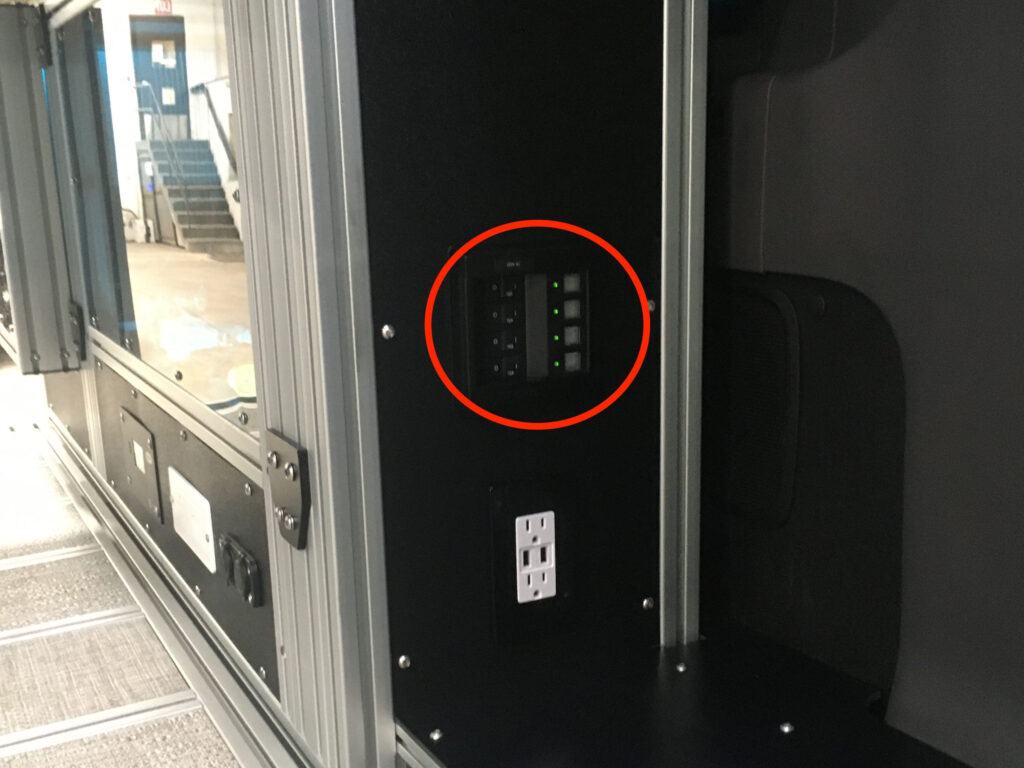
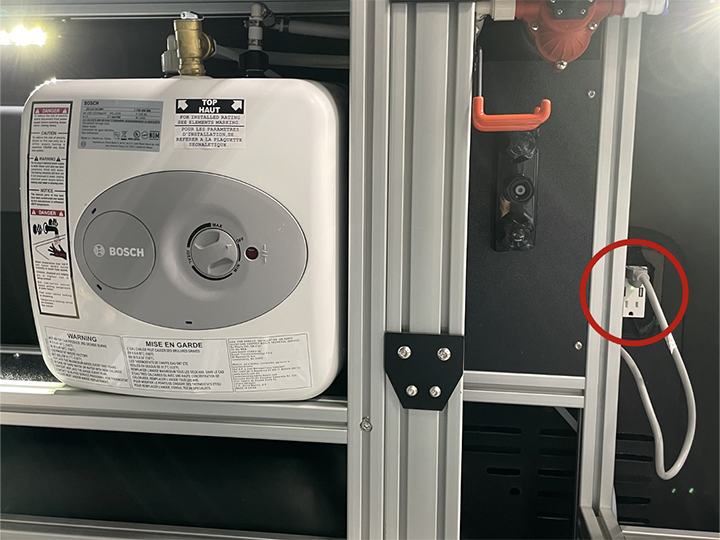
4. Turn off all circuit breakers. In the DO model, the circuit breaker panel is located on the power tower. In the LIV model, it is located on the front of the power box, behind where a 2-seat bench or kitchen pod may be installed in your van.
LIV circuit breaker location:
5. As often as is reasonable, check the internal temperature of the batteries and the battery level using step 4 above.
Note: Mastervolt batteries’ rate of self-discharge is less than 5% per month. Low ambient temperature affects the self-discharge rate of the batteries. Keeping batteries charged above 60% is key to their health.
To resume using your van after long-term non-use/storage:
1. Turn on all of the circuit breakers.
2. Turn the yellow RBS switches to the unlocked position.
3. Drive the van for at least 1 hour and then plug it into shore power. Driving will automatically press the top of the yellow switch(es) in to begin charging the battery. After long-term cold weather storage, we always recommend charging the battery all the way back up to 100%. Charge the batteries from either driving the vehicle or charging from shore power.
4. After 1 hour of being plugged into shore power, use the Mastervolt lithium monitor to check the battery level. If it is lower than 80%, please reach out to the Vandoit Customer Support team by submitting a ticket through the Customer Support portal or emailing [email protected] . Please include photos of each page of the Mastervolt screen.
If your Mastervolt batteries reach a critically low level and the Mastervolt monitor displays a “Battery Safety Mode” message, stop and immediately contact Vandoit Customer Support.
If you experience any issues with maintaining your lithium system in cold weather, please reach out to the Vandoit Customer Support team by submitting a ticket through the Customer Support portal or emailing [email protected]. Please include a description of how the system is performing and any relevant photos and videos of the Mastervolt screen and system components.
Was your van delivered before September 2021 with a lithium battery system? Are you experiencing issues with the system functioning during cold weather? Your van may be a candidate for needing a heating pad that can be installed on the battery/ies. Please submit a ticket to the Customer Support Team with your request for a lithium battery heating pad. Please include whether you live in or travel to cold climates for more than a few days at a time. This will help determine if your van is a candidate for needing the heating pad. Please also include a good shipping address where the heating pad can be sent.
Winter is coming. For some parts of the country, winter weather has been here for weeks. This means you should be taking some steps towards winterizing your van. This guide will show you how to winterize your Vandoit campervan AGM Power System
Confirmed Issue: Some van owners opt to store their vans over the winter rather than driving and using them. Long-term storage requires caring for the AGM battery system.
Affected Units: Any Vandoit van with an AGM battery system
Issue Explanation: A van that sits unused is always drawing power. Therefore, if you do not plan to use your van for a week or longer, you will want to take steps to prevent the battery system from draining so low that the batteries are in danger of being damaged.
What Steps Should You Take Towards Winterizing Your AGM Power System?
1. The best option for winterizing the AGM system is to keep the van plugged into shore power in a location where the rooftop solar panels can receive regular sunlight; this combination will keep the AGM system fully charged. Having both will serve as a backup incase any power issues with your shore power source.
2. If keeping the van plugged into shore power is not an option, parking the van in a location where the rooftop solar panels can receive regular sunlight is the next best option.
Note: You may wish to purchase ground solar panels that plug into the van next to the shore power plug. Ground solar not only adds to the incoming power the van can receives, but the panels can be placed on the ground near the van or on the windshield. This option is especially helpful when the van must be parked in shade or under a covering. Contact the Customer Support team (see below) for information on purchasing ground solar panels.
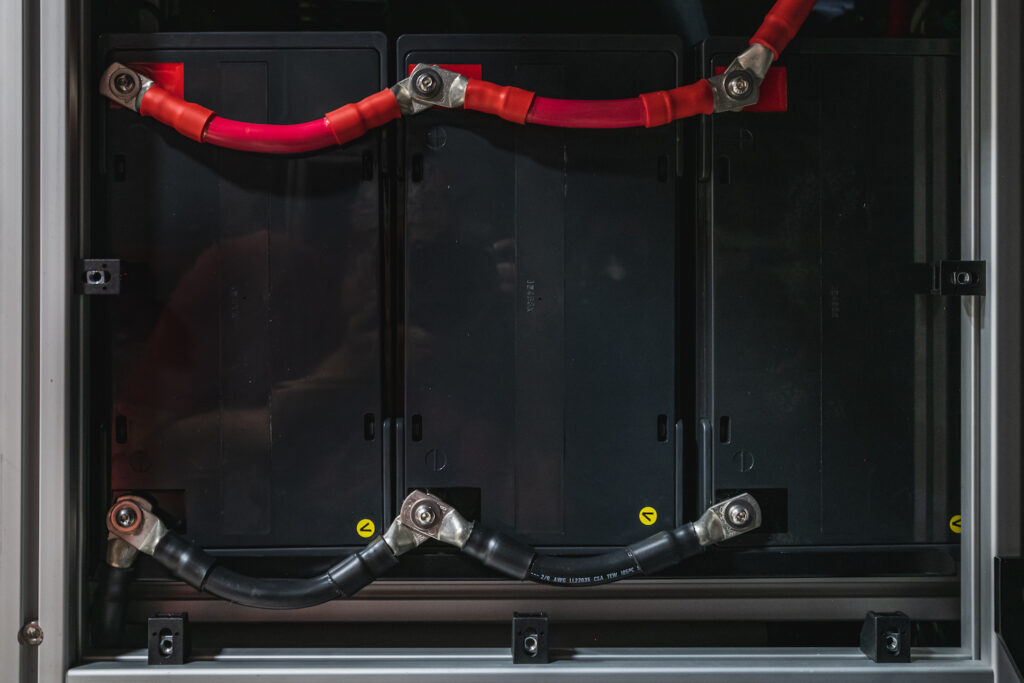
3. If keeping the van plugged into shore power or accessing solar power are not options, the Vandoit AGM batteries can be disconnected by removing the power cables from the battery terminals to stop the draw of power (This may require removing a panel from the power box using a 4mm Allen wrench).
Note: Make sure shore power is disconnected and the vehicle is turned off before removing rear AGM batteries.
4. Disconnect the power cables from the battery terminals starting with the positive first and then the negative. The longer positive red cable should be removed and covered with electrical tape or a rubber cap to prevent contacting metal when repositioning it to get the batteries out.
Be aware that it may take 2 people to remove the batteries safely due to their weight (approx. 60 lbs each).
5. Store the batteries in a warm, dry location such as a heated garage, and attach them to a battery tender (If batteries are only disconnected and not attached to a battery tender, they will lose up to 3% of charge per month).
6. When you are ready to use the van again, make sure it is not plugged into shore power. Detach the batteries from the battery tender and install back in the van. Then reconnect the power cables to the battery terminals the same way they were removed. Wait for the system to kick back on. Voltage readouts in the van should show around 12.8 volts.
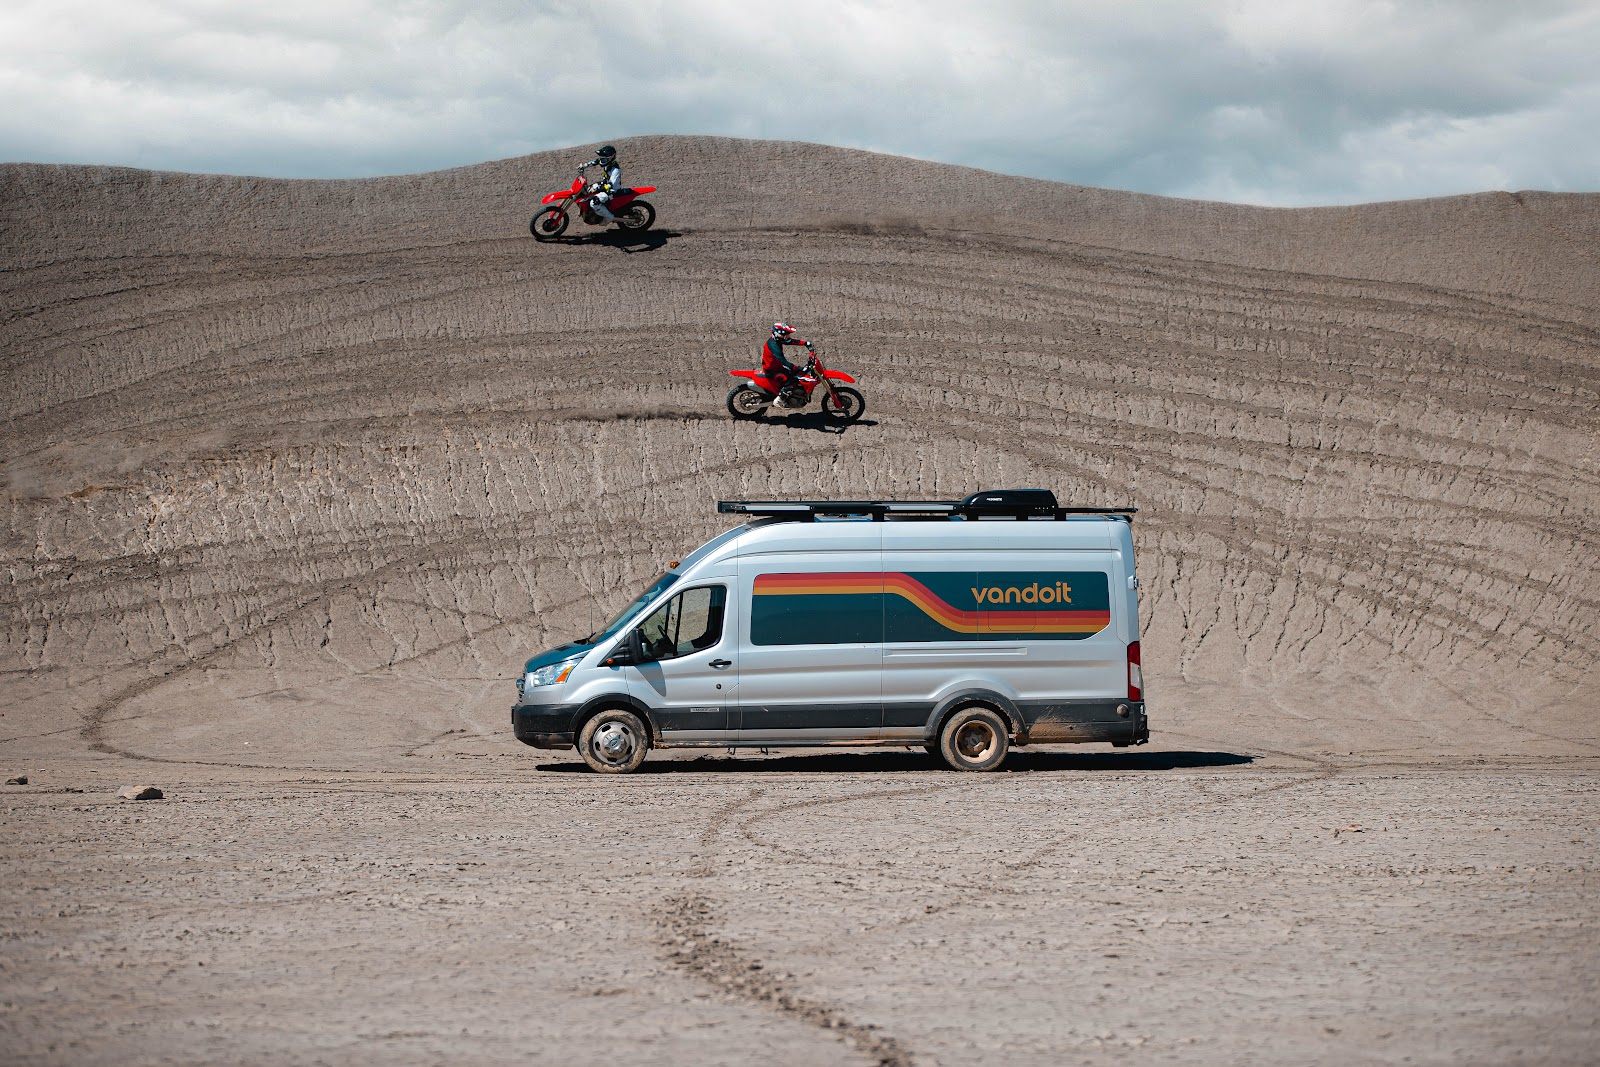
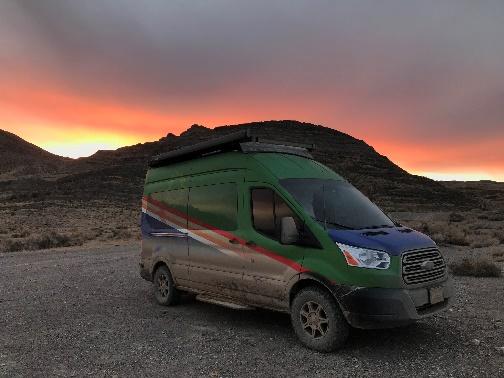
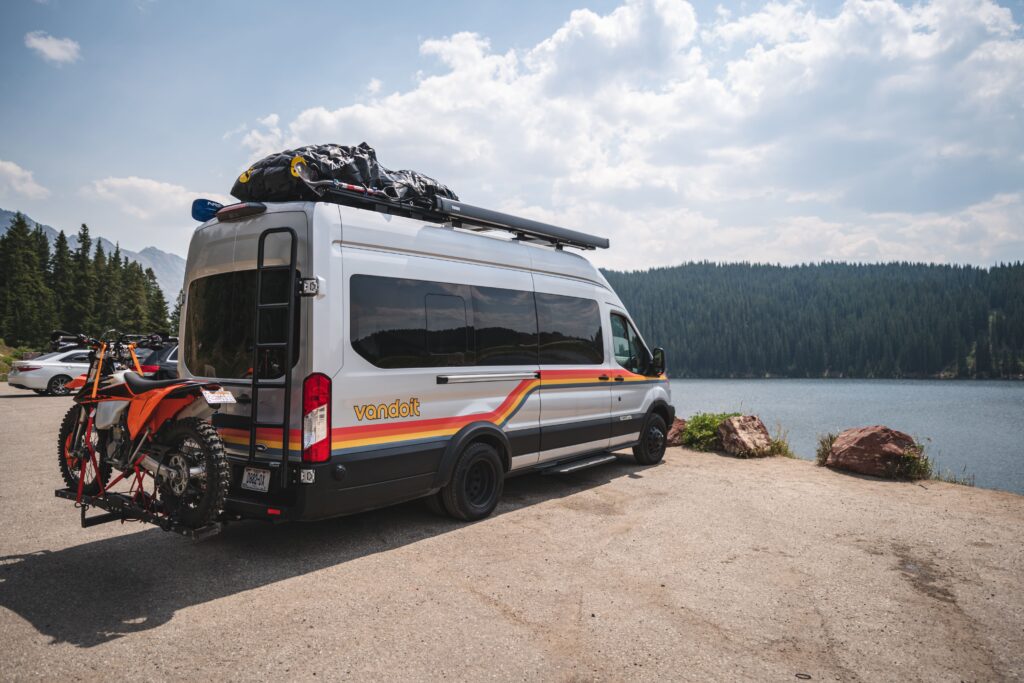
Just a little sneak peek of Vandoit’s signature Adventure van visiting Twin Lakes in Colorado. Van life, paddle-boards and lakes just go together. Check out all our awesome camper.
Winter is coming. For some parts of the country, winter weather has been here for weeks. This means you should be taking some steps towards winterizing your van. This guide will show you how to winterize your Vandoit campervan.
Winterizing Your Water System
When water freezes it expands. As a result, full jerry cans, water lines, water nozzles, sink heads, or hot water tanks can burst. This covers how to remove water from the van if you will not be using the van.
It is important to note that water will freeze if the interior of your van is 32 degrees Fahrenheit or lower. If you are leaving your van for a day or two in the winter, if you use your van as a daily driver, or if you are traveling full time and want to keep water in the van, we recommend utilizing the Espar heater.
The Espar heater comes programmed to run for 12 hours. This can be adjusted up or down as needed depending on how long you are leaving the van. Important reminder: You need more than 1/4 tank of gas for the Espar to run. For those not utilizing water in the winter, please refer to the model you have below.
Winterizing The Vandoit LIV Model
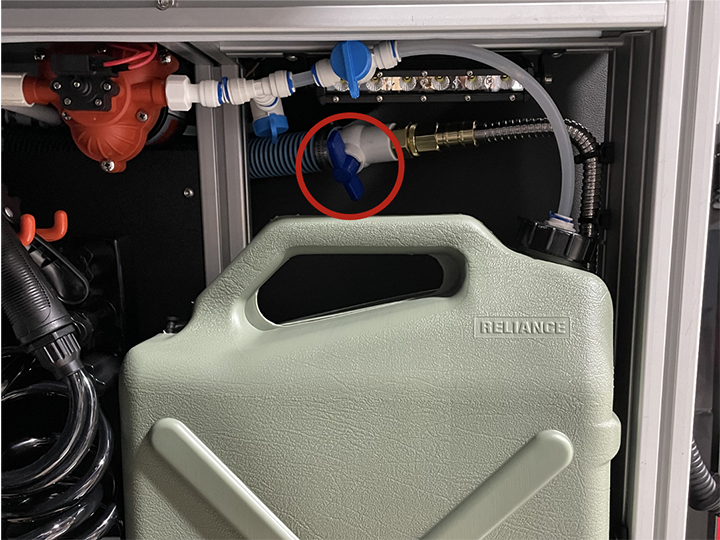
LIV models come with the water system mounted in the passenger side box. GO models may have water in the driver side box. The water system is made from a combination of a jerry can, hot water tank, and/or 10 gallon tank.
Winterizing The Jerry Can
Unbuckle the green jerry can. Empty the remaining water.
Turn on the water pump. Spray out any remaining water from the line. Once empty, turn off the water pump.
Winterizing The 10-Gallon Tank
Turn the valve to open to pull water from the 10 gallon tank (Blue valve parallel with water line).
Spray all the water out of the 10 gallon tank. Make sure to look at the level window on the front side of the tank to ensure it is empty.
Continue spraying the water pump to spray any water from the line. Once empty, turn the water pump off. The tank can stay in the van.
To Winterize the Hot Water Tank:
Although water was sprayed, there can still be up to 1 gallon of water left in the hot water tank. Unbuckle the hot water tank.
Unplug the hot water tank from the outlet.
Disconnect the red, blue, and back flow water lines from the top of the tank. They are hand screwed on.
Remove the tank from the van and tip upside down.
Winterizing The Kitchen Pod
After doing the above steps, turn the kitchen sink on. Let all water run out of the lines.
Unscrew the kitchen water line from the brass fittings.
Keep brass fittings open for the winter. Should water be accidentally left in the line, we do not want water expanding and busting a closed fitting.
Winterizing The Vandoit DO Model
The DO model equipped with the hot water module or the cold water module.
Spray remaining water out of the hot water or cold water jerry can till empty.
Disconnect the waterlines where they attach to the water modules. It is okay to keep the lines connected to the kitchen pod.
Store modules in a place where they will not freeze.
*DO NOT STORE THE MODULES IN THE VAN
See this video for more information on winterizing your water system
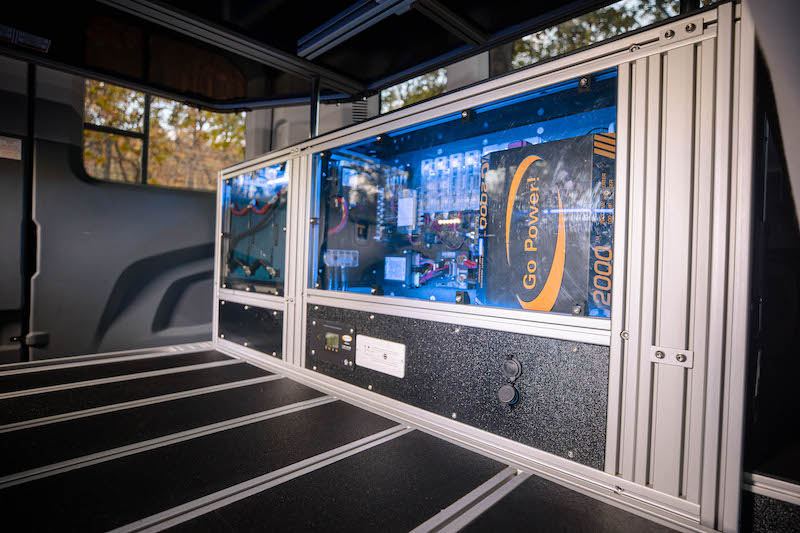
A complete overview of the AGM Battery System in the LIV model. This video covers everything from DC power, AC power, the inverter, and more. The AGM battery system is one of the two options for battery power in our van builds.
These Vandoit campervan owners discuss the main reasons as to why they chose Vandoit for their van build. They loved the reputation that Vandoit has. They also went with the LIV do to simplicity of the bed system.
✕
Up to one year 0% interest
On select units
Applies for 1 year on our in house lease purchase program. Interest will apply at 2 points over New York prime after one year.
May be used in combination with or in lieu of other incentives
Minimum down payment will be required based on credit, price and other factors.
With approved credit.
“Travel On Us” All National Parks, all access free pass (1 year) may apply…ask your representative for details.